Manage Users for Communication Recording Agent
Add Users For Communication Recording Agent
Users in Administration Platform are synced with your external directory. Adding a user to your external directory in a synced location/group will be replicated in your Administration Platform account. The platform also supports the ability to add users manually, either one User at a time (manually), or multiple Users at a time (using a CSV import).
The access and permissions a user has are initially set when the user is created, these can be updated by an Account Administrator whenever required. See Update Users for information on how to make changes to existing users, including their access and permissions.
Communication Recording Agent also allows access permissions to be based on what group they are part of. To do this, add your users to the relevant node in Organization Hierarchy, effectively adding them to a group.
See Organization Hierarchy for more information on how to add users to groups and add new groups.
See Access Policies for more information on creating and assigning access permissions to Users and Groups using Policies.
Go to Administration > Users & Accounts > Users, and click + Add User. The Add New User dialog is displayed:
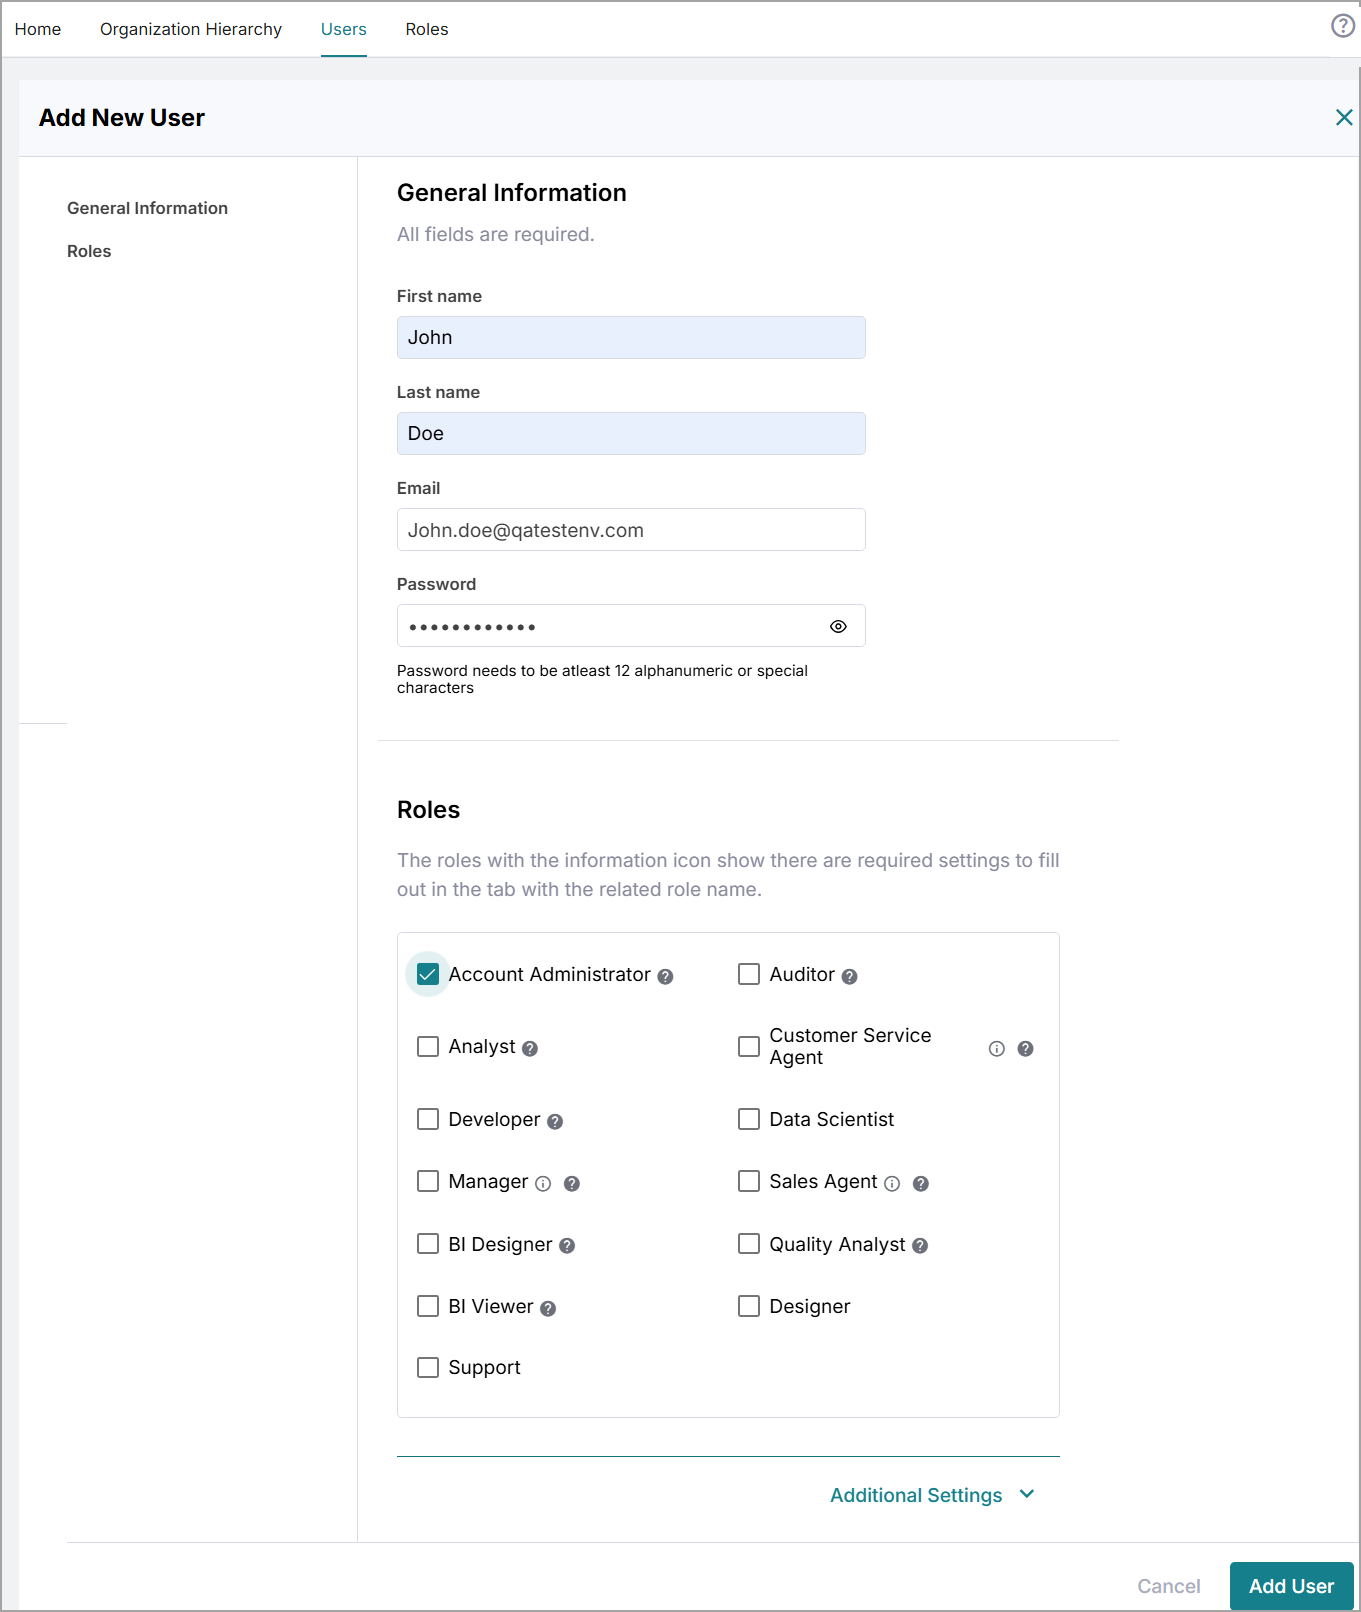
Enter the General Information for your new user, First name, Last name, and Email.
Under Roles, select all the Roles that you would like the user to have.
Note
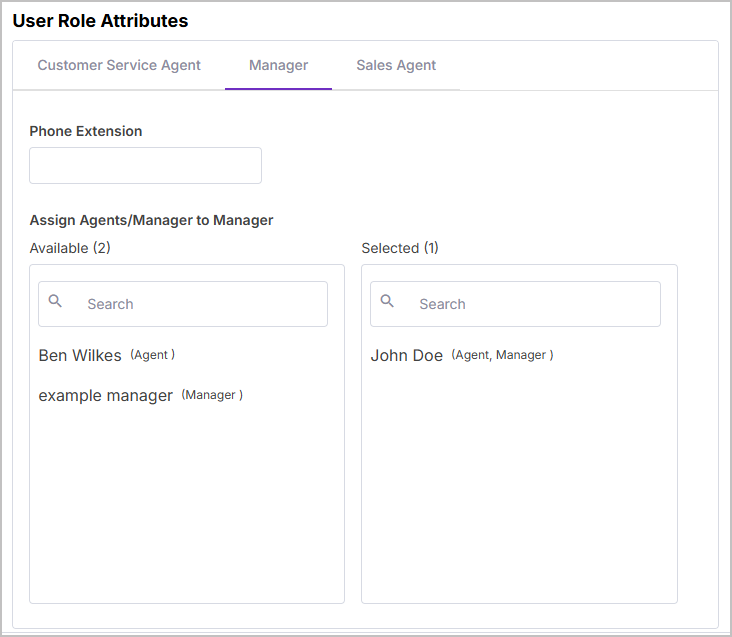
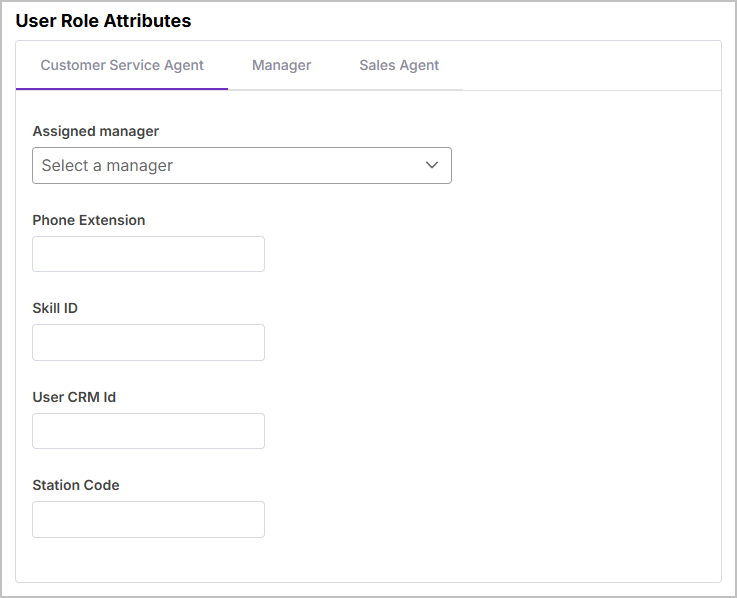
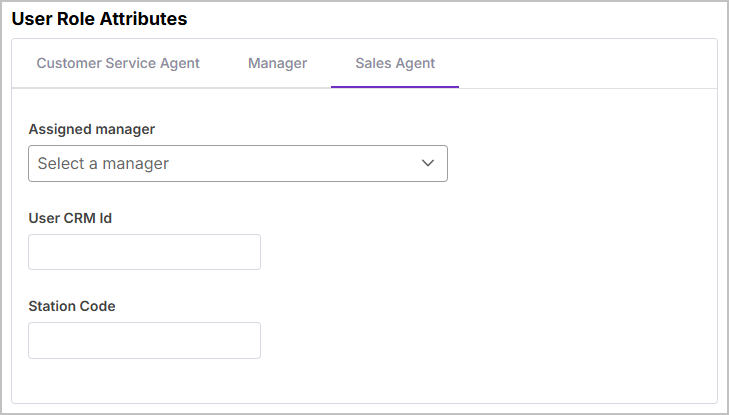
Selecting Manager, Customer Service Agent, and/or Sales Agent opens additional User Role Attributes. More information on each Role's configurable attributes is provided in the table below.
If required, click the Additional Settings drop-down to enter the following optional settings:
Alias: a friendly name for the new user.
User Type: a custom description for the type of user.
Title: the title of the user.
External reference ID: any external ID, useful for identifying the user based on an external ID.
Department: a descriptive field to show the department that the user is part of.
Note
As this is a descriptive field, adding the user to a Department here is not reflected in the Organization Hierarchy and therefore doesnot impact the user's access permissions.
Division: which division the user is part of.
Phone and Ext: useful for when the Role does not require the phone extension to be added (such as Account Administrator) but it would be useful to include the user's phone and extension in the system.
Confirm the details of your new user and click Add User. The user is added to the Users list, and an email is sent to the specified email address with instructions on setting their password.
Role/User Role Attribute | Description |
|---|---|
Manager | |
Phone Extension | Add the extension for the Manager user. |
Assign Agents/Manager to Manager | Add Agents and Managers under the new user's supervision. Search the list of Available users in the system (if the user is an Agent or a Manager is shown next to each user), click the + to add the Agent under the new user (this grants the Manager access to the Agent's calls). To move the Agent back, click the - next to the Selected Agent. CautionIf a pre-existing Manager is added to the new Manager, the Agents under the pre-existing Manager need to be re-added. |
Customer Service Agent | |
Assigned Manager | Assign a Manager to the Agent. |
Phone Extension | Add the extension for the Agent. |
Skill ID | Assign a Skill ID to the Agent. |
User CRM Id | Add the CRM ID to the Agent. The User CRM ID must match the user's Email exactly and is case-sensitive. This is required to populate call metadata with an Agent ID and allow the user to have a manager assigned. |
Station Code | Add the Station Code for the Agent. |
Sales Agent | |
Assigned Manager | Assign a Manager to the Agent. |
User CRM Id | Add the CRM ID to the Agent. The User CRM ID must match the user's Email exactly and is case sensitive. This is required to populate call metadata with an Agent ID and allow the user to have a manager assigned. |
Station Code | Add the Station Code for the Agent. |
Go to Administration > Users & Accounts > Users > and click + Import Users.
Presuming you are new to importing users using a CSV file, we recommend downloading the template to get started, click Download this template to assist to download the template.

Open the CSV template (download from above) and add your users as follows:
First Name, Last Name, and Email are required fields.
Current Role assignment choices are: Account Administrator, Analyst, Auditor, Customer Service Agent, Data Scientist, Developer, Manager, and Sales Agent. Delimit multiple Role assignments using a semi-colon (;).
All other settings are optional, or can be updated later by accessing the Users list.
To assign a user to a specified Access Policy, add the name of the Policy under Data Access Policy Reference.
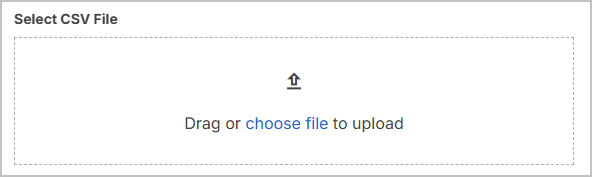
When you've added your users to the CSV file (and saved the file), upload the file to the platform. Return to the + Import Users panel and under Select CSV file, either drag and drop the file into the box or by click choose file and select the file to upload.
Once the file is uploaded, click Start Import to run the import.
When the import completes, an Import Summary list is displayed. This list includes all the users imported, along with the quantity imported, and details of any errors encountered during the process.
Click Close import window to finish, or click Start over to start a new import process from the beginning.
Refresh the Users page to see your newly imported users in the list. An email is sent to the specified email addresses with instructions on setting their passwords.
Update Users for Communication Recording Agent
Note
For the Communication Recording Agent, access permissions are not only managed through user roles, they are also provided through Access Policies using call Filters and Claims - see Access Policies for more information.
You may need to update your users from time to time for various reasons, such as name changes, restructuring, or other changes.Administration Platform provides a method to update your users accordingly.
At any time, users can be updated from within the application, with immediate effect.
Important
If your users are synced with an external directory, changes in the directory are reflected in Administration Platform when the system syncs. If syncing is set up, make the required changes in your directory. For more information on syncing, click here.
If sync is set up, it does not override or update your manually added users. Avoid manually creating users in Administration Platform if sync is enabled.
Any updates to user details, such as changes to the first name, last name etc, or user deactivation, can take up to 30 minutes to reflect in the application. This is due to a scheduler that checks for updates at 30-minute intervals. A caching mechanism is also implemented to optimize performance and prevent potential bottlenecks.
Users can be updated one at a time or (for applicable actions such as adding/removing Roles, deactivating users, and/or deleting users) in bulk. See below for instructions on updating single users or users in Bulk from inside Administration Platform .
Go to Administration > Users & Accounts > Users. A summary of all users is in the Users list.
Find the user to update. Use the Search box to search the list or use the Name and E-Mail columns to sort the list.
Click on the user's Name to open a page with the user's General Information, Roles, and Additional Settings:
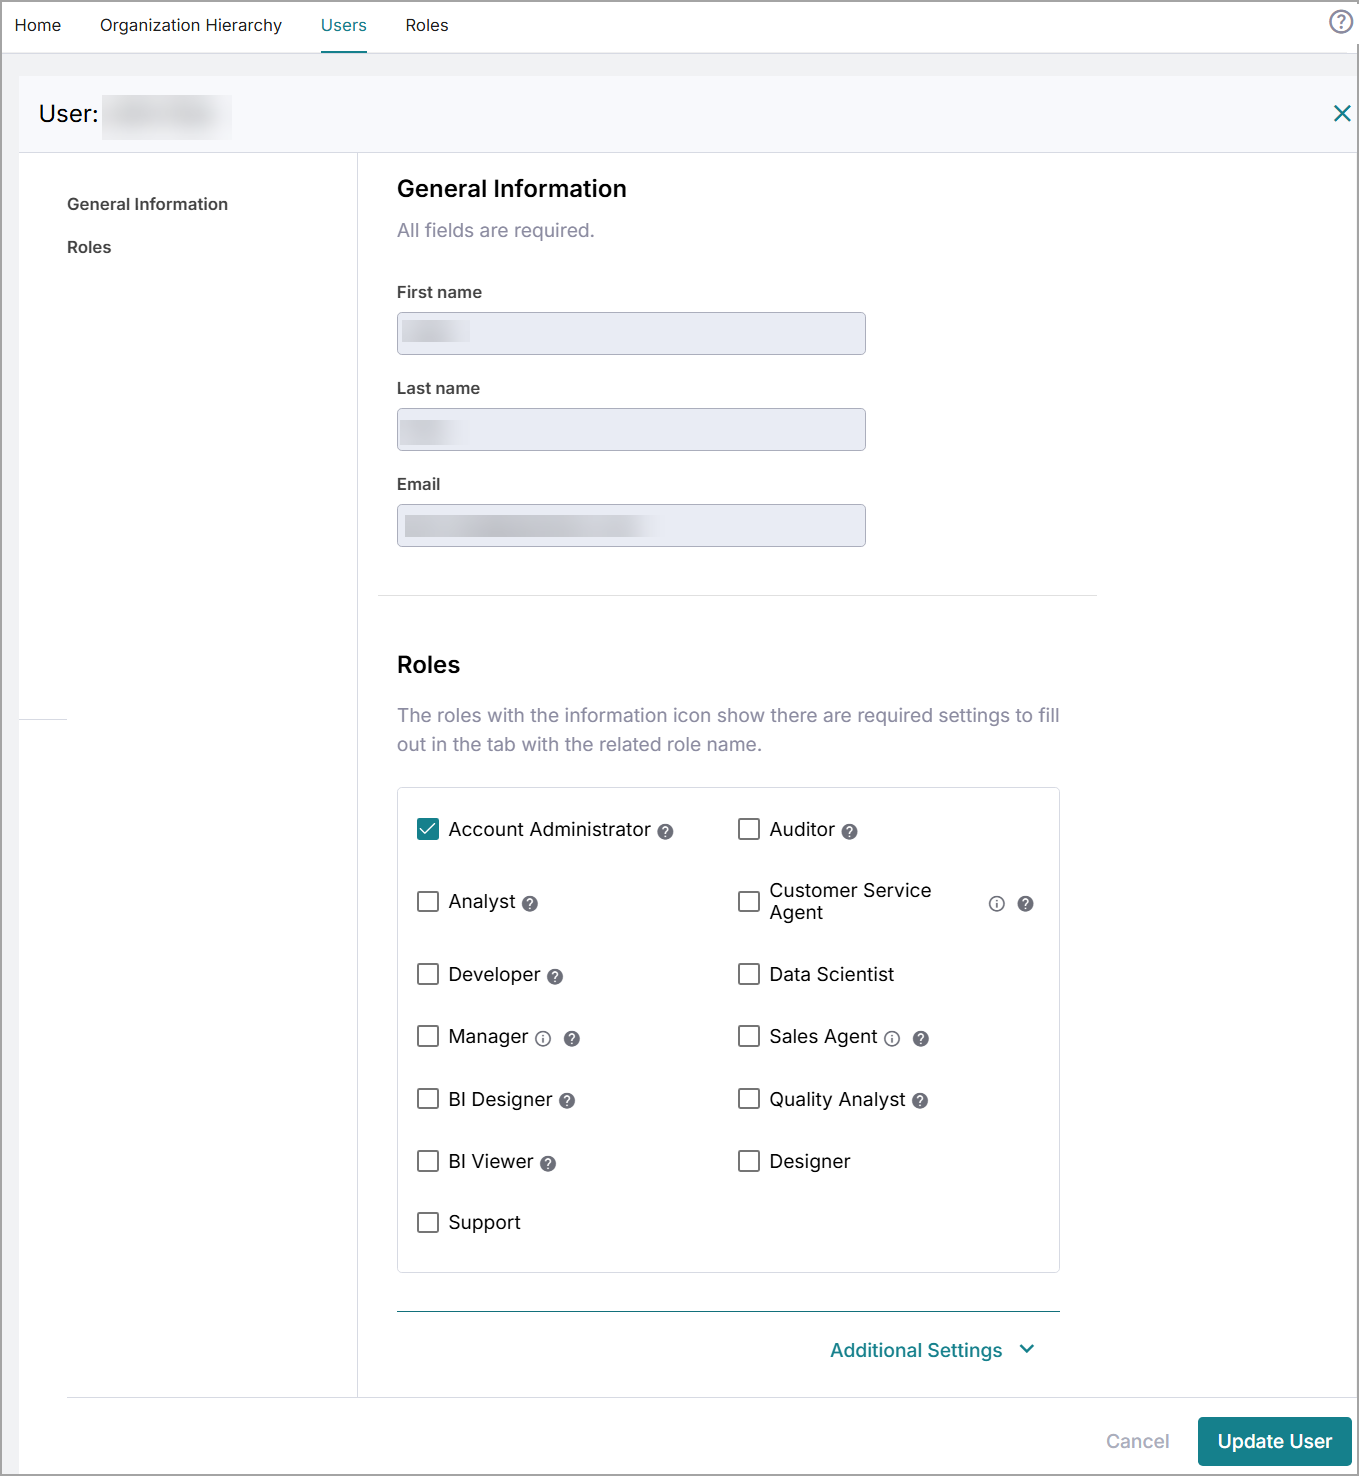
From here, make any changes to the user.
Caution
When you update a Manager user (M1) and assign a Manager (M2) under that Manager (M1), the agents reporting to the manager that you're not updating (M2) have their agents removed from their reporting line.
Changing or adding to the Department field is not reflected in the Organizational Hierarchy.
Confirm your changes and click Update User. The changes are applied to the user immediately.
Bulk actions include Add roles, Remove roles, Deactivate users, and Delete users.
Go to Administration > Users & Accounts > Users. The total number of users in the system is shown at the top of the Users list. Inside the list, you can see each of your users. You likely have more than one page of users.
Find the users to update. Use the Search box to search the list or use the Name and E-Mail columns to sort the list.
Select the users to update using the check boxes to the left of each user.
Click Bulk actions, and select one of the following actions:
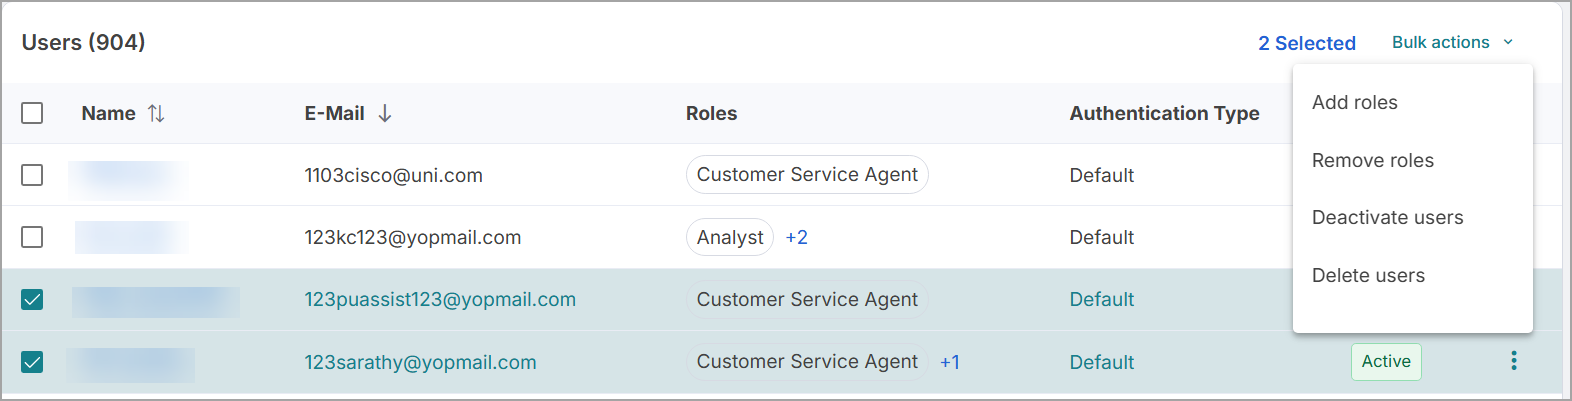
Add roles: Select the Roles to add to the selected users, and click Add roles. All of the selected Roles are added to the users; you do not need to select Roles that the users already have. Leaving Roles unselected does not remove those unselected Roles from the selected users.
Note
The Manager, Customer Service Agent, and Sales Agent Roles have additional settings to configure - these additional settings are set on a per-user basis.
Remove roles: The Roles that every selected user currently has are preselected; unselect the Roles that you want to remove from the selected users.
Deactivate users: Remove all access from any and all Uniphore applications for all selected users. You are prompted for confirmation.
Delete users: Permanently delete all selected users from any and all Uniphore applications. You are prompted for confirmation.
Warning
Deleting users can not be undone.
Deactivate or Delete Users
All Administration Platform users can be reviewed in Administration > Users & Accounts > Users. This provides for direct "account intervention" if needed, such as "forced" account removal.
Note
After you delete a user, if you still have the external user active in your External Directory Services and in a syncing location, the user account is recreated when the system syncs with your directory. Ensure that the user is removed from the synced directory location to avoid the user being recreated in Administration Platform .
Log in to Administration Platform as an Account Administrator and go to Administration > Users & Accounts in the side menu and click into the Users tab.
A summary of all users is shown in the Users list. Simply click an individual user's name to review their details. Use the columns and search box to sort and search the list as needed.
If needed, you can remove Deactivate or Delete users, either:
Select one or more users in the list using the check boxes on the left and click Bulk actions to make changes to all selected users. The following options are available:
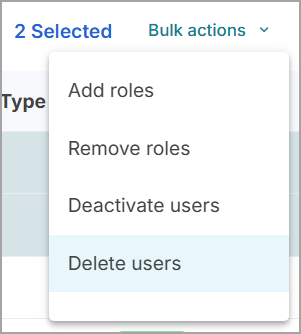
Click the Ellipsis
 menu to the right of a user and select Deactivate User to block the user from accessing the system, or select Delete User to permanently remove the individual user from the system.
Deactivating users takes effect immediately. To reactivate a user, simply select the deactivated user/s, click the Ellipsis
menu, and click Activate User.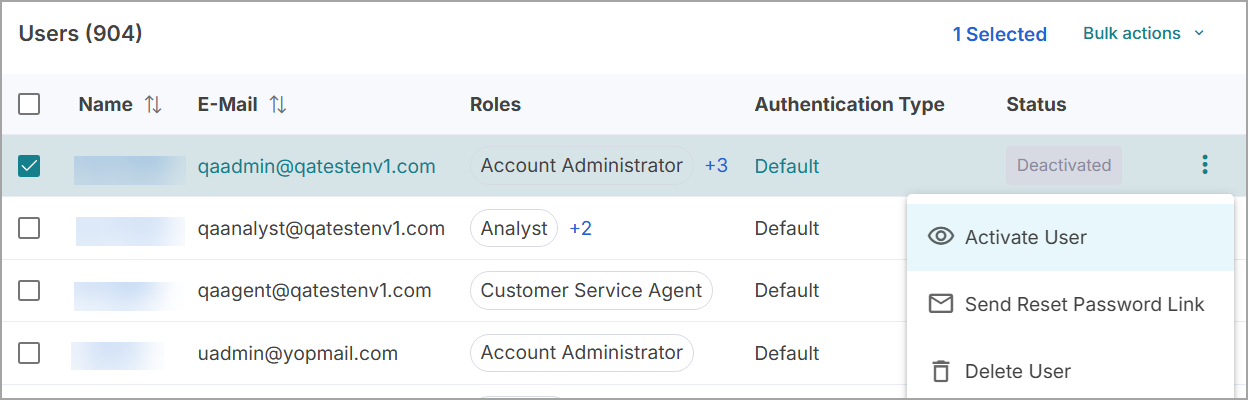
After clicking Delete User, a confirmation box is displayed asking you to confirm that you want to delete the user.
Warning
Deleting a user is an irreversible action.
User Passwords
Note
If you need to remove a user's access, changing their password is not a suitable action. Instead, see Deactivate or Delete Users to either Deactivate or Delete the user.
Resetting a user's password is straightforward. Users with the Account Administrator Role can send reset password links to user email addresses (instructions below), however, this is likely infrequent. Users can click Forgot Password? on the login page, where they can enter their email address to receive a reset password link without an Administrator present.
Go to Administration> Users & Accounts > Users.
Using the Search bar, search for the user who needs their password reset.
Click the Ellipsis
menu to the right of the user, and click Send Reset Password Link. As you would expect, the system then sends an email to the user with a link to reset their password.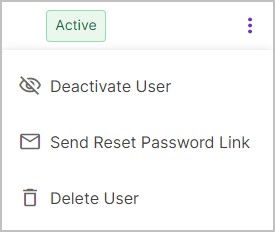
Once the user receives the reset password link via email, they can follow the link to reset their password.