Agentic Workflow
An Agentic Workflow is a low-code tool for building and running automated, multi-step processes. Use it to design workflows, assign tasks to AI agents, and monitor their execution. Use the Agentic Workflow environment to design and activate workflows. Once activated, a workflow can be:
Executed by multiple agents at once
Triggered by specific events
Invoked directly by end users
Invoked by agents as a tool within their own execution
Before you move a workflow to production, you deploy it to a Live environment to test end-to-end execution and confirm that tasks run in the correct sequence, data flows correctly between steps, and conditional logic behaves as intended. Once you're satisfied with the results, you deploy to Prod for real-world operation. After deployment, you can run Agent Evaluation on the workflow to measure real-world outcomes such as task completion rate, output quality, tool usage correctness, and performance.
Business AI Cloud supports two methods for building workflows:
Agentic Workflows - The current method for building workflows.
BPMN Workflows - The existing method is based on the Business Process Model and Notation (BPMN) standard.
To get started working with Agentic workflows, go to the home page > Agents > Agentic Workflows.
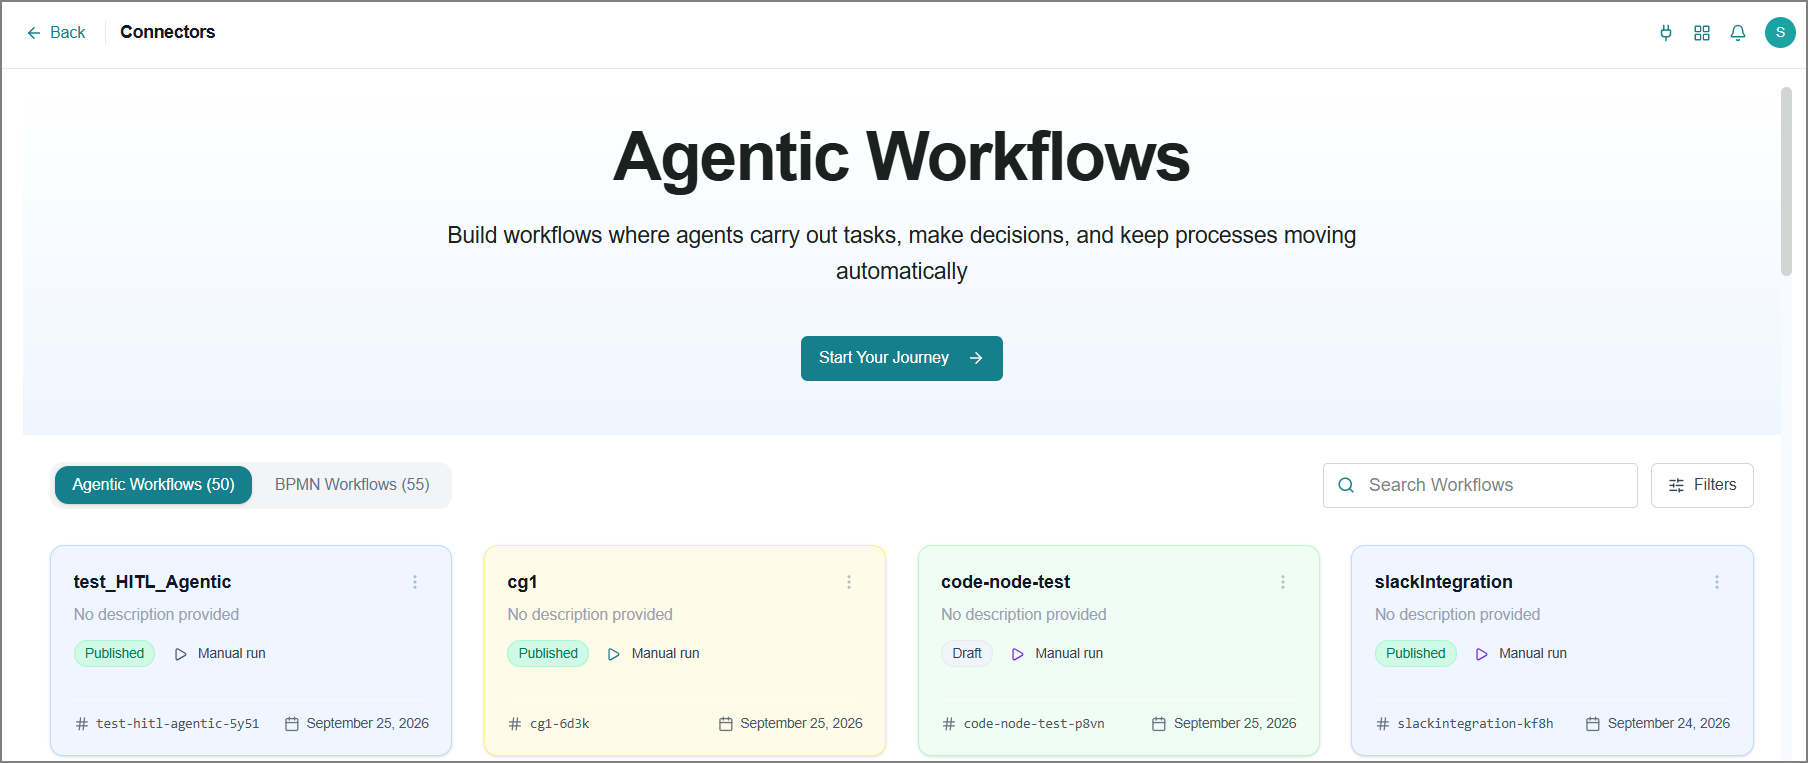
The Agentic Workflows page opens and displays all your existing Agentic Workflows, organized into two tabs: Agentic Workflows and BPMN Workflows. Switch between the tabs to view and manage existing Workflows.
Agentic Workflows
Agentic workflows are automated workflows you build and manage in Business AI Cloud. Each workflow consists of a series of connected nodes. Nodes are individual steps that perform actions, run logic, call agents, or interact with external systems, executed in the order you define.
Agentic Workflows use a workflow engine that supports both deterministic workflows (where you control exactly which steps run and in what order) and non-deterministic workflows (where agents can make decisions and dynamically delegate tasks at runtime).
To get started, go to the home page > Agents > Agentic Workflow > Agentic Workflows tab.
Each Agentic Workflow is displayed as a card on the Agentic Workflow tab, showing its name, description, trigger type, key, current status, and last modified date.
For Agentic Workflows, you can:
Creating an Agentic Workflow
To create an Agentic Workflow:
On the Agentic Workflows page, click Start Your Journey.
The Choose Workflow Type dialog opens.
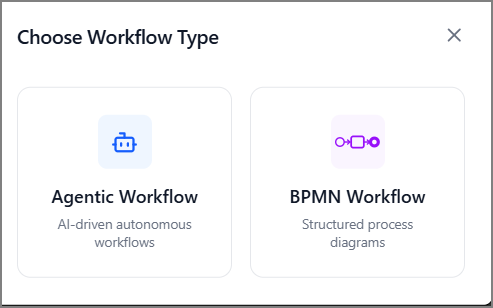
Select Agentic Workflow.
The Create New Workflow dialog opens.
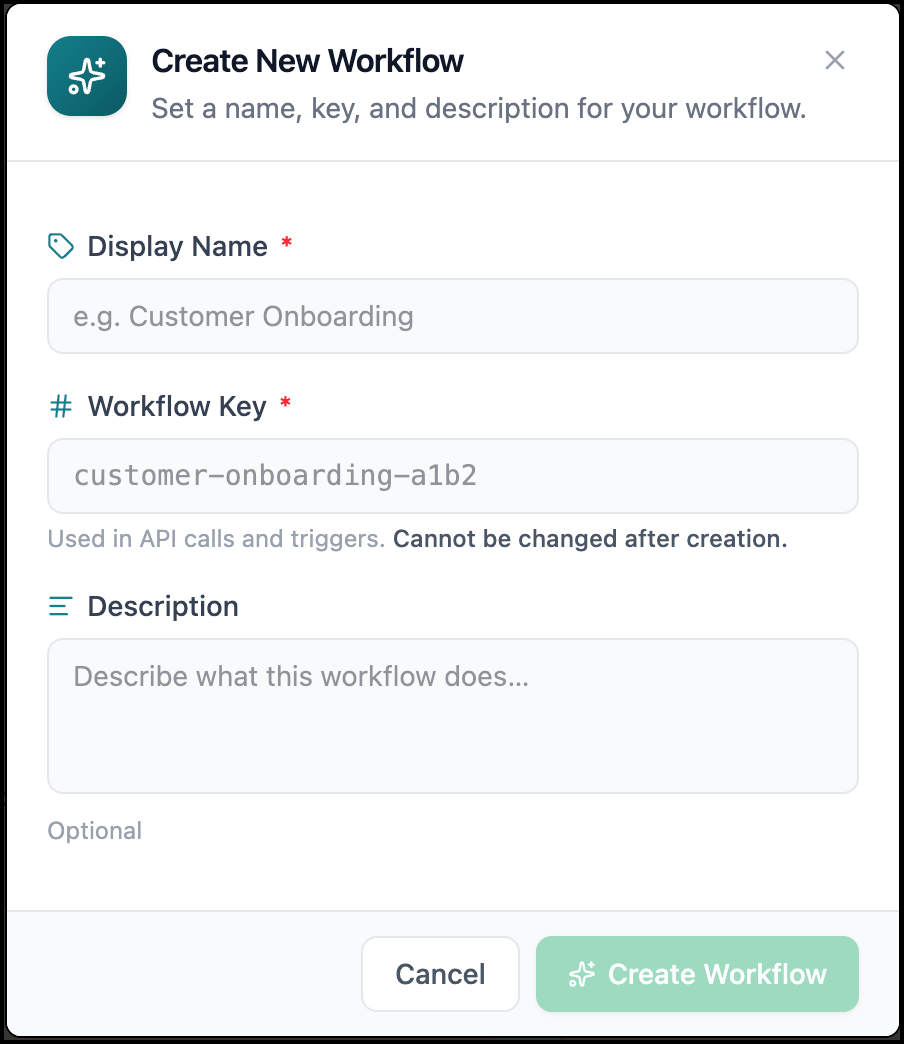
Complete the following fields:
Field
Description
Display Name
The name displayed on the flow's card on the Agentic Workflows page.
Workflow Key
A unique identifier used when invoking the workflow via the API. Generated automatically from the Display Name, but can be edited before creation.
Description
An optional description of what the workflow does.
Click Create Workflow.
The workflow is created and opens in the Canvas Builder.
Note
The Workflow Key cannot be changed after the workflow is created.
The following sections walk you through the Canvas Builder interface and how to use it to build, test, and publish your workflow.
The Canvas Builder
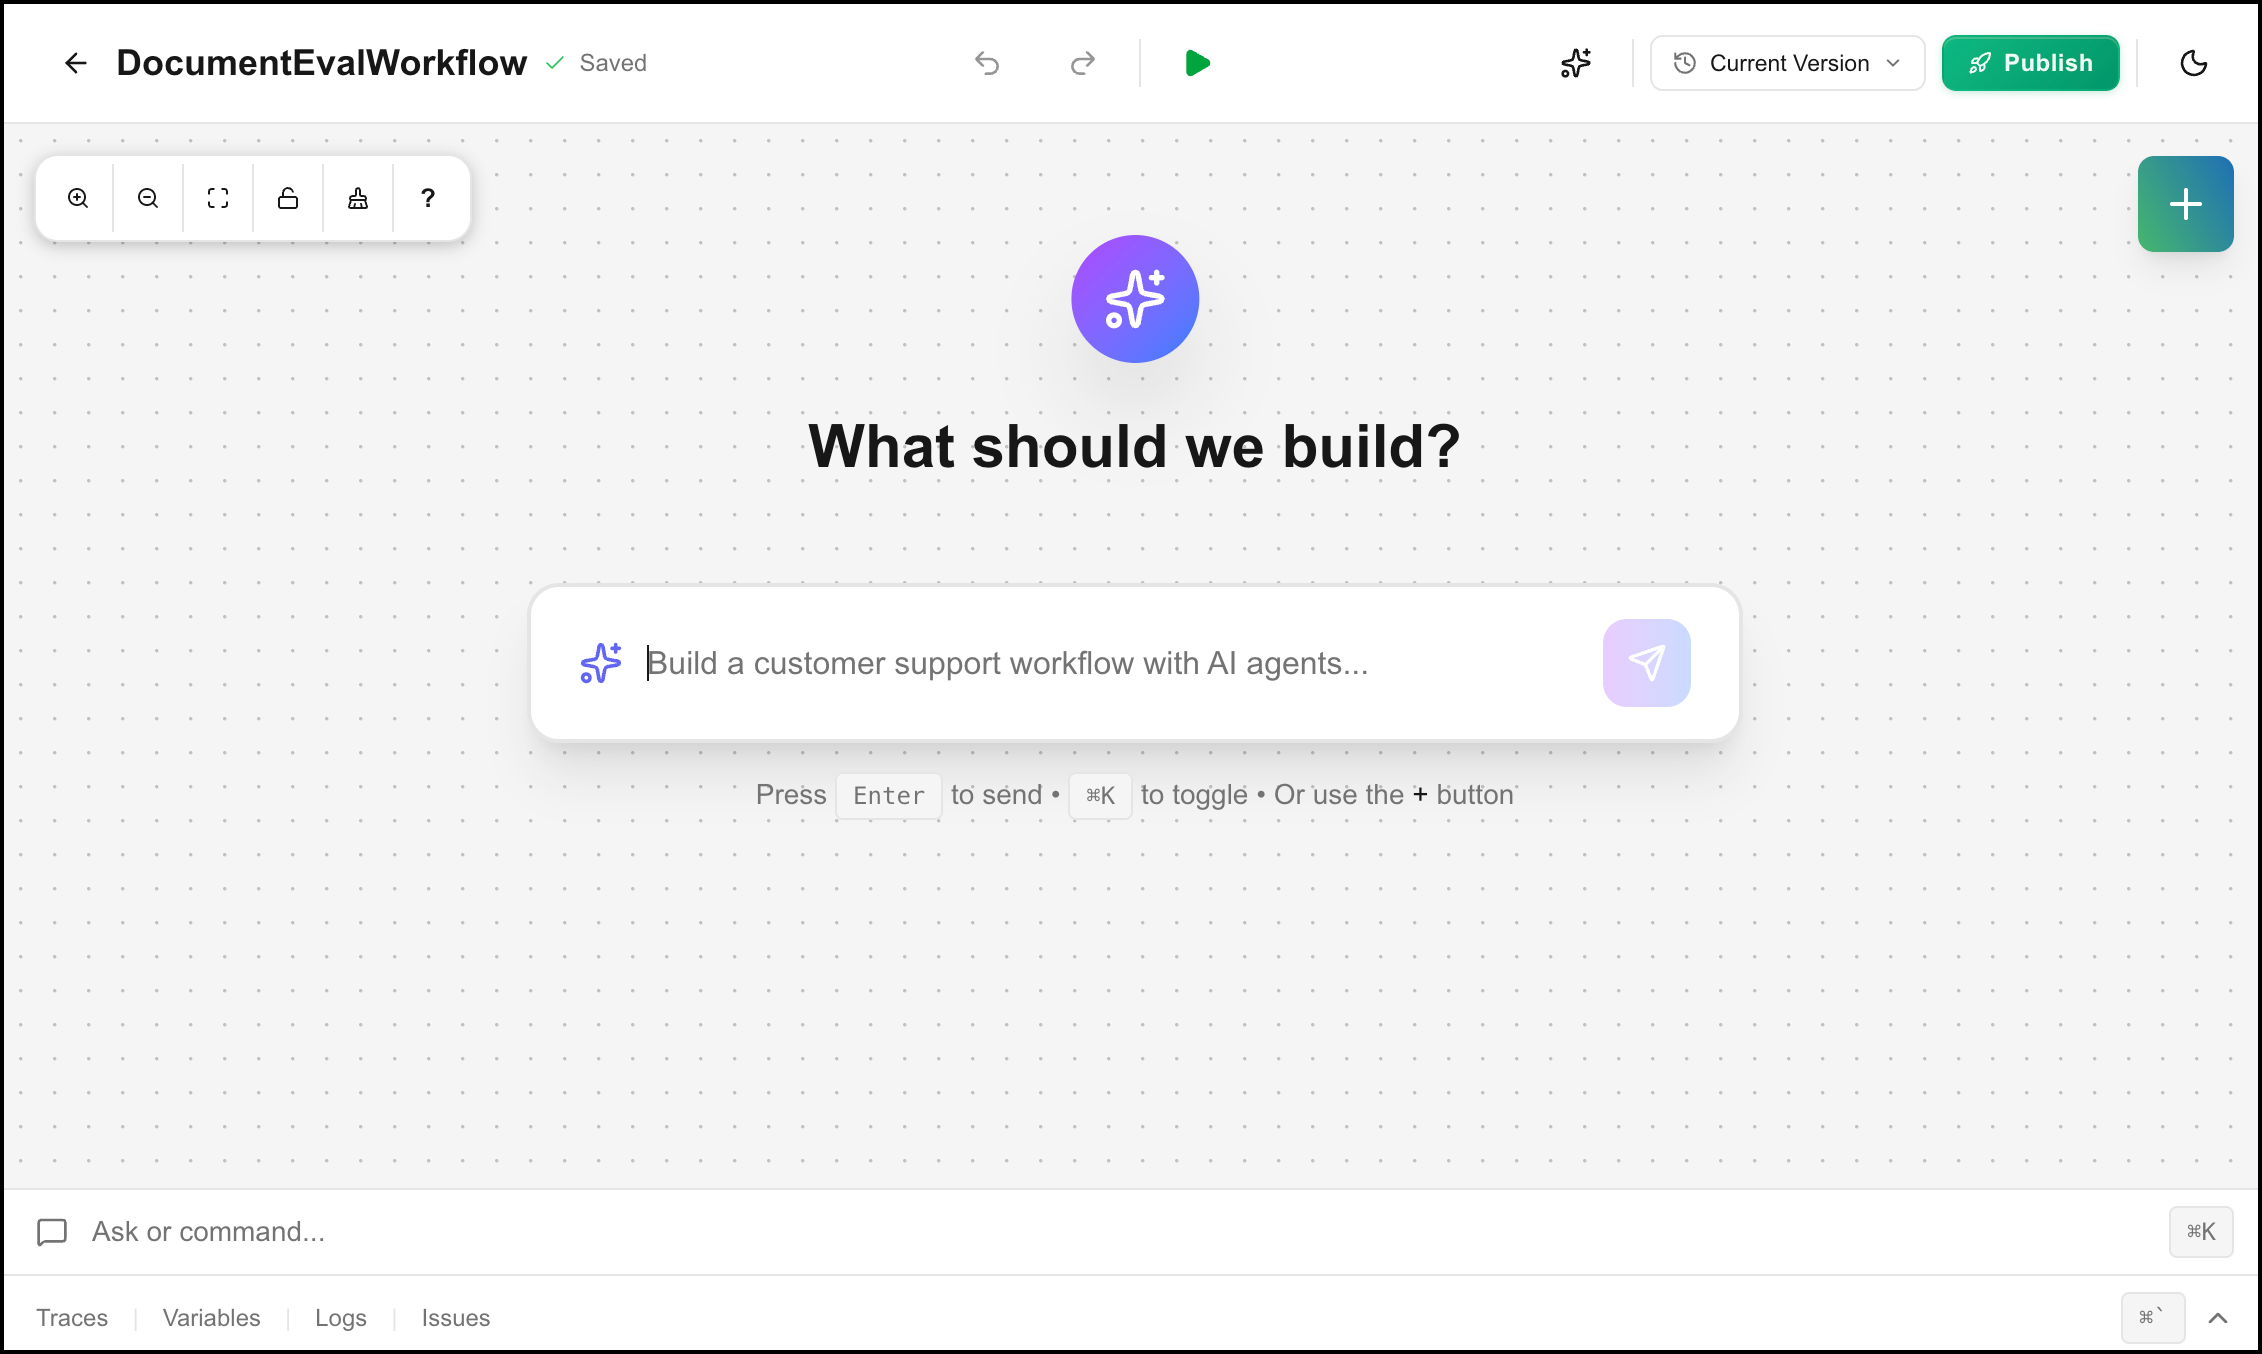
The Canvas Builder is where you design your Agentic Workflow by adding and connecting nodes. When a new workflow opens, the canvas displays a prompt inviting you to describe your workflow in natural language. You can use this to build your workflow with BAIC Copilot, or build it manually using the + button.
Canvas Controls
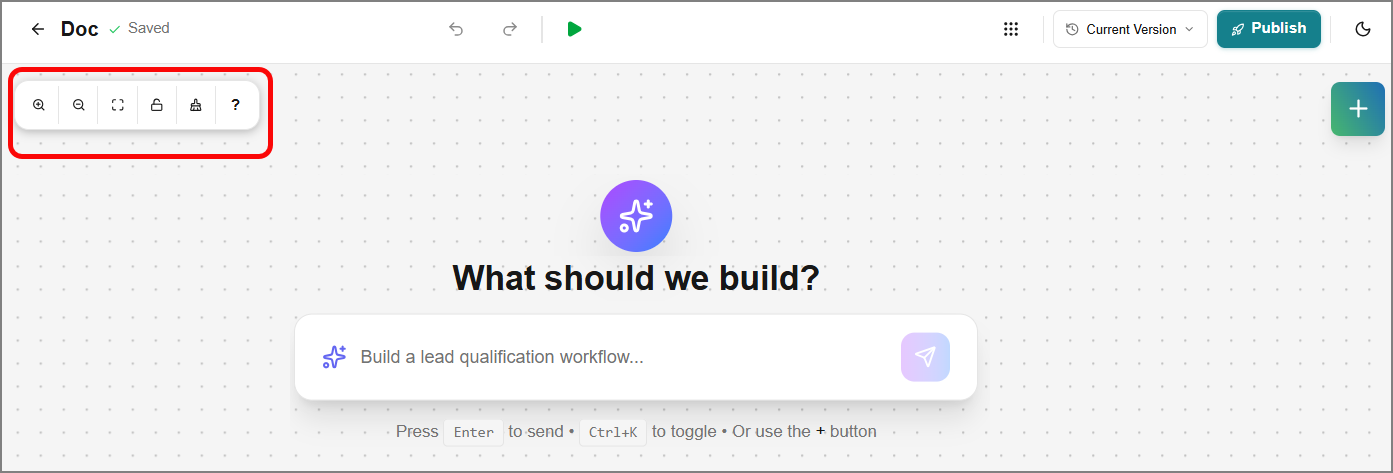
The toolbar in the upper left of the canvas provides the following controls:
Control | Description |
|---|---|
Zoom in / Zoom out | Adjusts the canvas zoom level. |
Select | Enables selection mode for multiple-node selection. |
Lock | Locks the canvas to prevent accidental changes. |
Tidy | Automatically arranges and aligns nodes on the canvas. |
Keyboard Shortcuts | Shows a list of all keyboard shortcuts. |
Debugger Panel
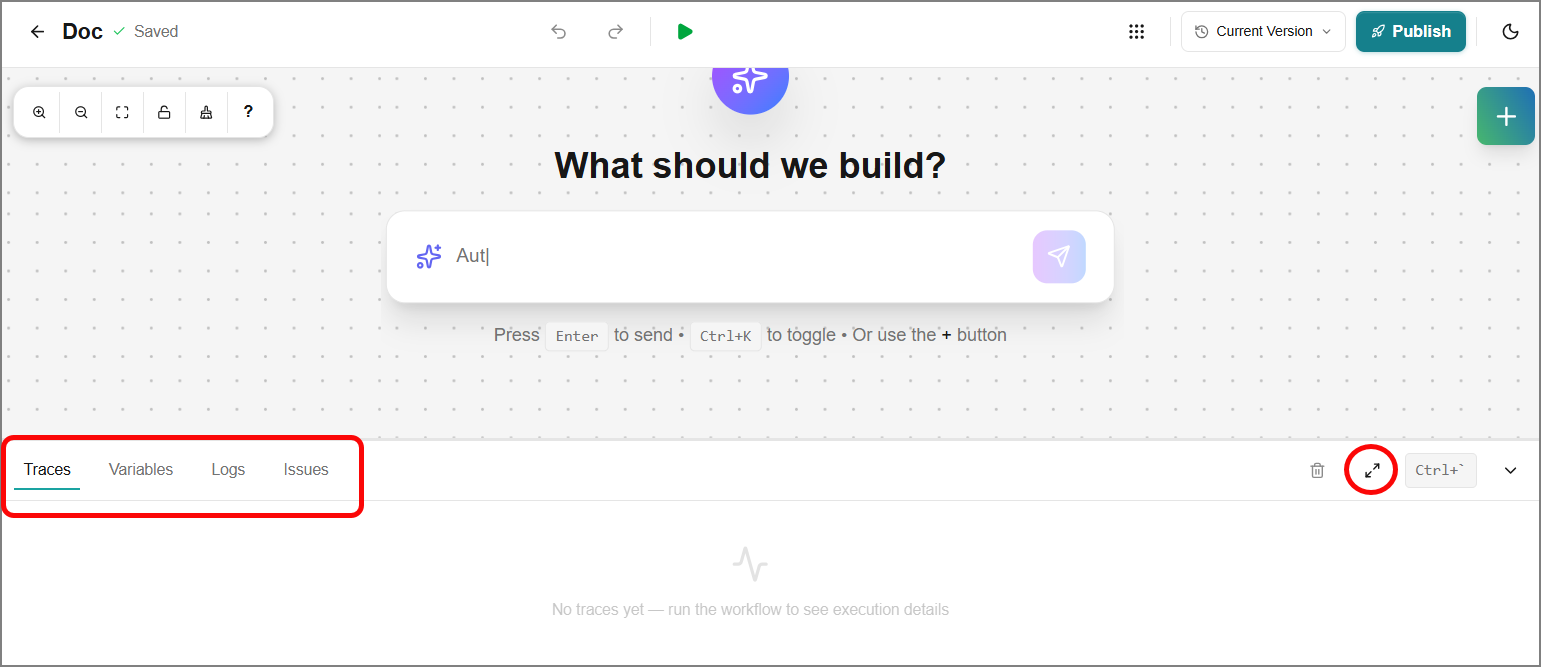
The Debugger Panel runs along the bottom of the Canvas Builder and contains the following tabs:
Traces tab - Displays execution traces for Agent nodes in the workflow.
Variables tab - Displays all variables produced during the execution, organized by scope. You can also edit variable values here during a paused execution.
Logs tab - Displays a timestamped event log of everything that occurred during the execution, along with detailed metadata for each event. Useful for diagnosing errors or tracing execution flow.
Issues tab - Displays validation errors in the flow, such as unconnected nodes or missing required fields. If this tab is empty, the flow is valid and ready to run.
Click the expand icon to maximize the Debugger Panel.
Building an Agentic Workflow with BAIC Copilot
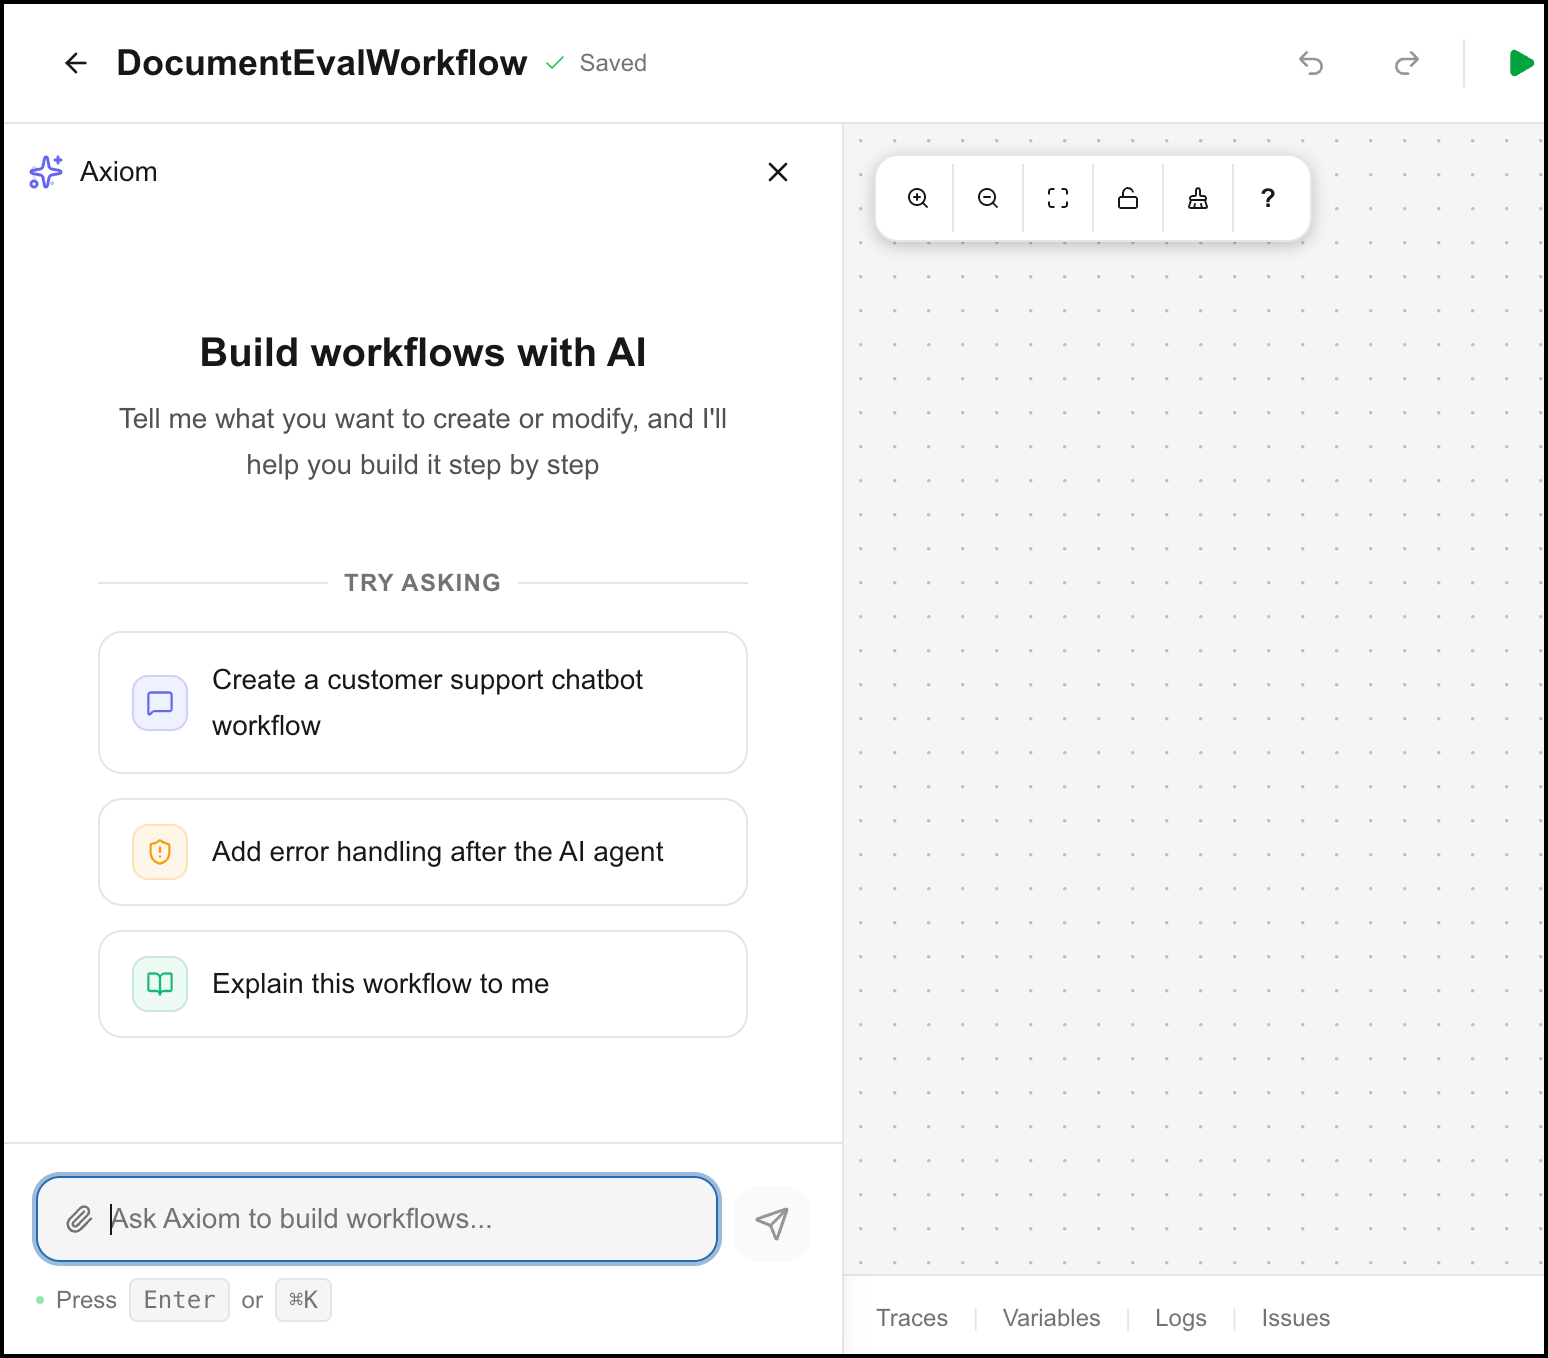
Copilot builds and modifies Agentic Workflows based on your natural language descriptions. Describe what you want your workflow to do, and Copilot will build it for you, step by step. You can also ask Copilot to modify an existing workflow or explain what a workflow does.
To open BAIC Copilot:
Type a description in the center prompt and press Enter, or
Click the Ask or command... bar at the bottom of the canvas, or
Press ⌘+K (Mac) or Ctrl+K (Windows).
 |
Building an Agentic Workflow Manually
If you prefer to build your workflow manually, click the + icon on the canvas.
The Add Node panel opens, displaying all available nodes organized into the following categories:
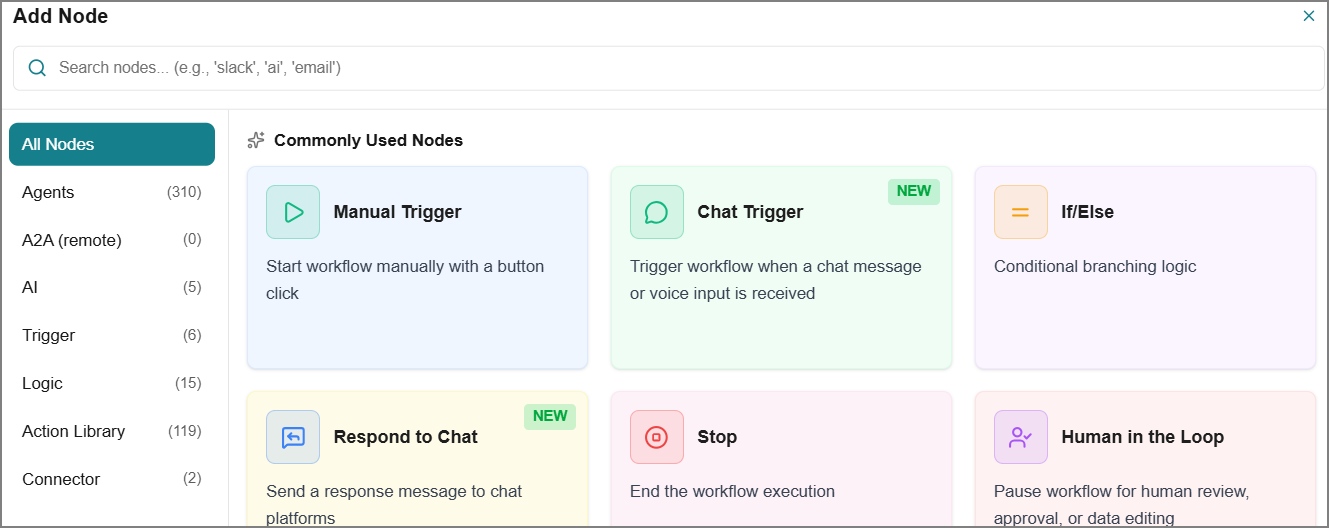 |
Agents - Agents you define on the platform.
A2A (remote) - External AI agents connected through the Agent-to-Agent (A2A) protocol you define on the platform.
AI - Nodes that call AI functions or models.
Trigger - Nodes that start the workflow.
Logic - Nodes that control the workflow's execution.
Action Library - Preconfigured tools/actions from the Agent Action Library page.
Connector - Nodes that hand off work to an external system or custom integration defined on the platform.
You can search for a node by name or keyword using the search bar at the top of the panel. Click a node to add it to the canvas, or drag it to a specific position.
Triggers
Every Agentic Workflow must begin with a trigger. A trigger defines how and when the workflow starts, whether that's a manual API call, an incoming webhook, a schedule, a chat message, or a Kafka event. Without a trigger, a workflow execution is not possible.
To add a trigger, click the + icon and select the Trigger category in the Add Node panel. Click a trigger to add it to the canvas.
|
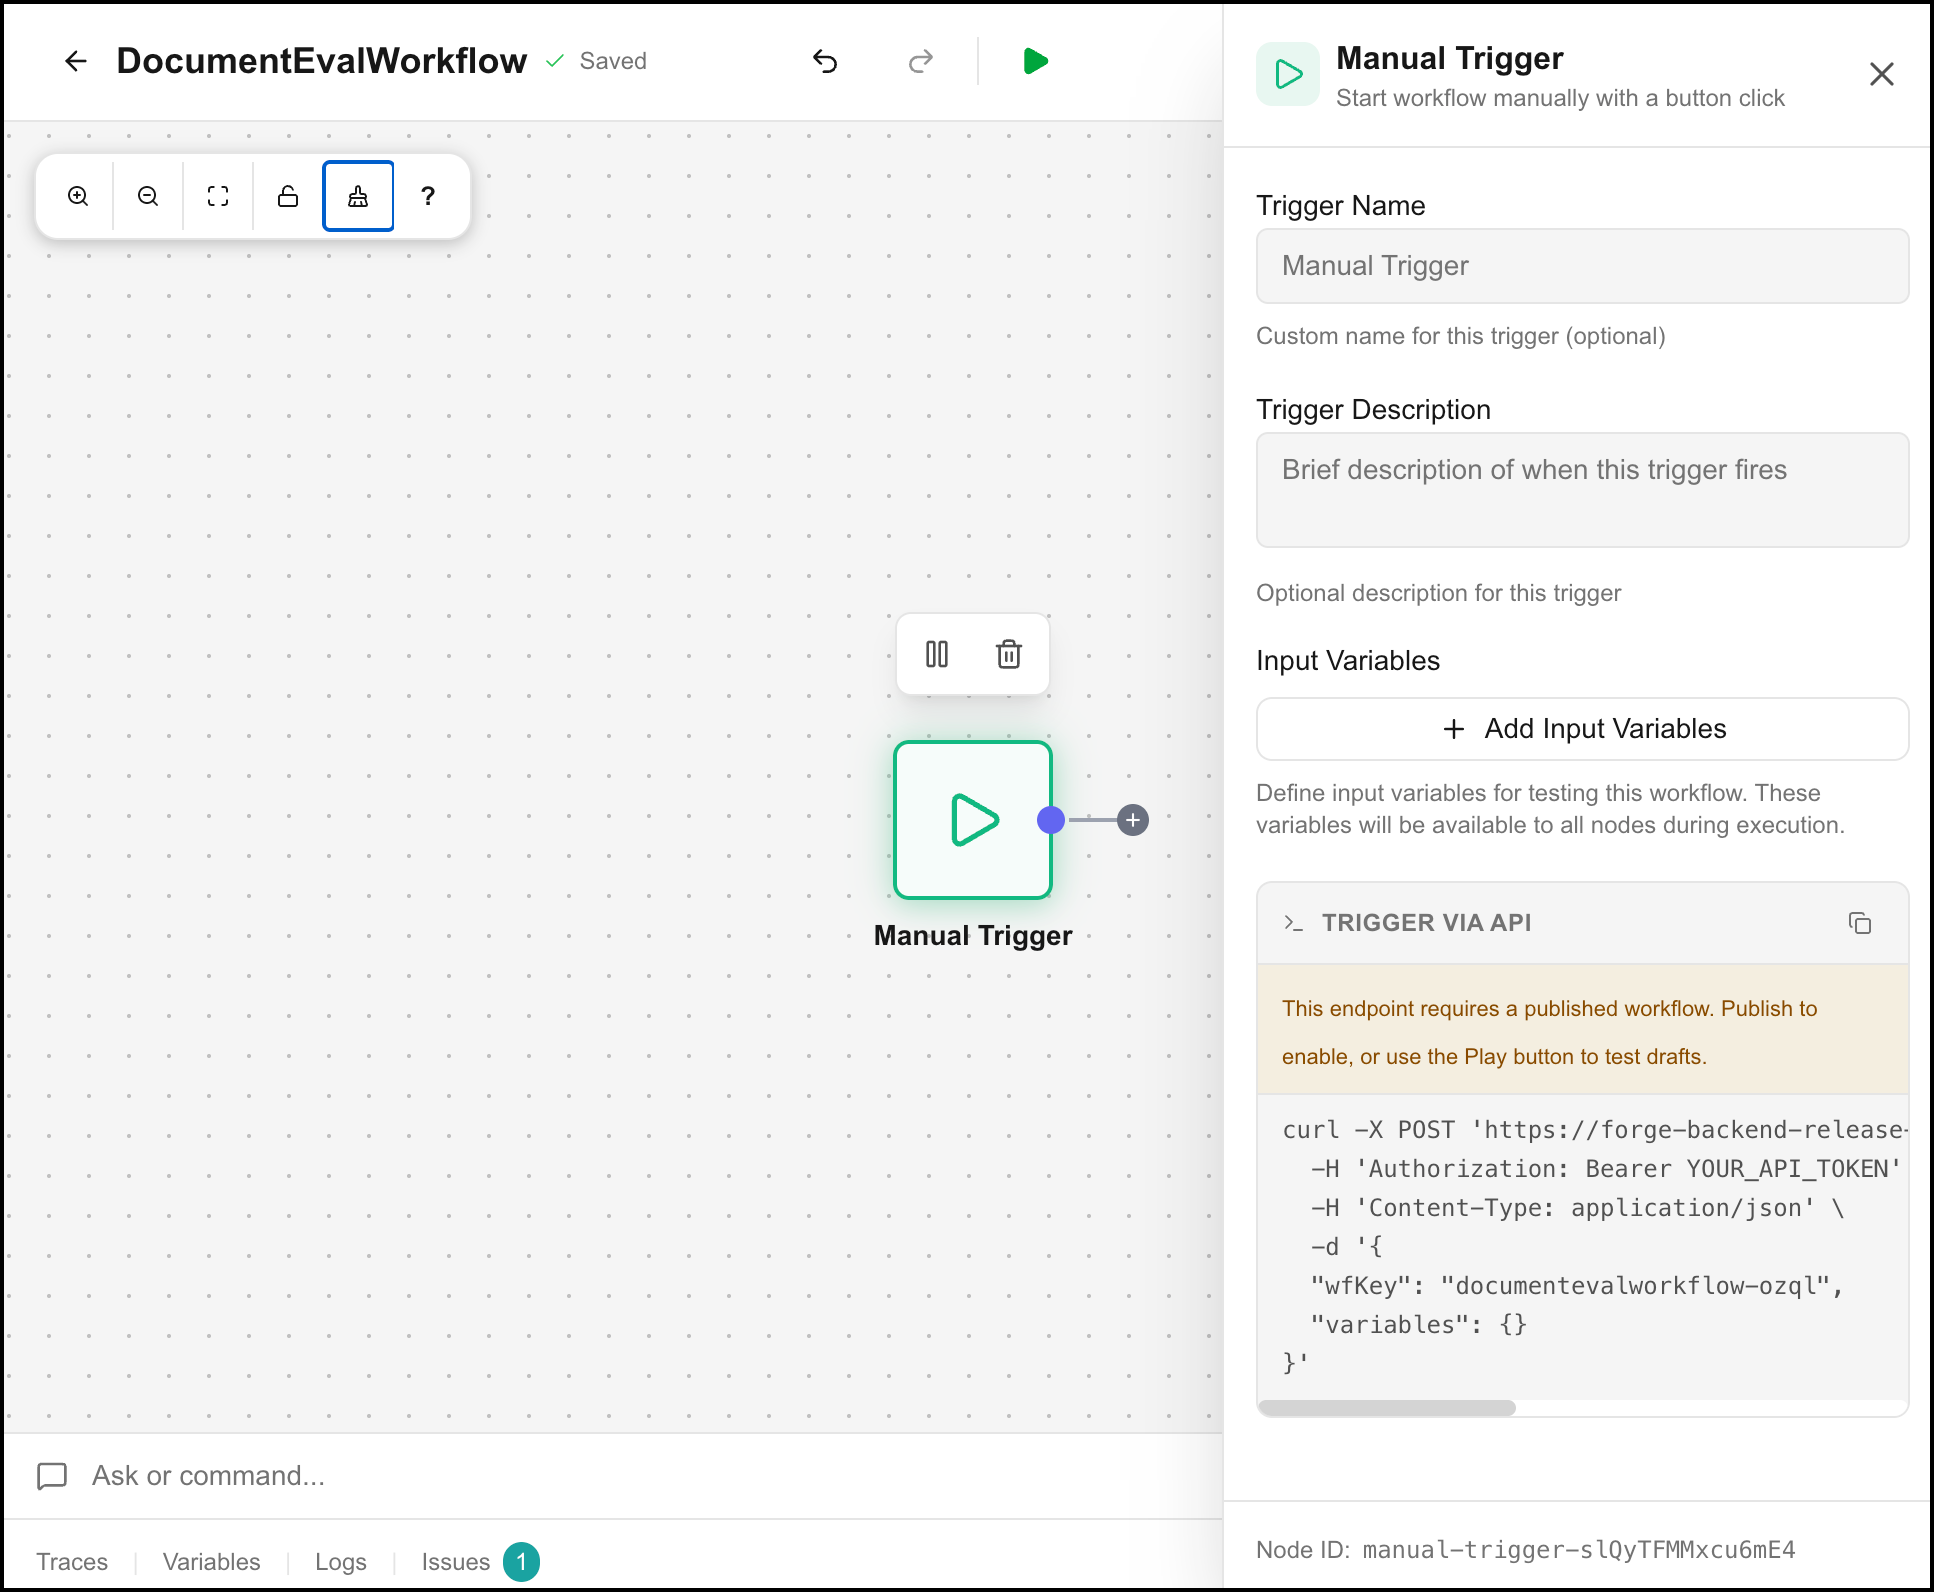
Once a trigger is on the canvas, double-click it to open its Properties Panel and configure it.
 |
The following trigger types are available:
Trigger | Description |
|---|---|
Manual Trigger | Starts the workflow manually via the API or the Run button in the Canvas Builder. The most commonly used trigger. |
Webhook | Starts the workflow when an HTTP request is received at a generated webhook URL. Supports returning a response upon flow completion. |
Schedule | Starts the workflow automatically on a schedule defined by a cron expression. |
Chat Trigger | Starts the workflow when a web chat message is received. Used to build conversational workflows. |
Kafka Trigger | Starts the workflow when a message is received on a configured Kafka topic. |
For a full description of each trigger's configuration options, see Node Types.
Nodes
Working with Nodes
Most nodes can be added to a flow, configured with a few parameters, and connected to the next step without much guidance beyond the parameter descriptions in Node Types. Some nodes, however, involve concepts or configuration patterns that benefit from more explanation.
This section provides conceptual background, configuration guidance, and examples to help you use those nodes effectively.
Code
The Code node executes custom JavaScript or Python code in a secure sandbox. Use it when you need logic that does not fit a preconfigured node: custom business rules, data transformation between nodes, or calling an external service with no native integration.
The Code node is designed for lightweight, deterministic computation. It is not intended for long-running jobs or I/O-intensive operations.
Languages and Libraries
The Code node supports JavaScript and Python. You can switch between languages using the language toggle at the top of the code editor.
Code runs inside a sandboxed environment with access to a curated set of libraries. The available libraries cover the most common use cases, including HTTP requests, email (SMTP/nodemailer), CSV parsing, date handling, and web scraping. If your use case requires a library not currently available, contact your Uniphore representative to discuss inclusion.
Writing Code
All code in the Code node is written inside a main() function. The function body is the only editable area. This design prevents top-level script leakage and ensures the workflow context is correctly injected at execution time.
To produce output from the Code node, return a value from main(). You can return any primitive value, object, or array. If main() returns nothing, the node produces no output and subsequent nodes will have nothing to reference from it.
// JavaScript example
async function main() {
  const total = execution.quantity * execution.unit_price;
  return { total };
}
# Python example
def main():
total = execution["quantity"] * execution["unit_price"]
return {"total": total}Accessing Variables
The Code node can read and write variables across multiple scopes, which are automatically injected by the workflow engine. The following scopes are available:
Scope | Syntax | Access |
|---|---|---|
Execution |
| Read/Write |
Node output |
| Read only |
Global (root exception) |
| Read only |
Parent (immediate parent flow) |
| Read only |
Loop item |
| Read only |
Loop index |
| Read only |
Chat input |
| Read only |
global and parent are distinct in multi-level subflow nesting. global always refers to the root-level execution; parent refers to the immediately enclosing flow. In a single-level subflow, they point to the same execution.
loop_item and loop_index are available when the Code node runs inside a Loop node. They carry the current iteration's item and its zero-based index, respectively.
chat_input carries the global chat context variable and is populated when the flow is triggered by a Chat Trigger. It is read-only.
Commented syntax examples for all scopes are included in the code editor as a reference.
Quick Run
Quick Run lets you test your code without running the full workflow. Click the Quick Run button in the code editor to open the mock input panel, where you can supply values for any execution-scoped variables your code references. The code executes immediately against the mock data and returns the result inline.
Use Quick Run during development to verify logic and catch errors before triggering the full flow.
Human in the Loop (HITL)
The Human in the Loop node pauses workflow execution and waits for a human to review and act before the workflow continues. Use it when a decision requires human judgment: approving an automated action, escalating an incident, or reviewing AI-generated output before it is acted on.
Branches
When a HITL node is reached, execution pauses, and a notification is sent to the designated reviewer. The reviewer's response, or its absence, determines which branch the workflow follows. The HITL node has three output branches:
Approve - the reviewer approved the request. Execution continues down the approval path.
Reject - the reviewer rejected the request. Execution continues down the rejection path.
Timeout - the reviewer did not respond within the configured time limit. What happens next depends on the timeout action (see below).
Every HITL node must have nodes connected to its Approve and Reject branches. The Timeout branch is required only if the timeout action is set to Route.
Notification Channels
The HITL node sends a notification to the reviewer when execution pauses. Two notification channels are supported: Email and Slack. You select the channel using the Notification Type field in the Properties Panel.
The notification includes the message you configure, along with two action buttons. When the reviewer clicks a button, their response is recorded, and the workflow resumes on the corresponding branch.
For email notifications, configure the following fields:
From - the sender email address.
To - the recipient email address. Supports static values and dynamic variables (for example,
{{execution.reviewer_email}}).Subject - the subject line of the email.
Brand - an optional identifier that controls which email template is used to render the notification.
Credential - the email account credential used to send the notification. QQQQ Select from the credentials configured in Credential Management.
The reviewer receives a formatted email containing the message and two buttons: one for accept and one for reject. Clicking the accept button opens a confirmation page and records the response.
Slack
For Slack notifications, configure the following fields:
Slack Target Type - select Channel to send to a Slack channel, or User to send to an individual user.
Channel / User - the channel name (e.g., #hitl-approvals) or user ID to send the notification to.
Credential - the Slack account credential used to send the notification. QQQQ Select from the credentials configured in Credential Management.
The reviewer receives a Slack message containing the message and two action buttons: one for accept and one for reject. Clicking the accept button in the Slack message posts a reply to the thread, confirming who responded and what action was taken.
Configuring the Message
The Message field defines the content of the notification sent to the reviewer. It supports both static text and dynamic values using template variable syntax:
Execution variables:
{{execution.variable_name}}Node output variables:
{{node("node-id").output()}}
Use node variables to include the output of a preceding node directly in the notification. For example, embedding an AI-generated incident summary or complaint analysis in the approval request.
Button Labels
The Approve and Reject action buttons in the notification can be relabeled to reflect the specific decision being made. Use the Approve Button Label and Reject Button Label fields to replace the defaults with context-appropriate labels such as "Execute Fix" and "Escalate", or "Approve Refund" and "Reject Request".
Timeout Behavior
The Timeout After and Timeout Unit fields define how long the HITL node waits before triggering a timeout. The On Timeout field controls what happens when that time elapses without a response:
Timeout Action | Behavior |
|---|---|
Auto Approve | The HITL status is set to Auto Approved, and execution follows the Approve branch. |
Auto Reject | The HITL status is set to Auto Rejected, and execution follows the Reject branch. |
Route to Timeout Branch | Execution follows the Timeout branch. Use this when a timeout requires its own handling logic. For example, escalating based on risk level before deciding whether to approve or reject. |
Loop
The Loop node executes a set of nodes once for each item in an array. Use it when you need to process a list of items, for example: running an agent against each record in a dataset, or sending a notification for each item in a queue.
Processing Items
Each iteration automatically injects the current array item into the reserved variable loop_item, which is accessible to all nodes within the loop. You do not need to configure this, as it is available automatically as long as the loop is running.
Sequential vs Parallel Processing
By default, the Loop node processes items sequentially, one at a time. You can increase throughput by setting the Batch value to process multiple items concurrently. Set it to 1 for sequential processing, or to a higher number to process that many items in parallel.
Note
Parallel processing is faster, but it means iterations do not have access to the results of other iterations. Use sequential processing if each iteration depends on the output of the previous one.
Capturing Outputs
By default, the outputs produced inside a loop are not available to nodes outside it. To make loop results available downstream, configure Capture Outputs by adding the Node IDs of the nodes whose outputs you want to collect. After the loop completes, the captured outputs are available as an array in the parent execution.
Subflow
The Subflow node executes a reusable block of nodes as a contained child execution. Use it to encapsulate logic used across multiple flows, or to break a complex flow into smaller, more manageable pieces.
Internal vs External Subflows
A subflow can be defined in one of two ways:
Internal - the nodes to execute are defined inline on the canvas, contained within the Subflow node itself. Use this to organize a complex flow without creating a separate flow.
External - the Subflow node references and executes a separate, independently defined Agentic Workflow. Use this to share logic across multiple flows.
Variable Scope
Subflows run in their own execution scope. Variables defined in the parent flow are not automatically available inside a subflow. To access a parent execution variable from within a subflow, use the global. prefix:
global.variable_name
Using execution.variable_name inside a subflow refers to the subflow's own execution scope, not the parent's.
Capturing Outputs
As with the Loop node, a subflow's outputs are not available to the parent flow by default. To surface subflow results back to the parent execution, configure Capture Outputs by adding the Node IDs of the nodes whose outputs you want to collect.
Split/Converge
The Split node forks execution into multiple parallel branches, allowing independent paths to run simultaneously. The Converge node waits for all branches to complete before allowing execution to continue. Use Split and Converge together when you need to run several independent operations concurrently and then act on their combined results.
Defining Branches
When you add a Split node, you define the number of branches you need and connect each one to the nodes that should run on that branch. Each branch is independent; nodes on one branch do not have access to the outputs of nodes on another branch while they are running.
Each branch can optionally be given a Boolean condition. If the condition evaluates to false at runtime, that branch is skipped entirely.
Collecting Results
After all branches finish, execution continues from the Converge node. To access the outputs of nodes that ran on parallel branches, reference them by Node ID as you would any other node output:
node("node-id").output()
All branch outputs are available to nodes downstream of the Converge node.
Nodes are the individual steps that make up an Agentic Workflow. Each node performs a specific action: running logic, calling an agent, executing code, interacting with an external service, and so on. Nodes are connected sequentially to define the execution path, and each node can produce an output that subsequent nodes can access.
To add a node to the canvas, click the + icon and select a node from the Add Node panel, or use Copilot to add nodes using natural language. Click a node to add it to the canvas, or drag it to a specific position.
|
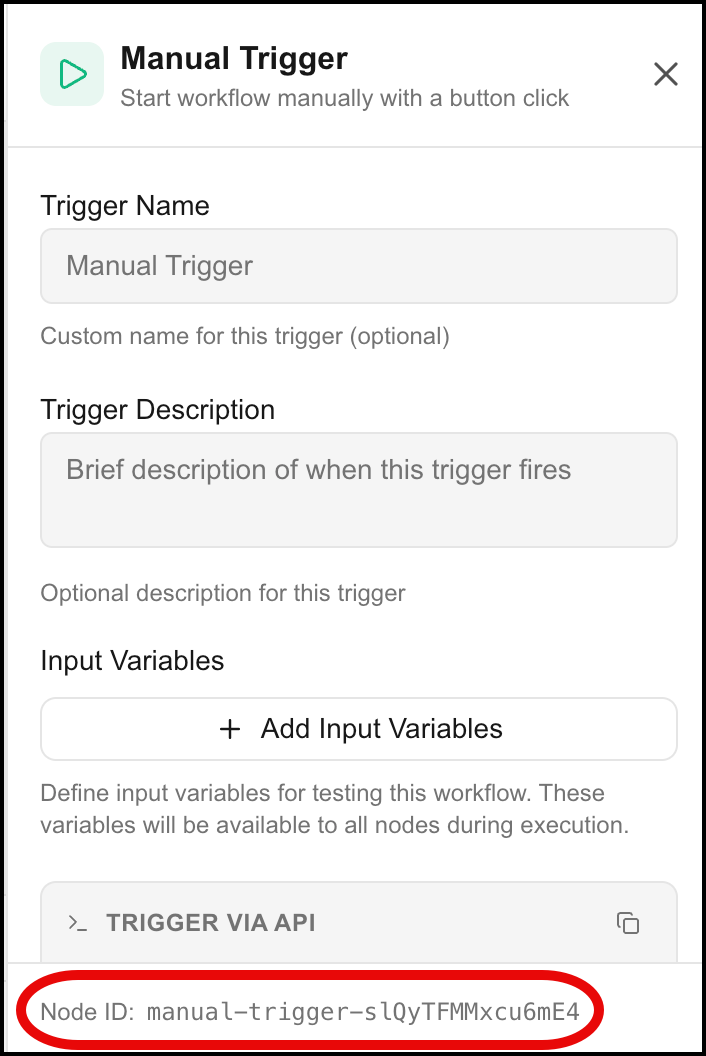
To configure a node, double-click it on the canvas to open its Properties Panel. The Properties Panel varies by node type, but all nodes share the Node Name and Node Description fields. The Node Name is displayed on the canvas and can be used to assign a meaningful label to the node. The Node Description is optional and appears below the node on the canvas.
Each node also has a Node ID, displayed at the bottom of the Properties Panel. The Node ID is used to reference the node's output in expressions and other nodes.
 |
Nodes are organized into the following categories: Triggers, Logic, AI, Agents, and Action Library. For a full description of each node type and its configuration options, see Node Types.
Node Types
The platform offers a variety of Agent flow task types, enabling quick workflow creation and straightforward configuration. Each node type is designed to handle specific actions within your workflow, making it easy to build complex processes.
Trigger Nodes
Nodes that initiate workflows based on various types of events.
Manual Trigger
Start workflow manually with a button click.
Parameters:
Trigger Name
Trigger Description
Input Variables
Webhook Trigger
Trigger workflow via HTTP webhook.
Parameters:
Trigger Name
Trigger Description
Path
HTTP Methods
Credential
Response
Response Type
Status Code
Content Type
Response Headers (Key/Value pairs)
Advanced
Allowed Origins (CORS)
Raw Body
Schedule Trigger
Schedule a trigger of a workflow.
Parameters:
Trigger Name
Trigger Description
Cron Expression
Enabled (on/off)
Input Variables (Key/Value pairs)
Chat Trigger
Trigger workflow when a chat message or voice input is received.
Parameters:
Trigger Name
Trigger Description
Welcome Message
Platform (Web Chat, WhatsApp, Telegram, Slack, Discord)
Message Type (All Messages, Text Only, Mentions Only, Direct Messages)
Enable Voice (Enable voice input and output for this chat trigger)
Kafka Trigger
Trigger workflow when a Kafka message is received on a topic.
Parameters:
Trigger Name
Trigger Description
Topic
Brokers
Consumer Group ID
Auto Offset Reset
Authentication Type
Advanced (Optional Settings)
Logic Nodes
Nodes that define program logic.
Code
Execute custom JavaScript or Python code in a secure sandbox.
Parameters:
Node Name
Node Description
Concurrency Groups
Code
Converge
Synchronize and join parallel branches.
Node Name
Node Description
Human in the Loop (HITL)
Pause workflow for human review, approval, or data editing.
Node Name
Node Description
Notification Type: Email
From
To
Subject
Brand (Identifier for email template)
Credential
Message
Approve Button Label
Reject Button Label
Timeout After
Timeout Unit
On Timeout
Notification Type: Slack
Slack Target Type (Channel/User)
Channel / User
Credential
Message
Approve Button Label
Reject Button Label
Timeout After
Timeout Unit
On Timeout
If/Else
Conditional branching logic.
Node Name
Node Description
Condition (CEL expression that returns a boolean)
Loop
Execute a node or workflow for each item in an array.
Node Name
Node Description
Loop Type (Internal/External)
Internal - the nodes to execute for each iteration are defined inline within the loop on the canvas.
External - the loop executes an existing subflow for each iteration.
Expr
Batch: Controls the number of items processed concurrently. Set to 1 for sequential processing. Set to a higher number to process multiple items in parallel. Set to 0 to process all items concurrently.
Loop Over: The array to iterate over, specified as an expression. This typically refers to a node output or execution variable that contains an array. For example:
node("my-node-id").output()orexecution.my_arrayCapture Outputs (Add Node IDs): Specifies which node outputs to collect across all iterations. Add the Node IDs of the nodes whose outputs you want to capture. After the loop completes, the captured outputs are available as an array in the parent execution.
Note
If you do not configure Capture Outputs, the loop will execute, but its results will not be available to subsequent nodes.
Respond to Chat
Send a response message to chat platforms.
Node Name
Node Description
Message
Wait for User Response (On/Off)
Split
Split execution into multiple parallel branches.
Node Name
Node Description
Parallel Branches (optional conditions)
Stop
End the workflow execution.
Parameters:
Node Name
Node Description
Switch
Multi-condition routing.
Node Name
Node Description
Switch Cases: Label (Output Name), Condition (JavaScript Expression)
Subflow Connection
Execute a contained sub-workflow.
Node Name
Node Description
Type (Internal/External)
Subflow ID
Capture Outputs (Add Node IDs)
Subflow
Execute a reusable sub-workflow with contained nodes.
Node Name
Node Description
Wait
Pause workflow execution for a specified duration.
Node Name
Node Description
Duration
Time Limit
AI Nodes
Nodes that call AI functions or models.
Speech to Text
Transcribe audio to text using AI models.
Node Name
Node Description
Input (Variable Name)
Output (Variable Name)
Text to Speech
Convert text to speech using AI voice models.
Node Name
Node Description
Audio Format
Input (Variable Name)
Output (Variable Name)
Other Nodes
In addition to the nodes defined above, Business AI Cloud, supports the following types of nodes:
Action Library Nodes - add defined actions from the Agent Action Library.
Agent Nodes - invoke any agent defined on the platform, pass it parameters, and capture the output.
Deterministic and Non-Deterministic Execution
Agentic Workflows support two approaches to agent execution, and you can use either or both within the same flow.
In deterministic execution, you explicitly control which agents run and in what order. Each agent node is connected in sequence on the canvas, and you define exactly what input each agent receives (typically the output of the previous node). This approach is predictable and straightforward to trace and debug.
In non-deterministic execution, a primary agent decides at runtime whether to handle a task itself or delegate it to one or more sub-agents. Sub-agents are attached directly to the primary agent node on the canvas and are represented by dashed connecting lines. During execution, the canvas dynamically updates to visualize the delegation as it occurs.
[Screenshot: Non-deterministic execution]
To configure non-deterministic execution, hover over an agent node on the canvas and click the + icon to attach a sub-agent. In the agent node's Properties Panel, set the Delegation Count to limit the maximum number of times the agent can delegate. This prevents unbounded or recursive delegation. The default is 5.
Note
Non-deterministic execution relies on the primary agent's configuration to determine when and how to delegate. For best results, ensure your agent's goals and instructions clearly describe the conditions under which it should delegate to each sub-agent. For more information on configuring agents, see Agent SDK.
Variables
Variables are how data is stored and passed between nodes during a flow execution. When a node runs and produces an output, that output is automatically stored as a variable and made available to subsequent nodes in the flow.
There are two scopes of variables:
Execution variables - available across the entire flow execution. Input variables passed when triggering the flow are stored here, and can be read or written by any node.
Node variables - scoped to a specific node. Each node's output is stored under its Node ID and can be accessed by referencing it in expressions.
To reference a node's output in a node's input field or a CEL/JavaScript expression, use the following syntax:
node("node-id").output()
Execution-level variables can be accessed using:
execution.variable_name
Note
When working inside a Loop or Subflow node, use global.variable_name to reference variables from the parent execution. Using execution.variable_name inside a subflow refers to the subflow's own execution scope, not the parent.
The Variables tab in the Debugger Panel displays all variables produced during an execution, organized by scope. You can inspect variable values and, during a paused execution, edit them directly to test different execution paths.
 |
[Potential additional Screenshot: Variables tab — editing a variable during a paused execution]
Running and Debugging a Flow
Before publishing a flow, you can run and debug it directly in the Canvas Builder to verify it behaves as expected.
Execution Modes
Agentic Workflows run in one of two modes:
Debug - runs the flow in the Canvas Builder with full observability. Use this mode while building and testing your flow. Debug executions are visible in Run History and are marked with a debug indicator.
Production - runs the published version of the flow at scale. Triggered via the API or a configured trigger.
Running a Flow
To run a flow in debug mode, click the Run ( ) icon in the top toolbar, or press ⌘+Enter (Mac) / Ctrl+Enter (Windows).
If your flow has a Manual Trigger, the trigger's Properties Panel opens so you can provide any input variables before the execution starts. Click Run to begin.
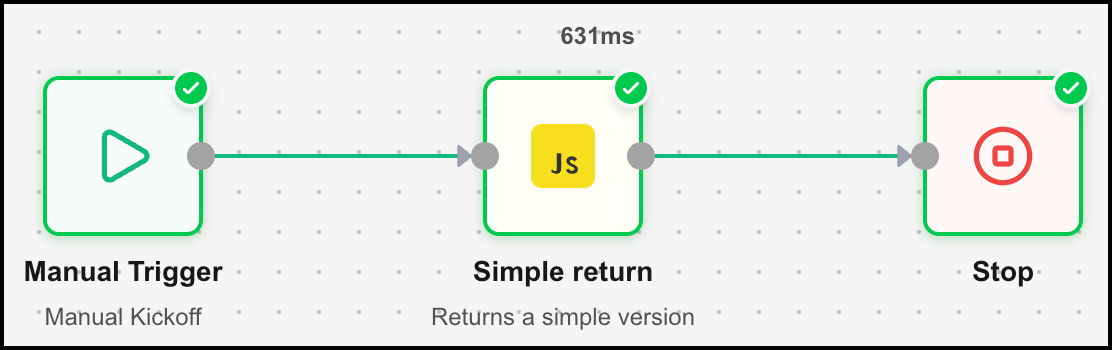
While the flow is running, the canvas updates in real time to show execution progress. Completed nodes display a green checkmark and their execution time. The Run button changes to a red Stop button, which you can click to cancel the execution at any time.
 |
The Debugger Panel at the bottom of the canvas opens automatically when a flow runs.
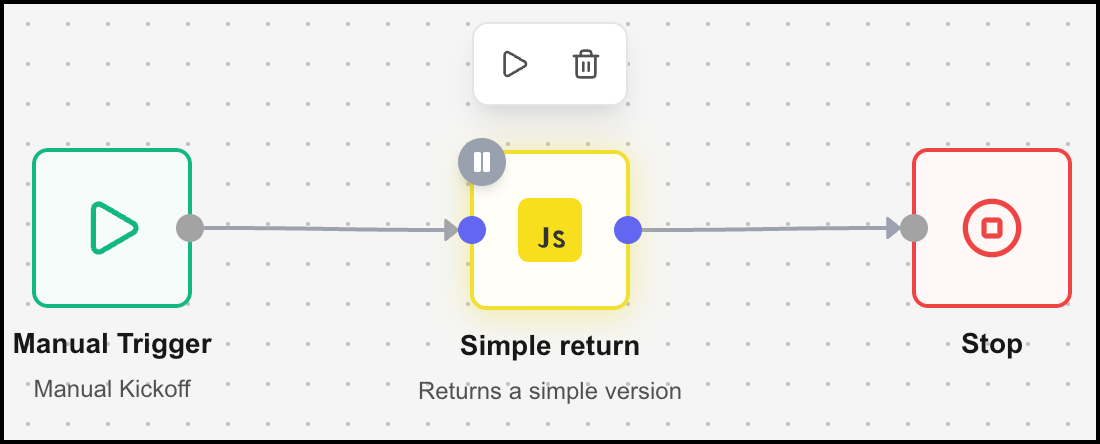
Using Pause Points and Step Over
You can pause execution at any node by adding a pause point. This lets you inspect the state of the flow at that point, modify variables, and then continue or step through the flow node by node.
To add a pause point, hover over a node and click the Add Pause Point ( ) icon.
When execution reaches a pause point, the node displays a Paused indicator and execution stops. From here you can:
Step Over - execute the current node and pause at the next one. Click the Step Over button in the top toolbar or press Ctrl+..
Resume - continue execution until the next pause point or until the flow completes. Click the Run button.
Edit Variables - go to the Variables tab in the Debugger Panel and double-click any variable to edit its value. This lets you test different execution paths without re-running the flow from the start.
Stop - cancel the execution entirely.
To remove a pause point, hover over the node and click the Play ( ) icon.
 |
[Also consider Screenshot: Variables tab — editing a variable during a paused execution]
Reading the Logs
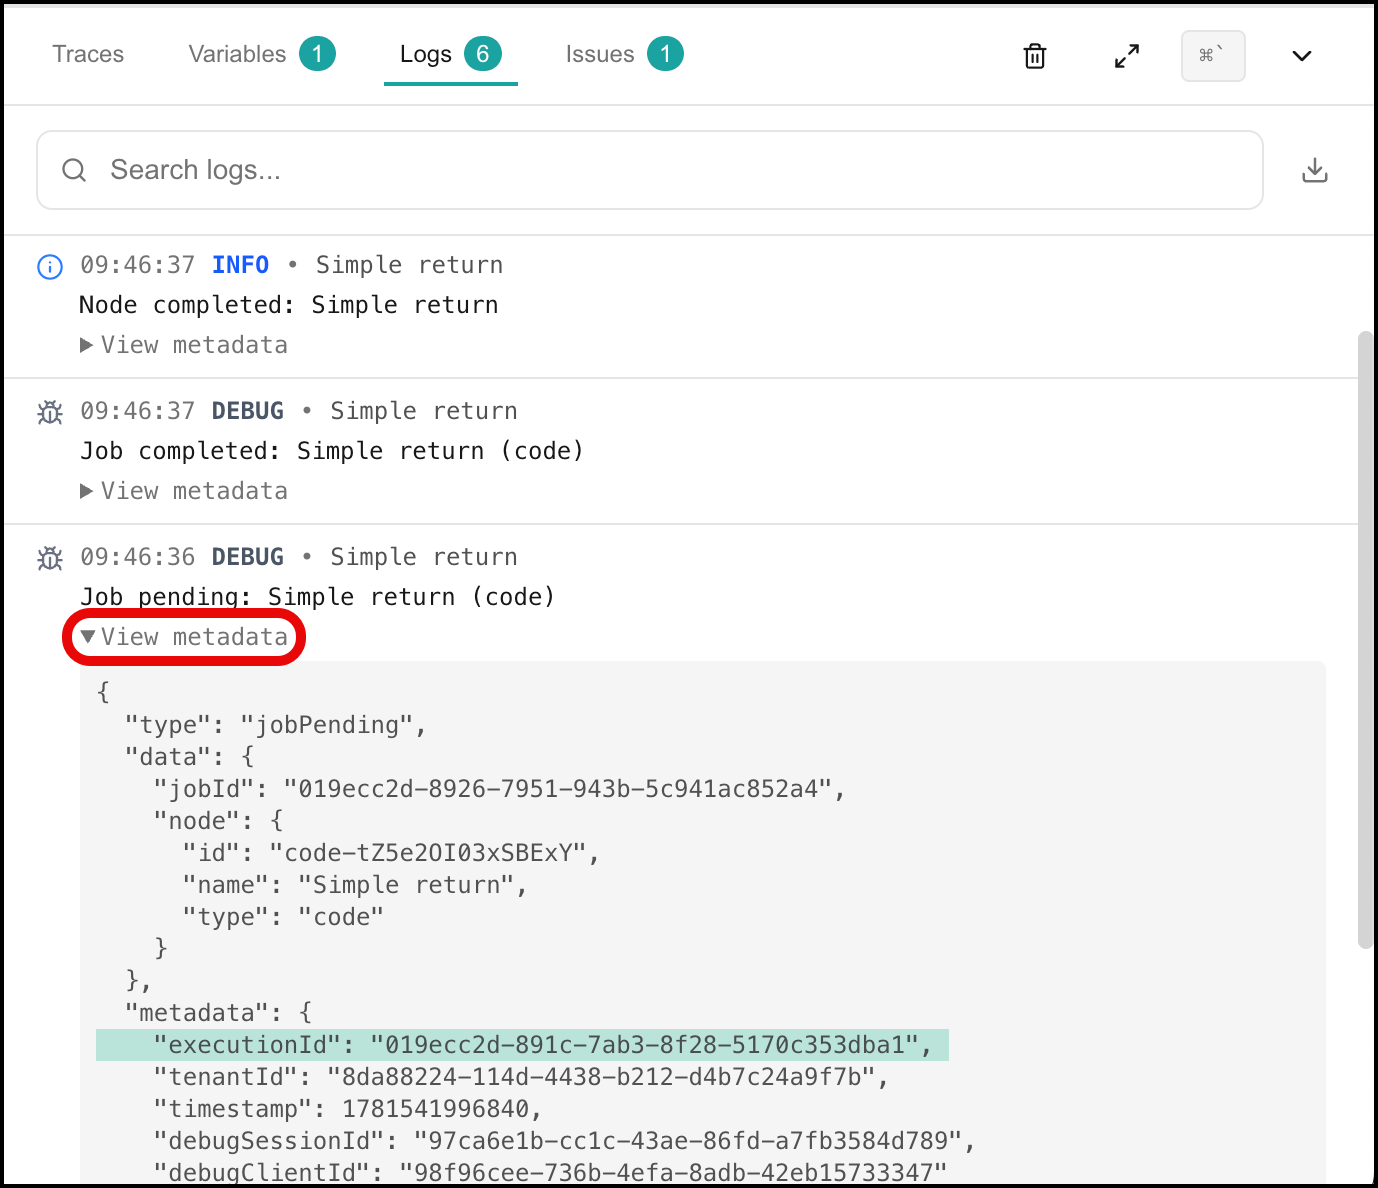
The Logs tab in the Debugger Panel displays a timestamped record of every event that occurred during the execution. Each entry shows the time, severity level (INFO or DEBUG), the node it originated from, and a brief description of what occurred. Click View metadata on any entry to see the full event details.
Use the search bar at the top of the tab to filter entries by keyword. Click the Download ( ) icon to download the logs as JSON.
The tab header displays a running count of log entries. Each execution is assigned a unique Execution ID, which you can use to locate the execution in Run History.
 |
Publishing a Flow
While you are building and testing a flow, it runs in draft mode. To make a flow available for production use (whether triggered via the API or a configured trigger), you must publish it.
Publishing creates a named version snapshot of the flow. The published version is what runs in production; the draft version remains editable in the Canvas Builder without affecting the published version.
To publish a flow:
In the Canvas Builder, click Publish in the top toolbar.
The Publish dialog opens.
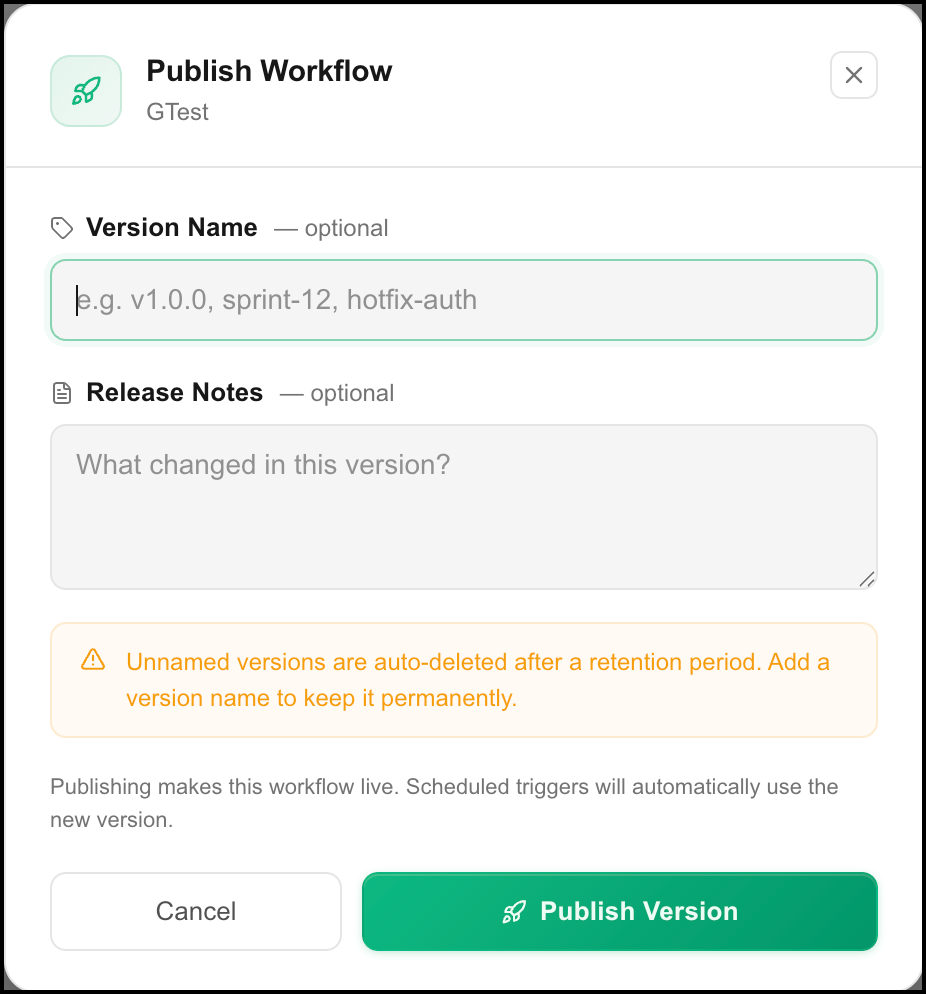
Enter a version name (optional). Unnamed versions are automatically deleted after a brief retention time. Add a version name to keep it permanently.
Enter a description of the changes in the Release Notes field (optional).
Click Publish.
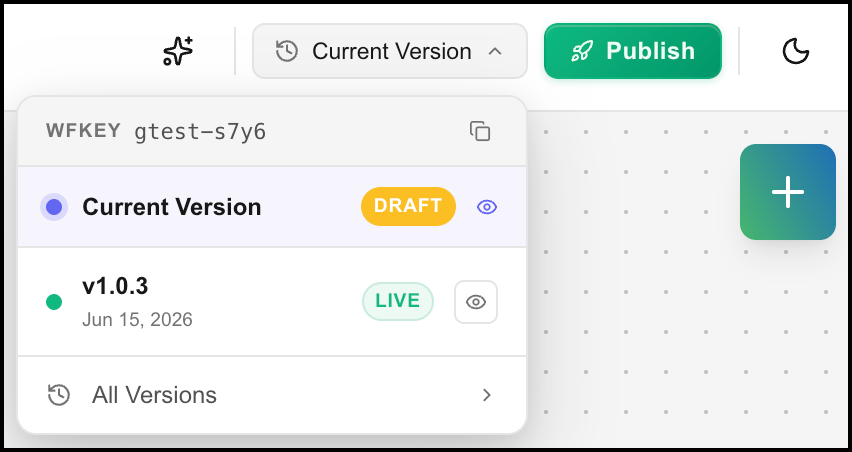
The flow is published. The Current Version indicator in the top toolbar updates to reflect the published version.
 |
Note
Publishing a flow does not affect executions that are already in progress. Only new executions use the newly published version.
Working with Flow Versions
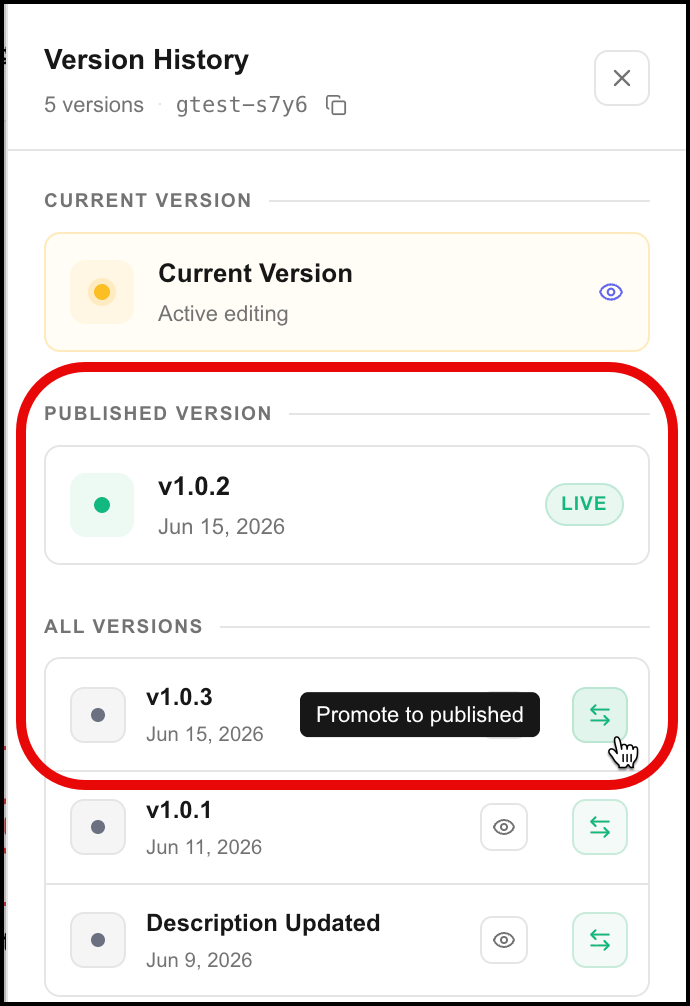
Every time you publish a flow, a new version is created. You can view and manage all versions from the Current Version dropdown in the top toolbar.
To view the list of all versions, click the Current Version dropdown in the top toolbar and click All Versions.
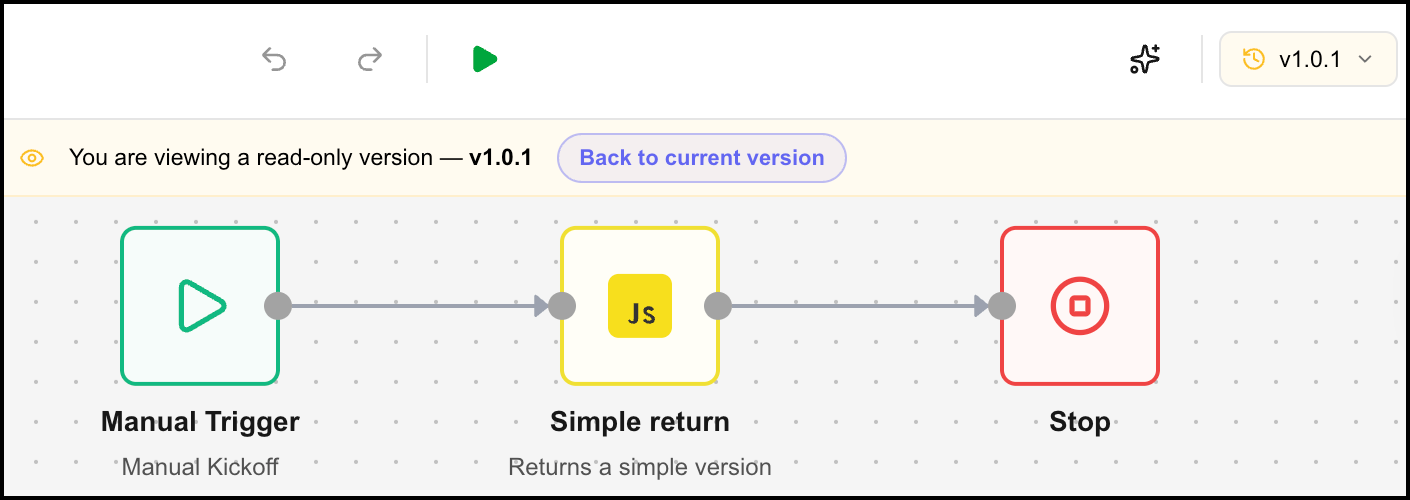
To view a previous version, click the View ( ) icon for that version. The version loads into the canvas in read-only mode.
 |
To promote a previous version to production, click the Promote ( ) icon for that version. This publishes it as the new current version.
 |
Editing an Agentic Workflow
You can edit an Agentic Workflow at any time from the Agentic Workflows page.
To open a flow for editing, click its card. The flow opens in the Canvas Builder.
All edits are made to the draft version of the flow. If the flow has been published, the published version continues to run in production unchanged until you publish a new version. To make your changes available in production, publish the flow again following the steps in Publishing a Flow.
You can use Axiom to modify an existing flow. Describe the change you want to make in natural language, and Axiom will update the flow accordingly.
Managing Agentic Workflows
From the Agentic Workflows page, you can perform the following management actions on existing Agentic Workflows.
Cloning a Flow
To clone a flow, click the Ellipsis ( ) icon on the flow card and select Clone. A copy of the flow is created and added to the Agentic Workflows page.
Viewing Run History
Run History shows a complete record of all executions for a flow, including both debug and production runs.
To access Run History, click the Ellipsis () icon on the flow card and select View Run History. The Run History page opens.
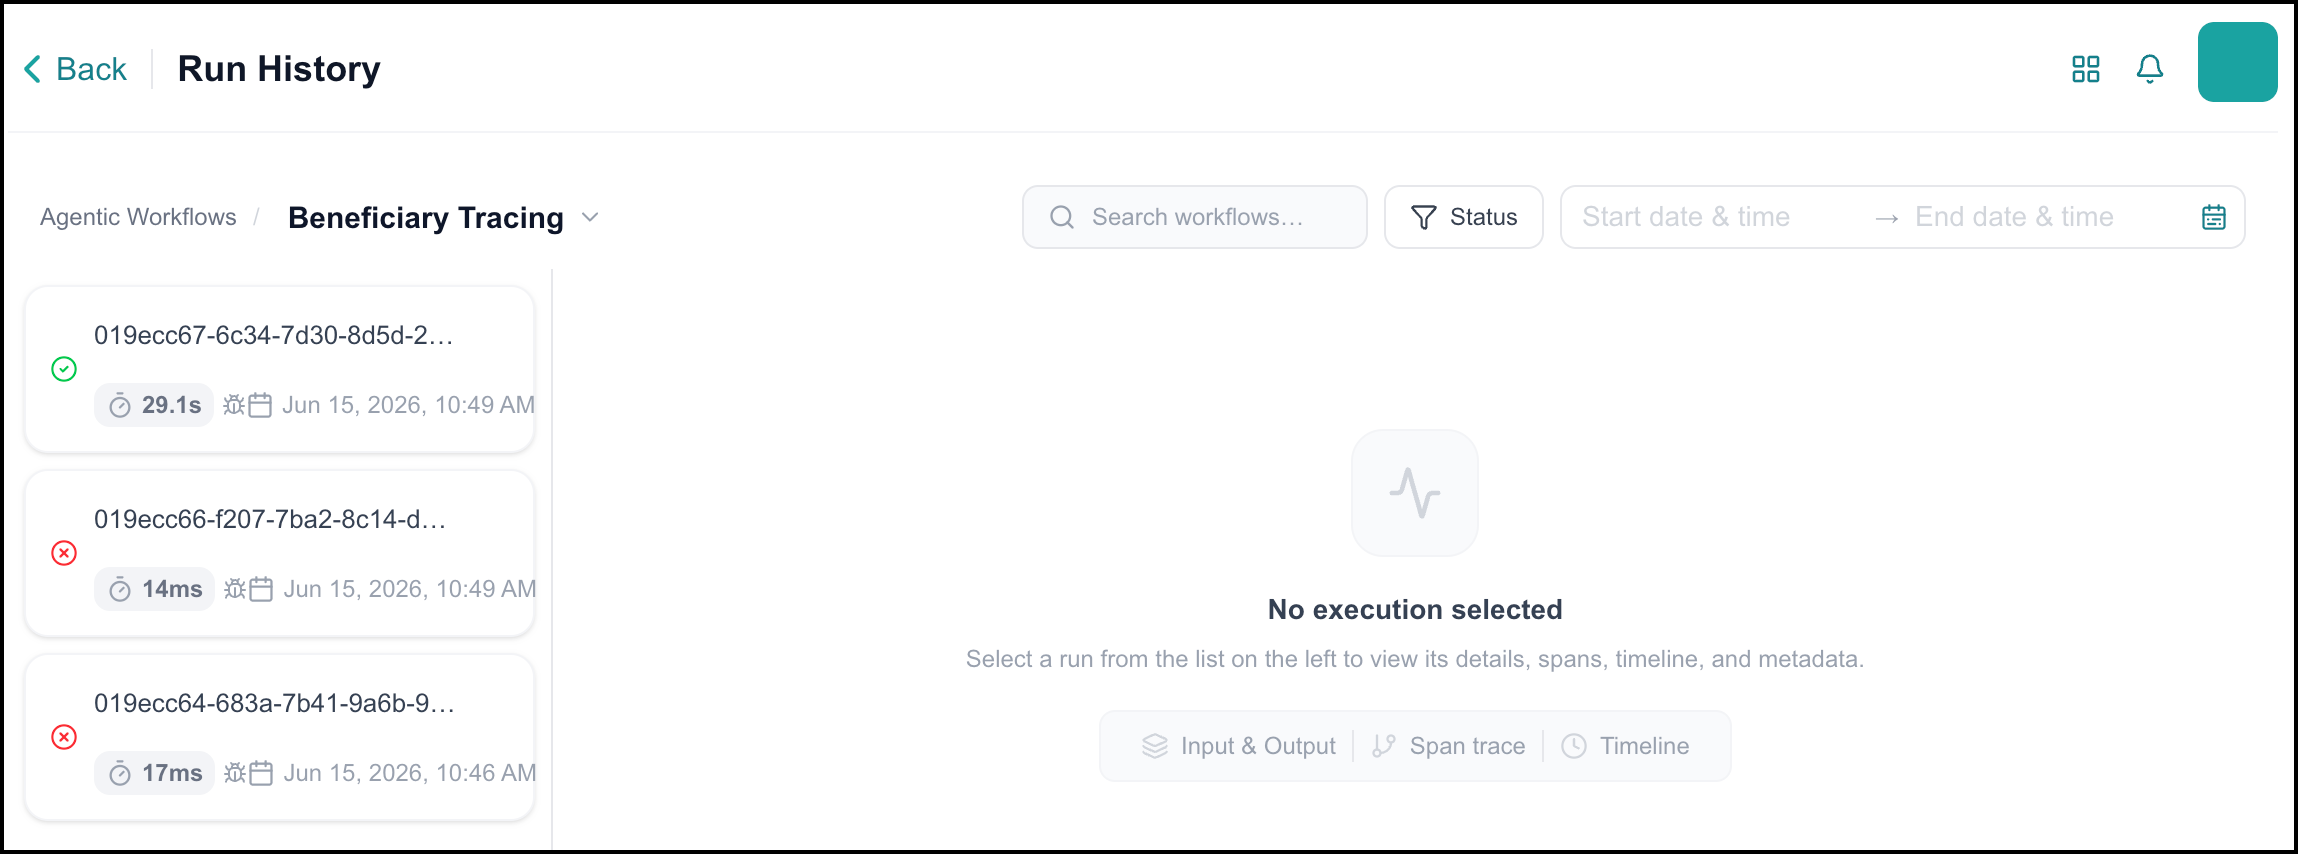
Each execution is displayed as a card in the left panel showing its Execution ID, status, duration, and timestamp. Debug executions are indicated by a Debug ( ) icon. You can filter executions by status or date range, or search for a specific execution by ID.
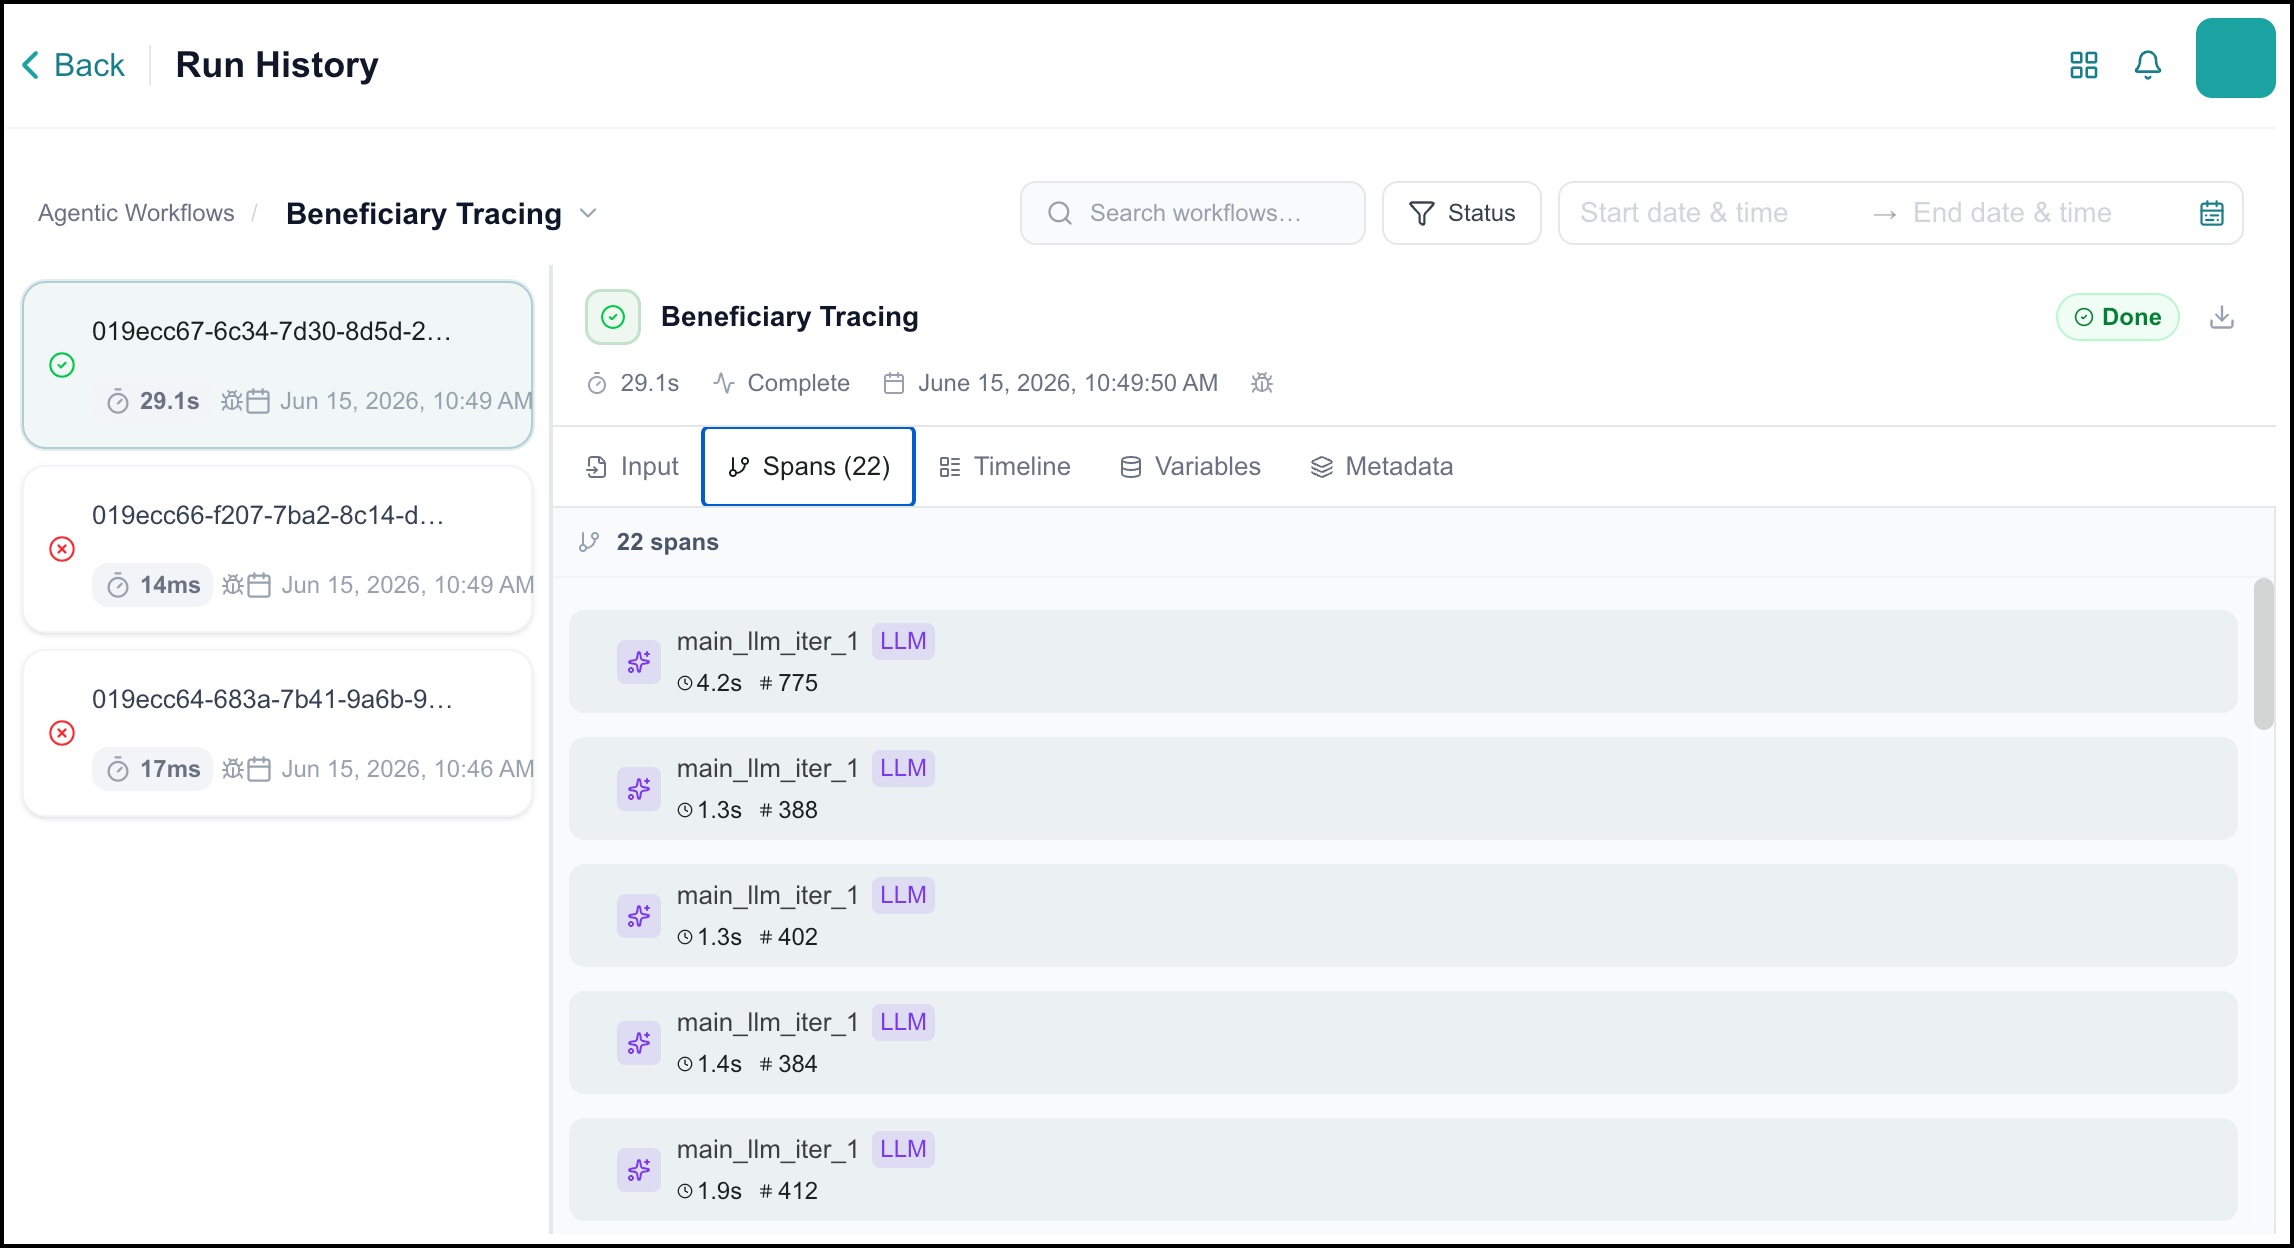
To inspect an execution, click its card. The right panel displays the execution details across the following tabs:
Input - the input variables provided when the execution was triggered.
Spans - the execution traces for Agent nodes. Click a span to view its input, output, and metadata.
Timeline - a visual representation of the execution path showing each node, the order it ran, and how long it took.
Variables - all variables produced during the execution.
Metadata - execution metadata including the Execution ID, status, trigger type, and timestamps.
Deleting Agentic Workflows
To delete a flow, click the Ellipsis () icon on the flow card and select Delete. Confirm the deletion by entering the name of the flow. Click Delete.
Invoking a Flow via API
Published Agentic Workflows with a Manual Trigger can be invoked programmatically via the API. This is the primary way to integrate a flow into an external application or automated process.
To invoke a flow, you will need:
Your API token
The flow's Workflow Key, visible on the flow card on the Agentic Workflows page and in the Manual Trigger's Properties Panel
Send a POST request to the following endpoint:
POST https://${instance}/proxy/forge-wf-triggers/v1/invokeWith the following payload:
{
  "wfKey": "your-workflow-key",
  "variables": {
    "variable_name": "value"
  }
}
The variables object is used to pass input variables to the flow. If your flow does not require input variables, pass an empty object.
A successful request returns an Execution ID, which you can use to look up the execution in Run History.
Note
The API endpoint requires a published flow. Use the Run button in the Canvas Builder to test draft flows during development.
BPMN Workflow
A BPMN Workflow is a low-code tool for building and running automated, multi-step processes. BPMN Workflows are based on the Business Process Model and Notation (BPMN) standard. Use BPMN Workflows to design workflows, assign tasks to AI agents, and monitor execution.
Business AI Cloudalso supports Agentic Workflows. You can use and manage BPMN Workflows alongside any Agentic Workflows you create. When you create a new workflow, you choose which type.
To get started, go to the home page > Agents > Agentic Workflows.
The BPMN Flows tab displays a list of all previously created BPMN workflow journeys. Use this tab to quickly review, manage, or extend existing workflow configurations.
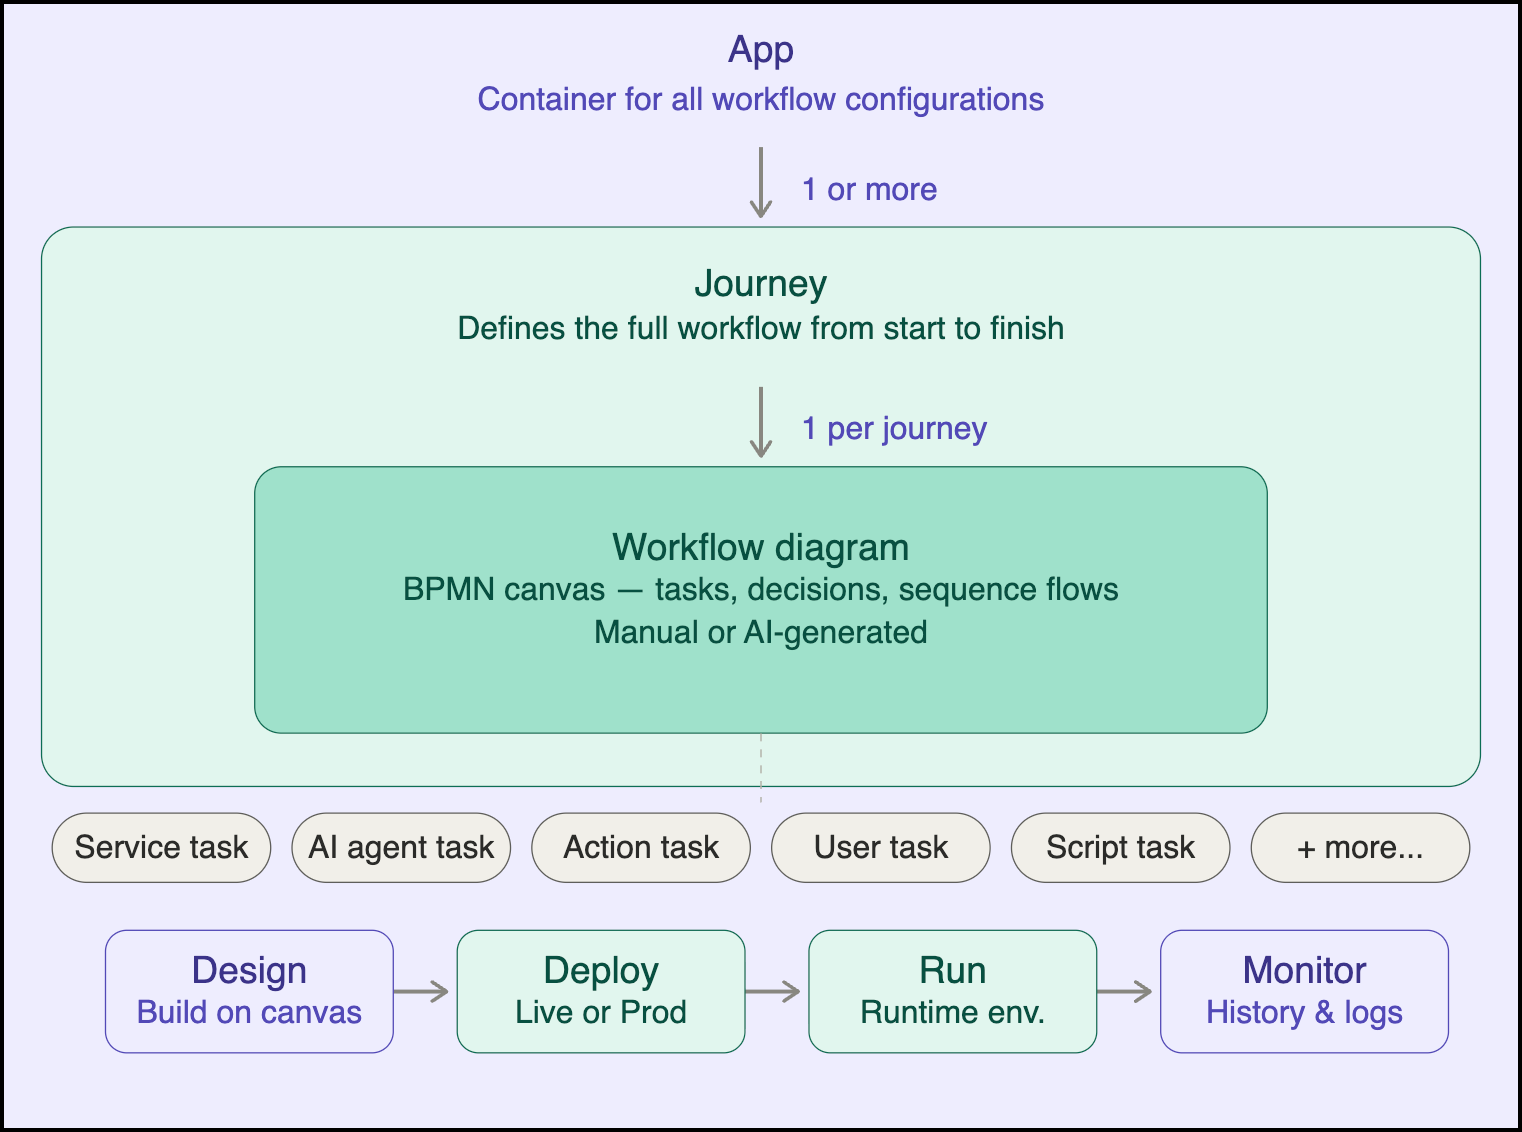
Use the Agentic Workflow environment to design and activate BPMN Workflows. Once activated, they can be executed by multiple agents, triggered by specific events, or managed while interacting with agents. As they run, they can be monitored for performance, patterns, and anomalies, with insights feeding back into workflow optimization, making the entire automation cycle adaptive and self-improving.
 |
Creating an App
You can start a new workflow journey by taking the first step, creating an App. An App is like a container that holds all your Workflow configurations in one place.
Note
The platform supports multi-user access, allowing multiple users to work on an app and its journeys simultaneously.
Go to the Home page > Agents > Agentic Workflow > Start Your Journey.
The Apps page opens and displays a list of existing apps, if available.
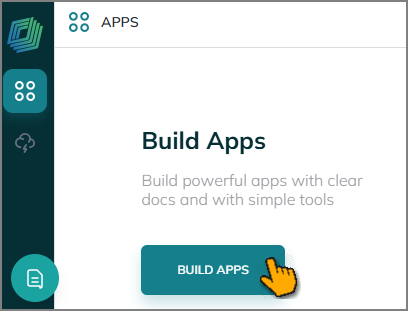
If there are no applications yet, click BUILD APPS. If apps already exist, you will see a list of applications. Click CREATE APP in the top-right corner.
In either case, the Create App window opens.
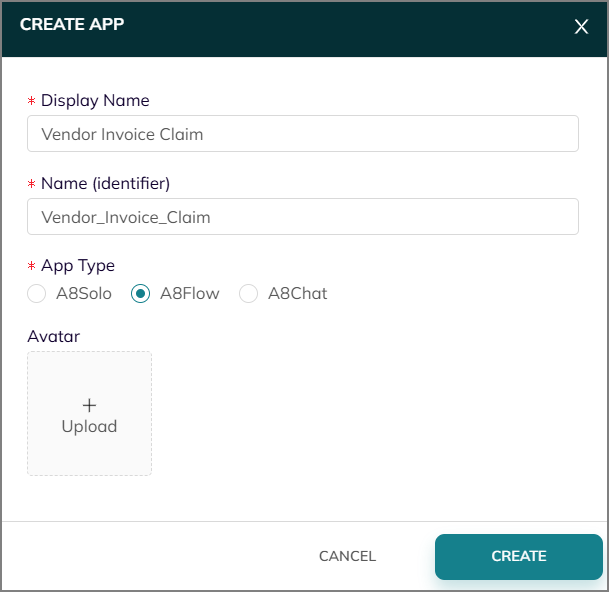
Enter a preferred name for your app in the Display Name field.
The Name (identifier) field is auto-filled; however, you can update it as needed.
Note
The system uses this name internally. Ensure it is unique, concise, and follows the recommended naming conventions.
Use the A8Flow App Type (selected by default). The other app types are not currently available.
Set the Avatar for your app, if needed.
Click Upload.
Select an image from your local system.
Click Open.
The selected image is uploaded and set as the new avatar for your app.
Click CREATE.
A success message confirms the app was created.

Managing an App
You can manage all your existing apps from the Apps page, where you can easily edit or remove them as needed.
Editing an App
To update an app:
Click the Edit
 icon next to the required app.
The EDIT APP window opens.
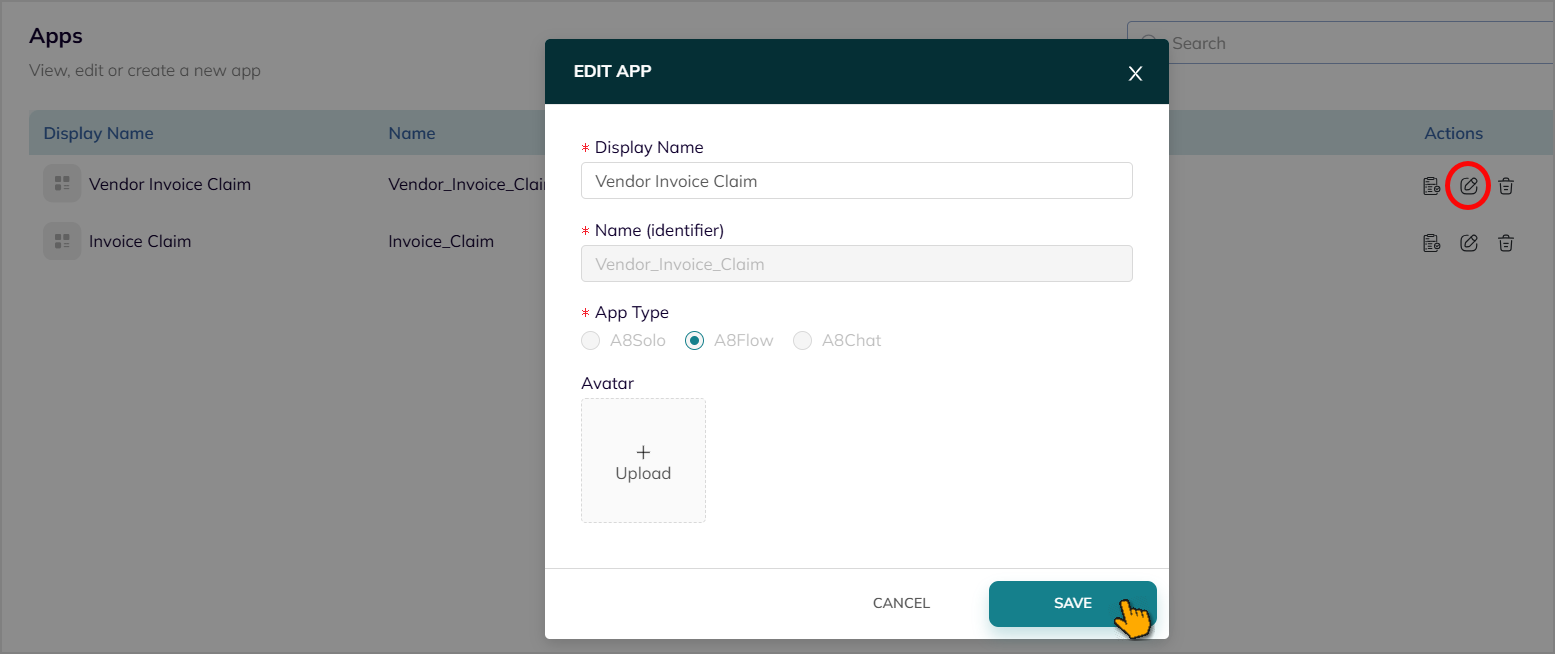
Update the app name and avatar as needed.
Note
Name (identifier) and App Type fields are non-editable.
Click SAVE.
A success message confirms the app was updated.
Removing an App
To remove an app:
Click the Delete
 icon next to the required app.
The DELETE APP confirmation box opens.
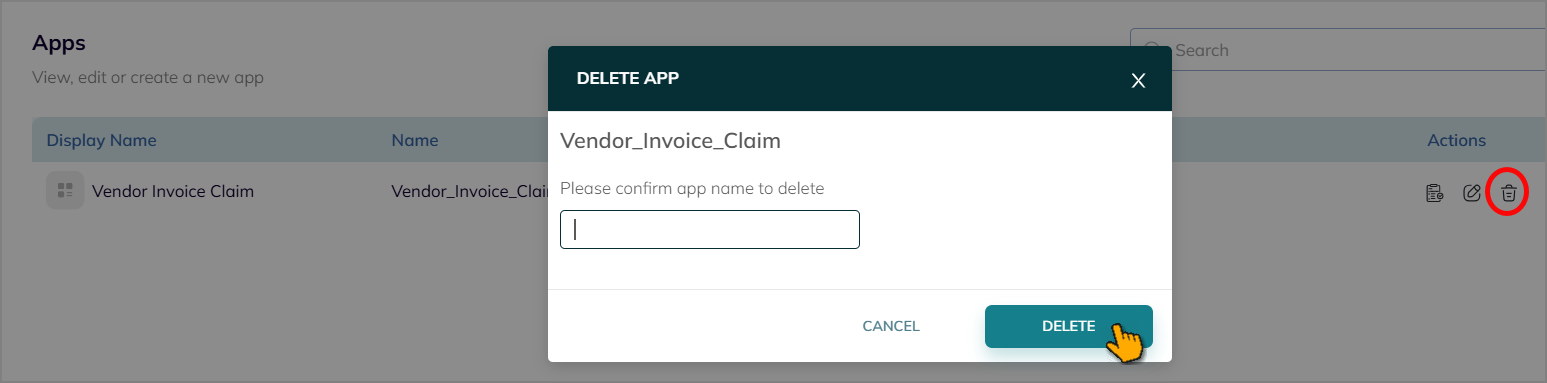
Re-enter the name of the app you want to delete for confirmation.
Click Delete.
A success message confirms the app was removed from the list.
Creating Journeys
A Journey defines your application's entire workflow, guiding it from start to finish. It outlines each step, decision, and action, ensuring that every task is executed in the correct sequence and the overall process runs smoothly. By mapping your workflow as a journey, you gain clarity, control, and efficiency in managing your operations.
Within an app, you can create multiple journeys to organize and manage different workflows in one place.
To create a new journey:
Click on the desired app.
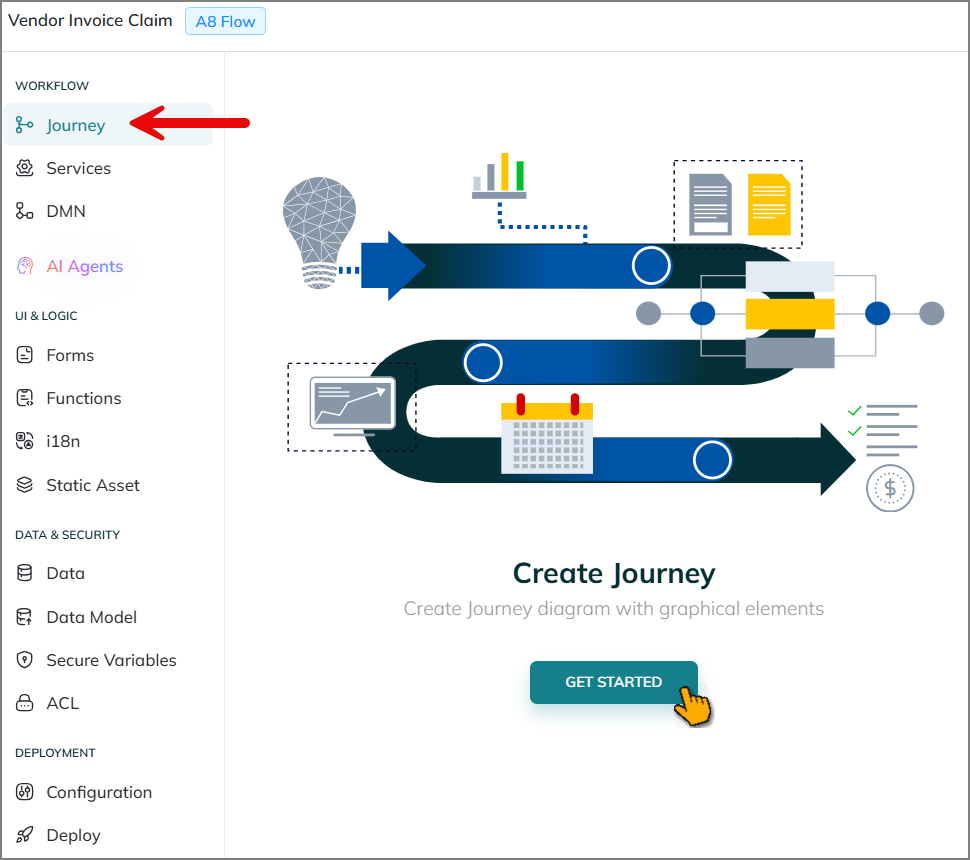
The Assisted page opens, and the left menu Journey is selected by default.
Click GET STARTED or CREATE JOURNEY. (If there are no other journeys present, you will see the GET STARTED button.)
The Create Journey window opens.
Enter a name for the journey in the Assisted Name field.
Enter a Description of your workflow journey.
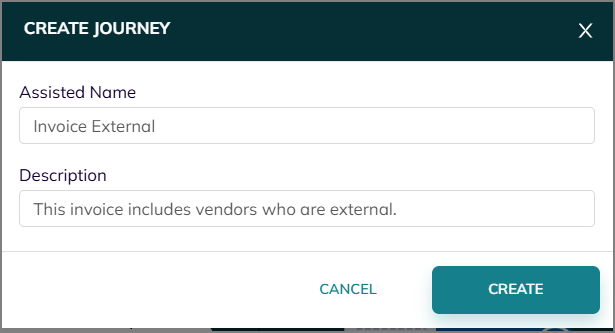
Click CREATE.
A success message confirms the journey was created. You can find the journey on the Agentic Workflows page.

You can repeat these steps to create multiple journeys within the same app. Assisted journeys are ideal for business processes that involve multiple participants and require coordinated teamwork.
Note
Because workflow creation depends on the required journeys being available, you should create all the required journeys for the app before starting workflow creation.
Managing Journeys
You can manage all your existing journeys in the app, easily editing or removing them as needed.
Editing a Journey
To update a journey:
Click the Edit
icon next to the required journey.The EDIT JOURNEY window opens.
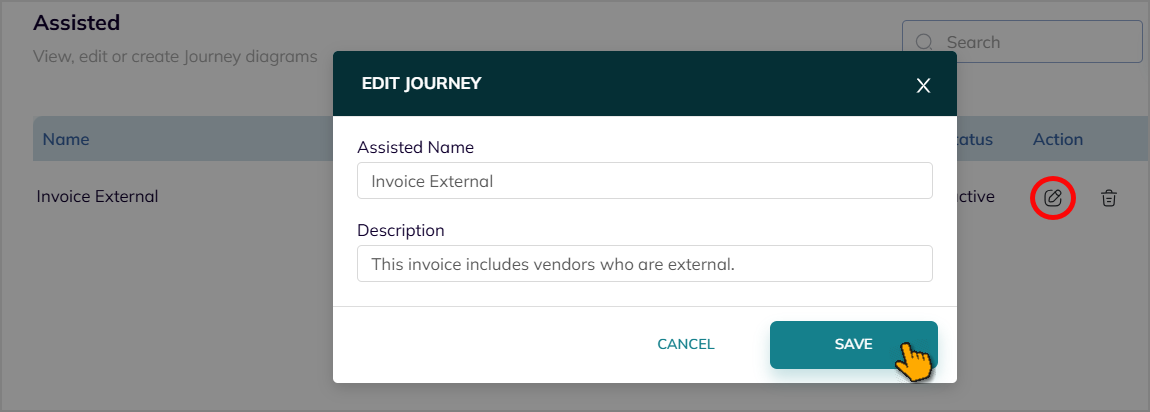
Update the name and description as needed.
Click SAVE.
A success message confirms the journey was updated.
Removing a Journey
To remove a journey:
Click the Delete
icon next to the required journey.The DELETE JOURNEY confirmation box opens.
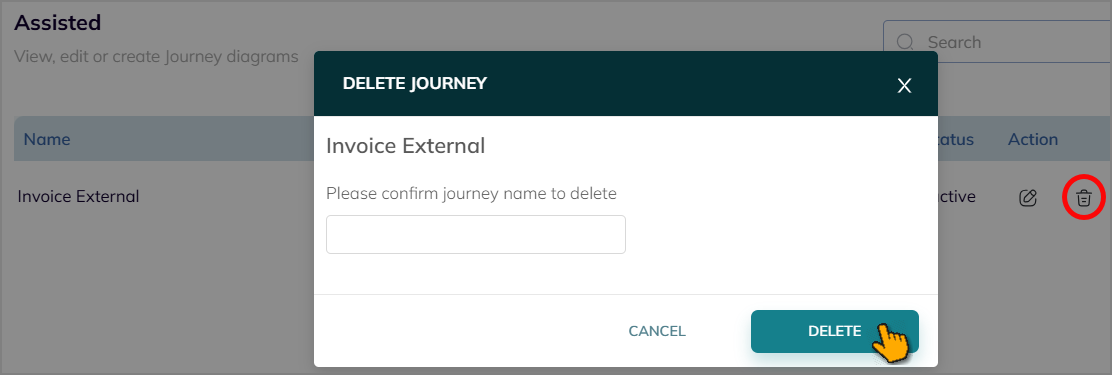
Re-enter the name of the journey you want to delete.
Click Delete.
A success message confirms the journey was deleted.
Creating a Workflow Diagram
A workflow is a set of interdependent tasks or processes that work in tandem to achieve a common business goal. This series of tasks assigned within a workflow has preset, user-defined rules and conditions. The processes are linear and can be completed sequentially or in parallel.
After creating an app and its journeys, you can start designing the workflow for each journey.
Tip
You can design your workflow using a diagram based on the Business Process Model and Notation (BPMN) standard. Refer to BPMN Framework for more information.
To create a new workflow:
Click on the desired app and its journey.
The journey page opens with a plain canvas.
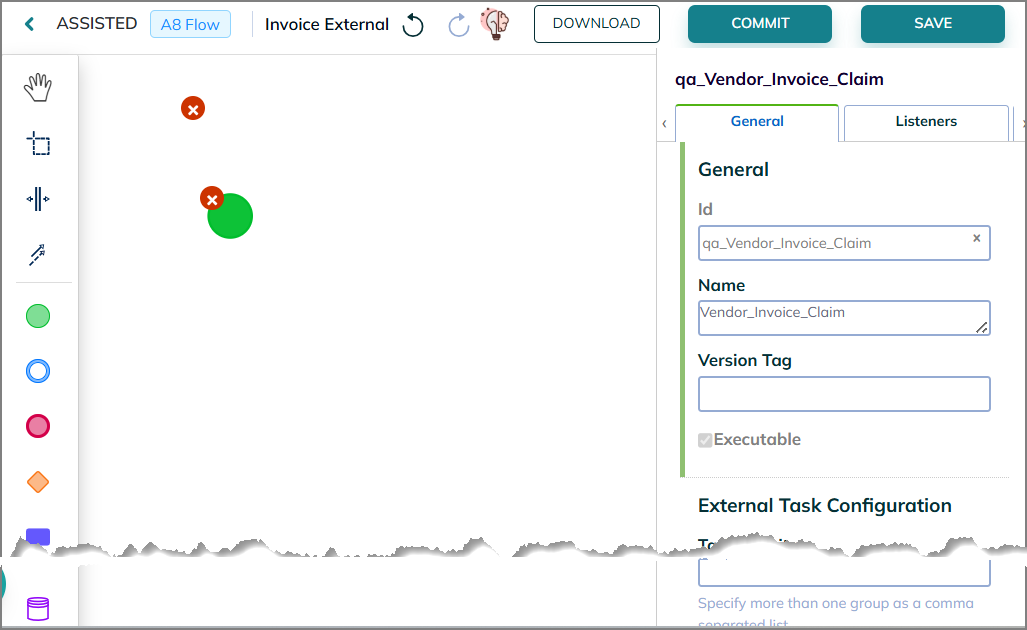
Start building your workflow process and configure it as needed.
Manual Workflow - Create workflows manually using the tools available on the page. Drag and drop tasks, connect them with arrows as needed. Refer to Creating Workflow Tasks for more information.
Automatic Workflow - The platform includes an AI assistant that can automatically generate workflows from your natural-language descriptions.
Click the AI Assistant
 icon to open the AI assistant at the bottom of the page.
Enter your workflow requirements in the text box as a prompt.
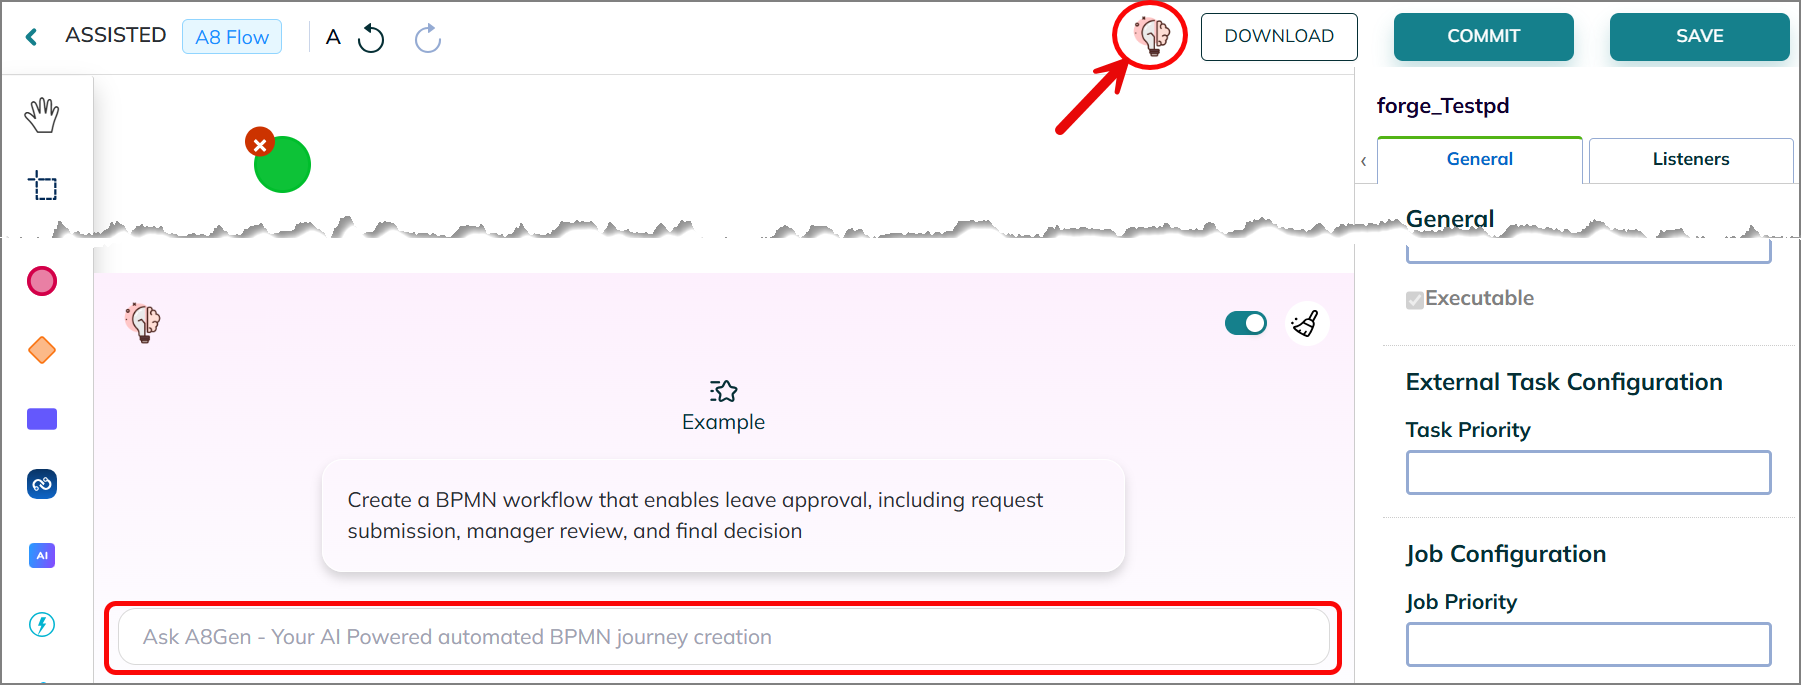
Press Enter.
The AI assistant analyzes your prompt and automatically constructs a complete workflow diagram, including relevant task types, sequence flows, and integration of existing AI agents from the Agent SDK, as well as MCP tools from the Agent Action Library for consistency.
If the generated workflow does not match your requirements, you can edit it manually or re-enter a more detailed prompt.
Tip
You can also use the AI assistant to modify existing workflows.
After completing the workflow creation, configure each element as needed. Refer to Creating Workflow Tasks for more information.
Click SAVE to save your changes.
Saving stores your current changes to the canvas, preserving your work and keeping it available for further editing.
A success message confirms your changes were saved.
When multiple users are collaborating on the same journey, you must click COMMIT to save your changes and commit the canvas for reuse.
The Commit confirmation box opens.
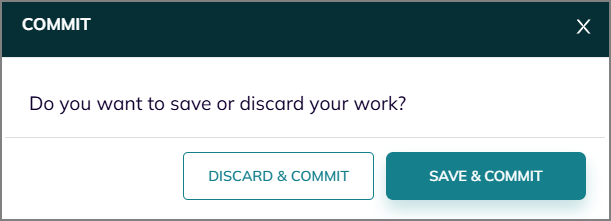
Note
This action creates a new version on the canvas, ensuring proper version control.
Click SAVE & COMMIT to save the changes and commit the canvas for reuse.
A success message is displayed, and the canvas becomes read-only.
Click DISCARD & COMMIT to discard the changes and still commit the canvas for reuse.
A success message is displayed, and the canvas becomes read-only.
Creating Workflow Tasks
The Workflow Journey Canvas is your visual design environment for creating workflow processes. Built on BPMN standards, it enables you to design workflows through an intuitive drag-and-drop interface.
By using BPMN, you can clearly define the steps, decisions, and agents involved in a process, making it easier to build, debug, and optimize. It ensures that both humans and AI systems have a shared understanding of how a task should be accomplished.
The journey page is organized into three distinct sections, each serving a specific purpose in the workflow design process:
Left Panel - Contains all the building blocks you need to construct your workflow diagram, including various task types, decision points, and connecting elements.
Center Canvas - Your main workspace where you assemble and arrange workflow elements to visualize your process flow.
Right Panel - A configuration panel that provides access to settings and properties. Use this panel to customize the behavior and parameters of selected workflow elements.
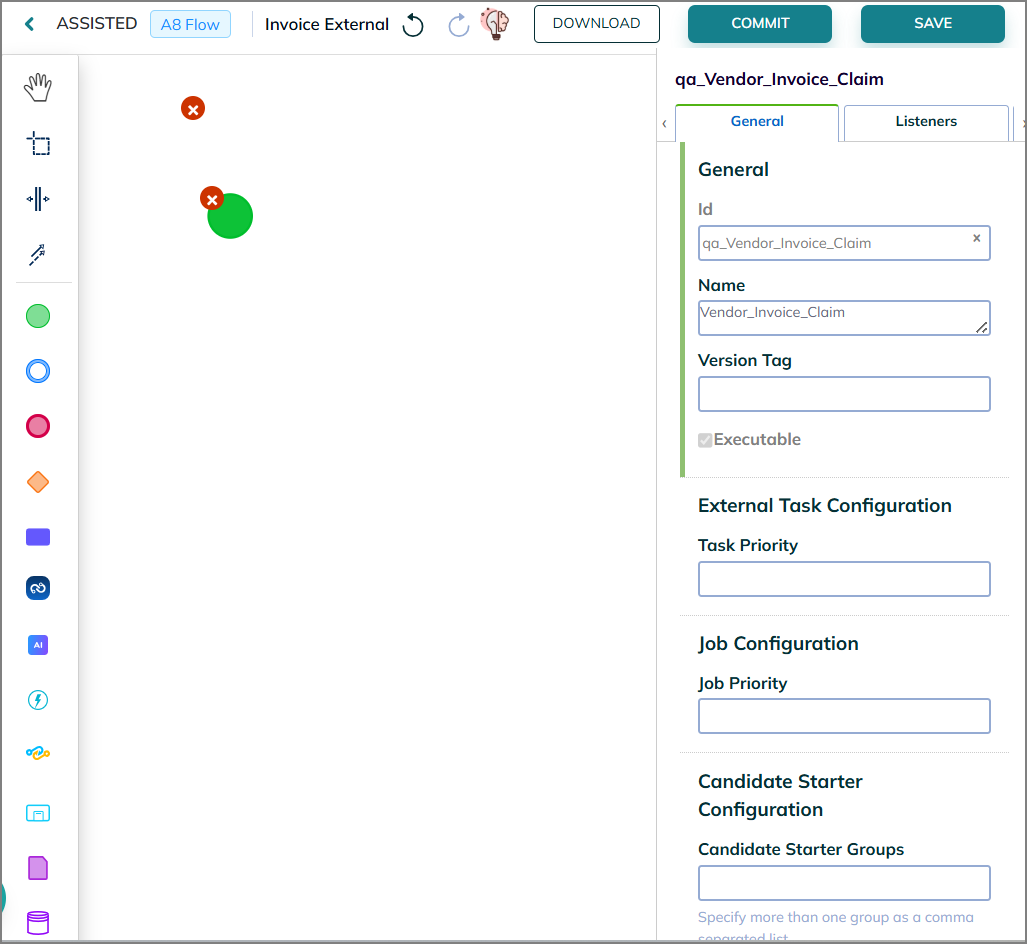 |
While creating workflow tasks, make sure to follow these basic BPMN standard rules:
Every workflow must have a Start Event and End Event.
All tasks must be connected with sequence flows.
Each task requires at least one incoming and one outgoing connection.
Gateways (decision points that control process flow) must have one incoming flow and multiple outgoing flows (or vice versa).
No orphaned or disconnected elements are allowed.
Flows must follow a logical direction from start to end.
Tip
The platform supports two methods for creating workflow diagrams:
Pop-up menu method
Drag-and-drop method
To create a simple diagram:
The Start Event is available on the canvas by default.
Click Start Event.
The pop-up menu opens.
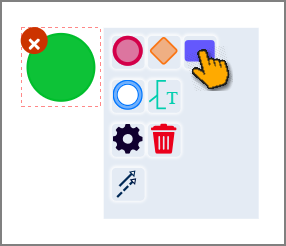
Click the Task
 icon.
icon.The blank rectangular task shape is added to the canvas.
Click the task and click the Change Type
 icon from the pop-up menu.
The list of all available task types is displayed. Each task type represents a different set of actions and behaviors that the task can perform within your workflow. Refer to Tasks Configuration for detailed information.
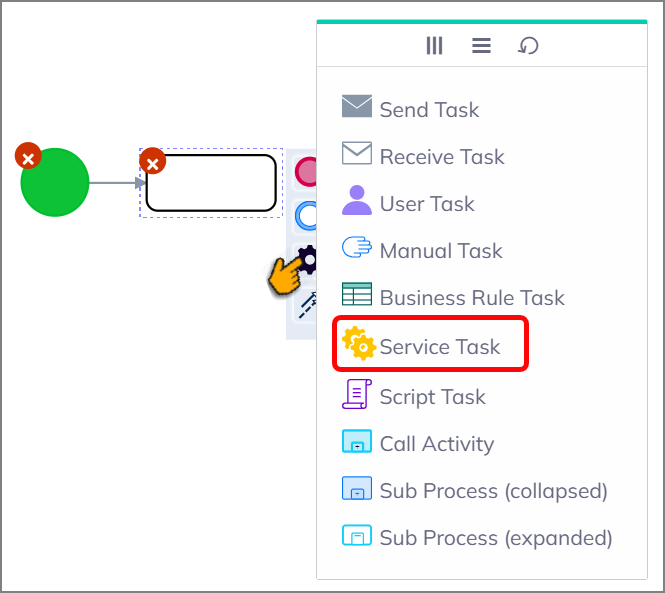
Click Service Task from the list.
The task on the canvas is highlighted and displays a small icon, indicating the task type you've chosen.
Click the task, then in the right-side configuration panel, under the General tab, fill in the ID and Name for the task. Refer to Tasks Configuration for detailed information.
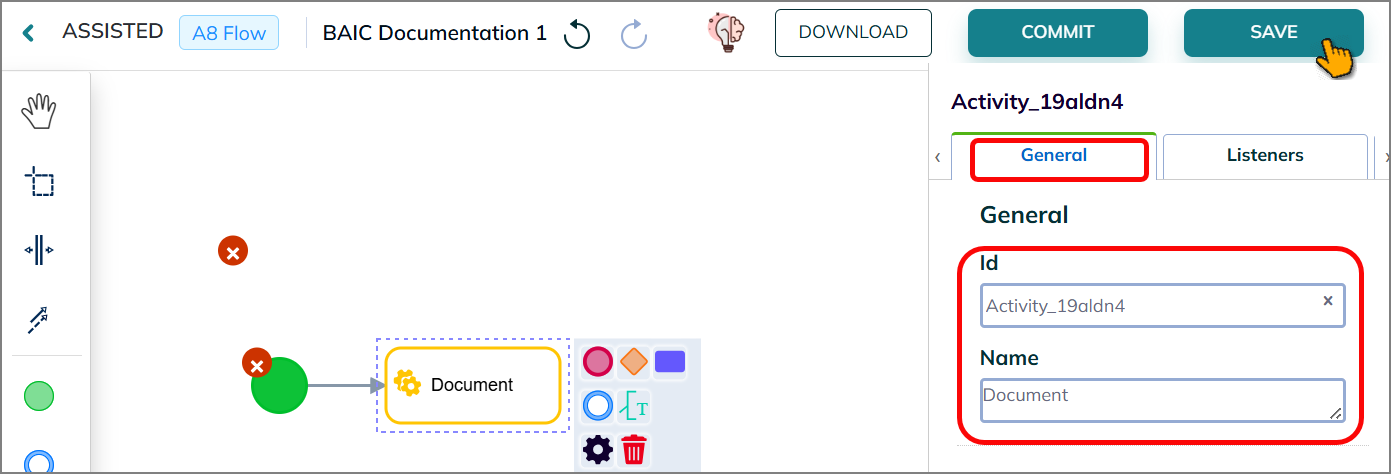
Additionally, you can double-click on the task.
The Service Tasks window opens.
Choose any existing service and click Select to execute. Refer to Tasks Configuration for more information.
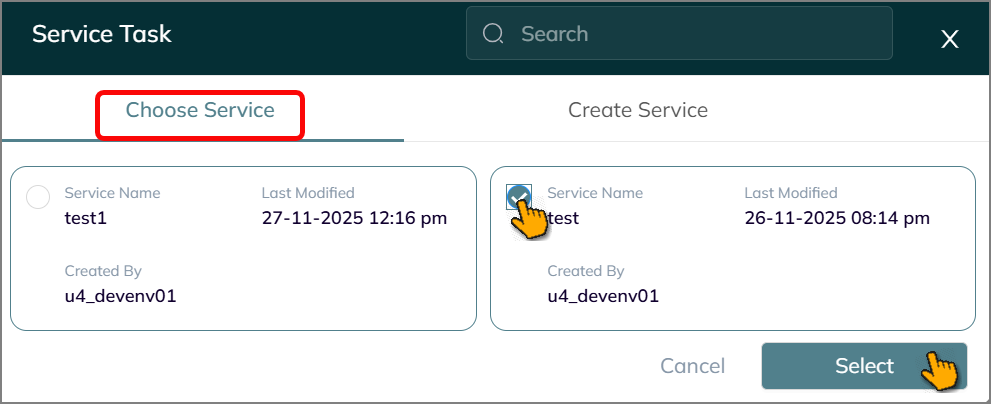
Click SAVE on the workflow canvas to save the changes.
Drag the aiAgent Task shape from the left-side panel directly onto the canvas.
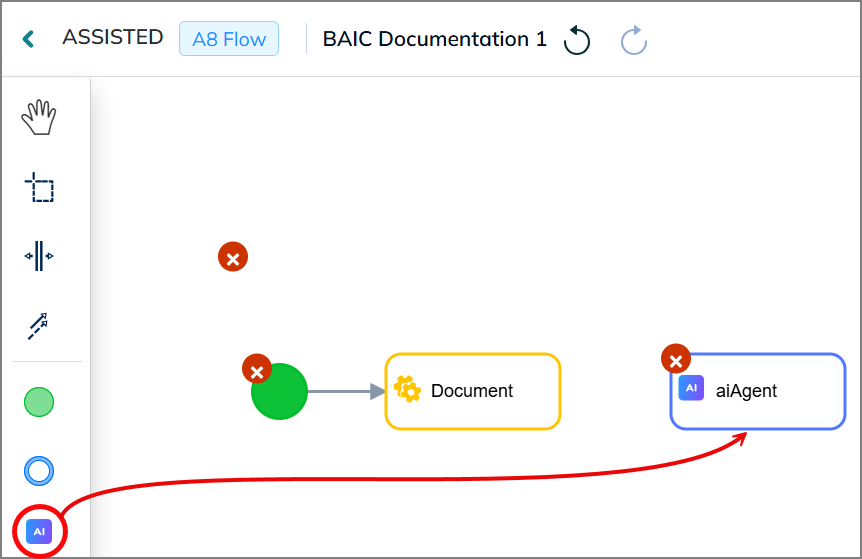
Double-click on the aiAgent task.
The AI Agents window opens and displays a list of public AI Agents that you created in the platform.
Search for the required AI agent and select it from the filtered list.
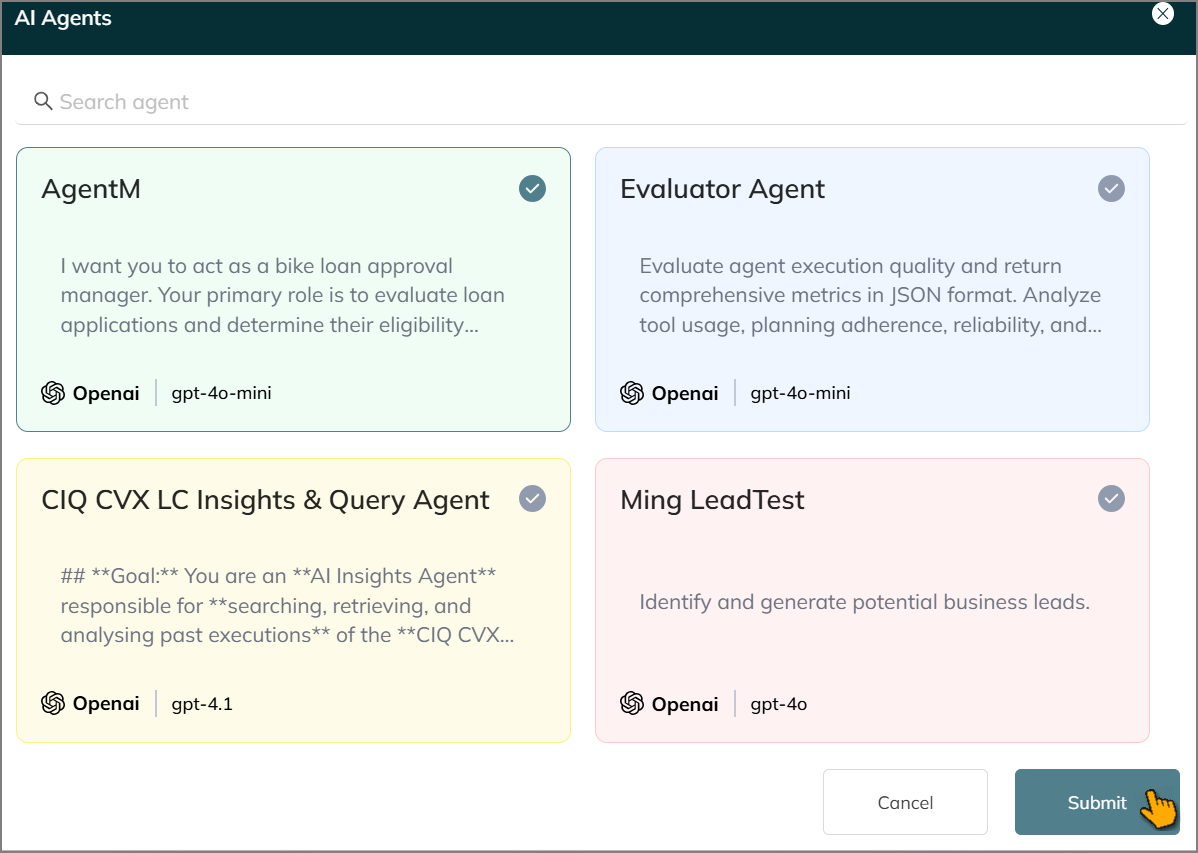
Click Submit to tag the AI Agent in the task.
Click Service Task.
The pop-up menu opens.
Click the Connector
 icon and connect it to the AI Agent Task.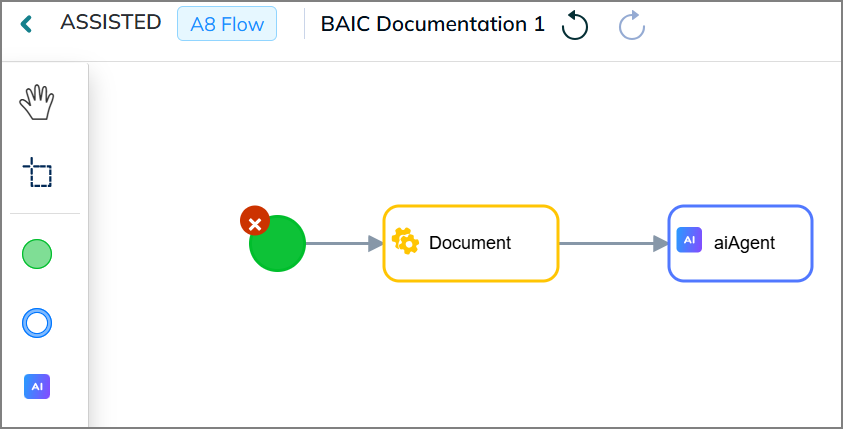
You can add an Action Task and tag an MCP tool that you created on the platform.
Similarly, you can add Multiple Tasks as needed and Configure them.
After creating all tasks, click your final task and select End Event from the pop-up menu to complete your workflow.
The End Event shape is added to the canvas.
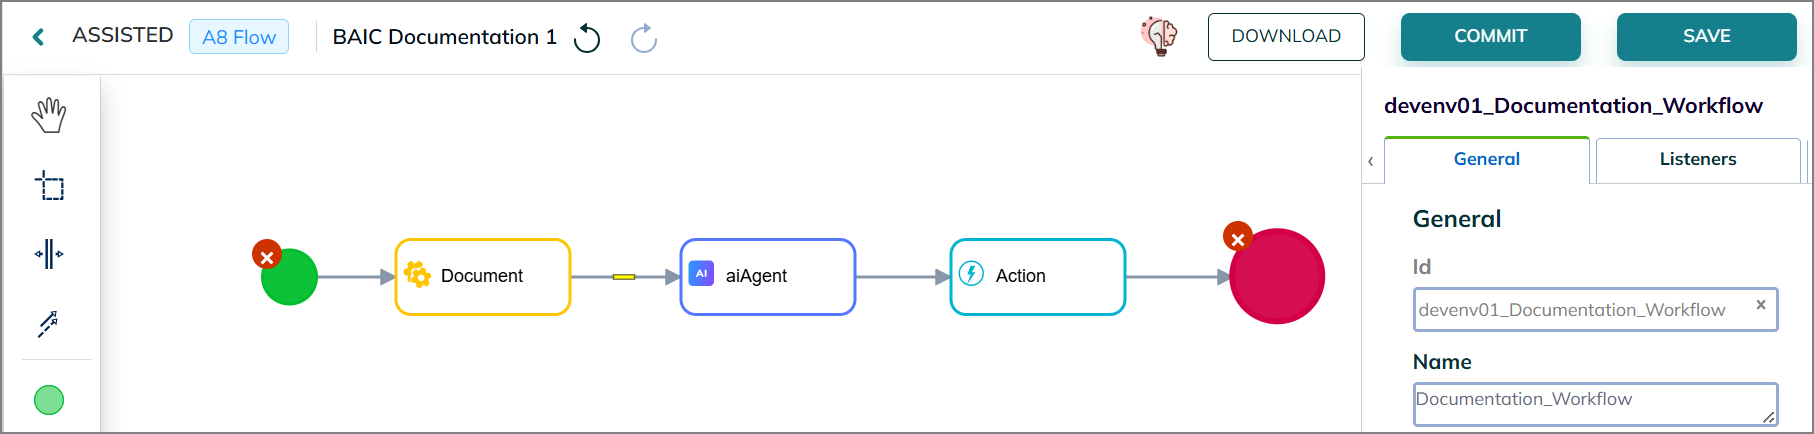
Click SAVE to save the canvas.
Task Types
The platform offers a variety of BPMN task types, enabling quick workflow creation and straightforward configuration. Each task type is designed to handle specific actions within your workflow, making it easy to build complex processes.
Action Tasks
Action Tasks represent workflow activities that invoke MCP tools that you created in the Agent Action Library. Action tasks bring the power of MCP integrations directly into your workflows, enabling your processes to interact with external systems, access real-time data, and perform operations across connected services.
When a workflow reaches an action task, the system automatically invokes the MCP tool and sends any required input parameters. The MCP tool connects to the external systems or database, performs the requested operation, and returns the results. Once the MCP tool returns its response, the workflow engine captures the data and continues execution to the next step in the process.
Common uses for action tasks include:
Search for customer information in your CRM system
Query databases and fetch relevant records
Retrieve and process files from cloud storage
Create or update tasks in project management tools
Fetch real-time data from external APIs
AI Agent Tasks
AI Agent Tasks represent workflow activities that invoke AI agents that you created in the Agent SDK. AI Agent tasks bring AI capabilities directly into your workflows, enabling your processes to leverage custom-built agents for intelligent automation, data processing, and decision-making.
When a workflow reaches an AI agent task, the system automatically invokes the AI agent and sends the input query or data. The AI agent processes the information using its trained capabilities, analyzing content, extracting insights, generating outputs, and making intelligent decisions. Once the AI agent returns its response, the workflow engine captures the results and continues execution to the next step in the process.
Common uses for AI agent tasks include:
Analyze customer feedback and sentiment
Extract structured data from unstructured documents
Generate reports or summaries automatically
Classify and route information intelligently
Provide context-aware recommendations
Business Rule Tasks
Business Rule Tasks enable you to evaluate business rules within your workflows. These rules are defined using Decision Model and Notation (DMN), a standard language for modeling and executing business decisions in a structured, consistent manner.
When a workflow reaches a business rule task, the system evaluates the defined business rules and stores the result in a process variable. The workflow then continues execution based on the evaluation outcome and moves to the next step in the process.
Common uses for business rule tasks include:
Approving loan applications
Determining discounts for customer orders
Routing customer service requests to specific teams
Calculating risk levels for new business ventures
Manual Tasks
A Manual Task is a special kind of task, used to model a task that is performed by a human actor outside of the BPM engine. Manual tasks are typically used to model tasks that are difficult or impossible to automate, such as:
Approving a document
Making a decision
Completing a physical task
For example, if a process contains a step for "Verify physical documents", that step can be modeled as a manual task because the actual work happens outside the system.
When a process instance reaches a manual task, the engine treats it as a pass-through activity; the process automatically continues to the next step when execution reaches it.
The platform supports manual tasks for modeling and process readability, but they do not behave like other types of tasks, where execution waits for interaction or a system response.
Receive Tasks
Receive Tasks represent workflow activities that pause workflow execution until a specific message or event is received from an external system. Receive tasks create controlled wait states in which your automated processes must pause until incoming communication arrives.
When a workflow reaches a receive task, the process instance stops at that point and enters a waiting state until the expected message arrives from an external source. Once the message is received and matched to the waiting process instance, the workflow captures the message data and continues execution to the next step in the process.
Common uses for receive tasks include:
Waiting for customer approval responses before proceeding with order fulfillment
Pausing until payment confirmation is received from a payment gateway
Holding for data synchronization signals from external systems
Waiting for partner system acknowledgments
Stopping until document upload confirmations are received from users
Script Tasks
Script Tasks represent workflow activities that execute custom scripts or code within your workflows, providing flexibility for specialized logic and data manipulation. Script tasks enable you to embed programming logic directly into your processes for business operations.
When a workflow reaches a script task, the system executes the configured script code in the specified programming language. The script can access and modify workflow variables, perform calculations, transform data formats, or implement custom business logic. Once the script completes execution, the workflow proceeds to the next step in the process.
Common uses for script tasks include:
Transforming data formats between different task requirements
Calculating values based on multiple workflow variables
Implementing specialized validation or business rules
Constructing dynamic data structures (JSON, XML) for external API calls
Manipulating collections or arrays of data within the process context
Important
Script tasks offer flexibility for custom logic, but they require careful testing and maintenance to ensure reliability and security.
Send Tasks
Send Tasks represent workflow activities that transmit messages or notifications to external systems as part of a business process. Send tasks enable outbound communication from workflows to external recipients, systems, or message brokers.
When a workflow reaches a send task, the system creates a work item for message transmission and executes the send operation through authorized workers. Once the message is successfully transmitted to the external system, the workflow continues execution to the next step in the process.
Common uses for send tasks include:
Sending email confirmations to customers
Publishing events to streaming platforms like Kafka to trigger downstream processes
Delivering status change notifications to external applications
Transmitting alerts to monitoring or logging systems
Service Tasks
Service Tasks represent workflow activities that invoke external services or systems as part of a business process. Service tasks are used for automated operations that interact with web services, APIs, external applications, or background workers.
When a workflow reaches a service task, the system automatically invokes the configured external service and sends any required data. Once the external service completes its operation and returns a response, the workflow engine captures the result and continues execution to the next step in the process.
Common uses for service tasks include:
Sending email notifications
Calling external APIs
Starting new sub-processes
Interacting with databases
User Tasks
User Tasks represent workflow activities that require human interaction within the workflow system. User tasks are used for activities that need human decision-making, data entry, approval, or review as part of an automated business process.
When a workflow reaches a user task, the platform creates a work item and assigns it to a specific user or group. The process instance pauses at that point, waiting for the assigned user to complete the task through the workflow interface. Once the user submits their response, the workflow engine resumes execution and continues to the next step in the process.
Common uses for user tasks include:
Approving purchase orders
Reviewing documents
Completing customer service requests
Performing quality inspections
Making business decisions
Webhook Tasks
Webhook Tasks represent workflow activities that interact with external systems requiring asynchronous callbacks before the workflow can continue. Webhook tasks enable two-way communication between your workflows and external platforms, making them ideal for processes that depend on external events or actions to proceed.
When a workflow reaches a webhook task, the system initiates the outbound request to the external system and triggers the external event. The process instance then pauses and enters a waiting state until the external system sends a callback response. Once the callback is received and processed, the workflow engine captures the result and continues execution to the next step in the process.
Common uses for webhook tasks include:
Sending documents to e-signature platforms and waiting for signed confirmations
Initiating payment requests and waiting for transaction completion callbacks
Triggering external verification processes and receiving approval results
Starting third-party background checks and capturing the returned findings
Requesting data processing from external systems and waiting for completion signals
Tasks Configuration
Once you've added tasks to your workflow canvas, the next step is to configure them to meet your specific requirements. Each task type offers a set of configuration options that control how the task behaves, what data it processes, and how it interacts with other workflow elements.
This section describes how to configure each task type, including essential properties, optional settings, and configuration options.
Action Tasks Configuration
An Action Task represents work performed by an MCP tool within a business process. Action tasks are typically used to model activities that interact with external systems, such as retrieving data, updating records, or executing operations, and connect with MCP tools configured in the Agent Action Library environment rather than requiring human interaction.
Action task attributes:
Tabs | Attribute | Description |
|---|---|---|
General | Name | The "Name" attribute defines the name or label of the action task. |
Parameters | Input Parameters > Name | The "Name" attribute specifies the input parameter's name as defined in the MCP tool. This corresponds to the parameter names defined in your MCP tool configuration. |
Input Parameters > Value | The "Value" attribute specifies the value for the MCP tool's input parameter. This can be a static value or a workflow variable. | |
Output Variable | The "Output Variable" attribute specifies the variable name that stores the Action Task's output value. Use this variable to reference the agent's output in subsequent workflow tasks. |
AI Agent Tasks Configuration
An AI Agent Task represents the work performed by an AI agent within a business process. AI agent tasks are typically used to model activities that require intelligent processing, such as analysis, content generation, or decision-making, and interact with MCP tools tagged with the AI agent rather than requiring human interaction.
AI agent task attributes:
Tabs | Attribute | Description |
|---|---|---|
General | Name | The "Name" attribute defines the name or label of the AI agent task. |
Input Query | The "Input Query" attribute defines the variable or string that serves as input for the AI Agent. This query provides the context or question that the AI agent will process. | |
Parameters | Output Parameters > Name | The "Name" attribute defines the variable name or label of the AI agent output value. |
Output Parameters > Value | The "Value" attribute defines the temporary variable name that stores the AI agent output value. Use this variable to reference the agent's output in subsequent workflow tasks. |
Business Rule Tasks Configuration
A Business Rule Task is a specific BPMN activity that evaluates and applies business rules or decision logic as part of the process flow.
Key Characteristics of a Business Rule Task
Rule Evaluation: Business rule tasks represent activities that involve the evaluation of business rules, decision tables, or decision logic to determine the path the process should follow.
Decision Making: Business rule tasks are used to make decisions or calculations based on the provided data and rules, which can affect the subsequent flow of the process.
Automated or Semi-Automated: Business rule tasks can be automated, where the decision logic is executed by a rule engine or a system, or can involve human interaction for rule evaluation and decision approval.
Conditional Flows: Business rule tasks often have multiple outgoing sequence flows with associated conditions that define different paths the process can take based on the outcomes of the rule evaluation.
Attributes
Business rule task attributes:
Attribute | Description |
|---|---|
ID: | The ID attribute represents the unique identifier of the business rule task. It corresponds to the task definition key in the BPMN model. |
Name: | The "Name" attribute defines the name or label of the business rule task. |
Implementation
The "Implementation" attribute specifies the method, class, or service that the business rule task will invoke or execute. It defines the technical implementation behind the task's functionality. Implementation options include:
Implementation | Description |
|---|---|
DMN: | Decision Model and Notation (DMN) is a visual representation of decision logic within a business process. When selecting this option, you need to specify the DMN decision reference. Decision Ref is a reference to a specific decision within the DMN model that the business rule task will execute. Binding: Binding determines how the decision is linked to the business rule task. Our tool offers the following options:
Tenant ID: Tenant ID isolates decision execution within a specific tenant's scope, which is useful for multi-tenancy scenarios. Result Variable: Result Variable is where the output of the executed decision is stored, enabling further processing within the same process. |
Asynchronous Continuations
Use asynchronous continuations to control whether a task runs asynchronously:
Attribute | Description |
|---|---|
Asynchronous Before: | The "Asynchronous Before" attribute indicates if the task can be started asynchronously before other tasks or events in the process. |
Asynchronous After: | Similarly, the "Asynchronous After" attribute denotes whether the business rule task can be completed asynchronously after other tasks or events in the process. |
Manual Tasks Configuration
Within BPMN (Business Process Model and Notation), a Manual Task represents work that requires human intervention, such as decision-making or manual interaction.
Key Characteristics of a Manual Task
Human Interaction: Manual tasks represent activities that involve human intervention, requiring a person to perform specific actions, such as approval, validation, or other manual tasks.
Time-Driven or Event-Driven: Manual tasks can be triggered by specific events or deadlines (event-driven) or simply be part of the process flow (time-driven).
Attributes
Manual task attributes:
Attribute | Description |
|---|---|
ID: | The "ID" attribute represents the unique identifier of the manual task. It corresponds to the task definition key in the BPMN model. |
Name: | The "Name" attribute defines the name or label of the manual task. |
Asynchronous Continuations
Use asynchronous continuations to control whether a task runs asynchronously:
Attribute | Description |
|---|---|
Asynchronous Before: | The "Asynchronous Before" attribute indicates if the task can be started asynchronously before other tasks or events in the process. |
Asynchronous After: | Similarly, the "Asynchronous After" attribute denotes whether the manual task can be completed asynchronously after other tasks or events in the process. |
Receive Tasks Configuration
In BPMN, a Receive Task is a type of task used to model a specific type of activity in a business process that represents the receipt or reception of a message, notification, or request from an external participant or system. Receive tasks are typically used to depict a point in the process where the process is waiting for an external event, message, or response.
Key Characteristics of a Receive Task
Message Reception: Receive tasks represent activities where the process is waiting to receive a message, notification, or request from an external participant or system.
Asynchronous: Receive tasks are typically asynchronous, meaning that the process waits for an external event or message to arrive and continues its flow after receiving it.
Message Content: Receive tasks may involve specifying the expected content or format of the incoming message and how the process should handle it.
Response Handling: Receive tasks are often followed by subsequent activities that process the received message or response.
Integration: Receive Tasks are used to model the integration of the business process with external participants, systems, or services through message-based communication.
Attributes
Receive task attributes:
Attribute | Description |
|---|---|
ID: | The "ID" attribute represents the unique identifier of the receive task. It corresponds to the task definition key in the BPMN model. |
Name: | The "Name" attribute defines the name or label of the receive task. |
Details
The "Details" section for the receive task includes the following Message attributes:
Attribute | Description |
|---|---|
Message: [Message_0vat9jk (id=Message_1ubmceq)] | The "Message" attribute indicates the specific message that is associated with this receive task. In this example, it references a message with the identifier "Message_0vat9jk" and the unique ID "Message_1ubmceq." The message defines the content and structure of the data that the Receive task will receive. |
Message Name: [Message_0vat9jk] | The "Message Name" attribute specifies the name or identifier of the message that is expected by the receive task. In this example, it is identified as "Message_0vat9jk." The message name is used to correlate the received message with the corresponding message definition in the BPMN process. |
Asynchronous Continuations
Use asynchronous continuations to control whether a task runs asynchronously:
Attribute | Description |
|---|---|
Asynchronous Before: | The "Asynchronous Before" attribute indicates if the task can be started asynchronously before other tasks or events in the process. |
Asynchronous After: | Similarly, the "Asynchronous After" attribute denotes whether the receive task can be completed asynchronously after other tasks or events in the process. |
Script Tasks Configuration
In BPMN, a Script Task is a type of task used to model a specific activity in a business process where a predefined script or code is executed. This script can be written in a scripting or programming language and performs a specific action or set of actions within the process. Script tasks are often used for tasks that involve custom logic, calculations, or operations that cannot be represented using other BPMN elements.
Key Characteristics of a Script Task
Script Execution: Script tasks represent activities where a script, often written in a scripting language like JavaScript or a programming language like Java or Python, is executed as part of the process.
Custom Logic: Script tasks are used for tasks that require custom or specialized logic, calculations, or operations that cannot be easily expressed using standard BPMN elements.
Automation: Script tasks can be automated, meaning they do not require human intervention, and the execution of the script is performed by a software system.
Input and Output Data: Script tasks may involve input data that is used by the script and produce output data based on the script's execution. BPMN provides elements for modeling data associations between tasks.
Integration: Script tasks are sometimes used to integrate the process with external systems or services by executing scripts that interact with these external entities.
Attributes
Script task attributes:
Attribute | Description |
|---|---|
ID: | The "ID" attribute represents the unique identifier of the script task. It corresponds to the task definition key in the BPMN model. |
Name: | The "Name" attribute defines the name or label of the script task. |
Details
The "Details" section for the script task includes the following Message attributes:
Attribute | Description |
|---|---|
Script Format: | Specifies the language or format of the script, influencing how the content is interpreted. |
Script Type: | Determines how the script is handled within a script task in BPMN, choosing between inline or external storage. - Inline Script: Directly provided within the BPMN process, defining actions or behavior. Script: Requires providing the script content. - External Resource: Script stored externally for reusability. Resource: Requires specifying the location or reference, such as a file path or URL. |
Result Variable: | Designates the variable name to store the script's execution result. Accessible in subsequent process steps to capture the outcome. |
Asynchronous Continuations
Use asynchronous continuations to control whether a task runs asynchronously:
Attribute | Description |
|---|---|
Asynchronous Before: | The "Asynchronous Before" attribute indicates if the task can be started asynchronously before other tasks or events in the process. |
Asynchronous After: | Similarly, the "Asynchronous After" attribute denotes whether the script task can be completed asynchronously after other tasks or events in the process. |
Send Tasks Configuration
A Send Task models a specific type of activity that represents the process of sending a message, notification, or request to an external participant or system. Send tasks are used to depict a point in the process where information is transmitted to another entity, such as a human user, another process, a service, or an external system.
Key Characteristics of a Send Task
Message Sending: Send tasks represent activities where a message, request, or notification is sent to an external participant or system as part of the process.
Asynchronous: Send tasks are typically asynchronous, meaning that the process does not wait for an immediate response but continues its flow.
Message Content: Send tasks may involve specifying the content of the message to be sent, which can include data and details relevant to the interaction.
No Direct Response: Unlike "receive tasks," which represent waiting for a response or incoming message, send tasks do not expect a direct response from the external entity.
Integration: Send tasks are often used to model the integration of a business process with external participants, systems, or services through message-based communication.
Attributes
Send task attributes:
Attribute | Description |
|---|---|
ID: | The "ID" attribute represents the unique identifier of the send task. It corresponds to the task definition key in the BPMN model. |
Name: | The "Name" attribute defines the name or label of the send task. |
Implementation
The "Implementation" attribute specifies the method, class, or service that the Send task will invoke or execute. It defines the technical implementation behind the task's functionality. Implementation options include:
Implementation | Description |
|---|---|
Expression: | An expression or script can be used to define the task's behavior. This allows for flexible and custom task execution based on the defined expression. Result Variable: You can specify the name of the variable where the task result will be stored. |
Asynchronous Continuations
Use asynchronous continuations to control whether a task runs asynchronously:
Attribute | Description |
|---|---|
Asynchronous Before: | The "Asynchronous Before" attribute indicates if the task can be started asynchronously before other tasks or events in the process. |
Asynchronous After: | Similarly, the "Asynchronous After" attribute denotes whether the send task can be completed asynchronously after other tasks or events in the process. |
Service Tasks Configuration
A Service Task represents work performed by a service or external system as part of a business process. Service tasks are typically used to model automated activities that interact with external services, applications, or systems rather than requiring human interaction.
Overview
A service task is a specialized workflow activity that executes custom logic written in JavaScript or TypeScript. Service tasks run automatically on the server side without any user intervention.
In a BPMN workflow, various actors may participate in the process, including APIs or systems that require decision-making capabilities. Service tasks handle these automated interactions.
Purpose
The primary purpose of a service task is to automate backend operations within an agentic workflow. It acts as the execution engine of your workflow, handling data manipulation, system integrations, and computational logic.
Key capabilities include:
System Integration: Calling external APIs (REST) to fetch or push data.
Data Transformation: Processing process variables, formatting dates, or calculating values.
Configure and Code
Double-click on the service task to select it.
In the pop-up panel, click Create/Choose Service. This opens the Service Editor.
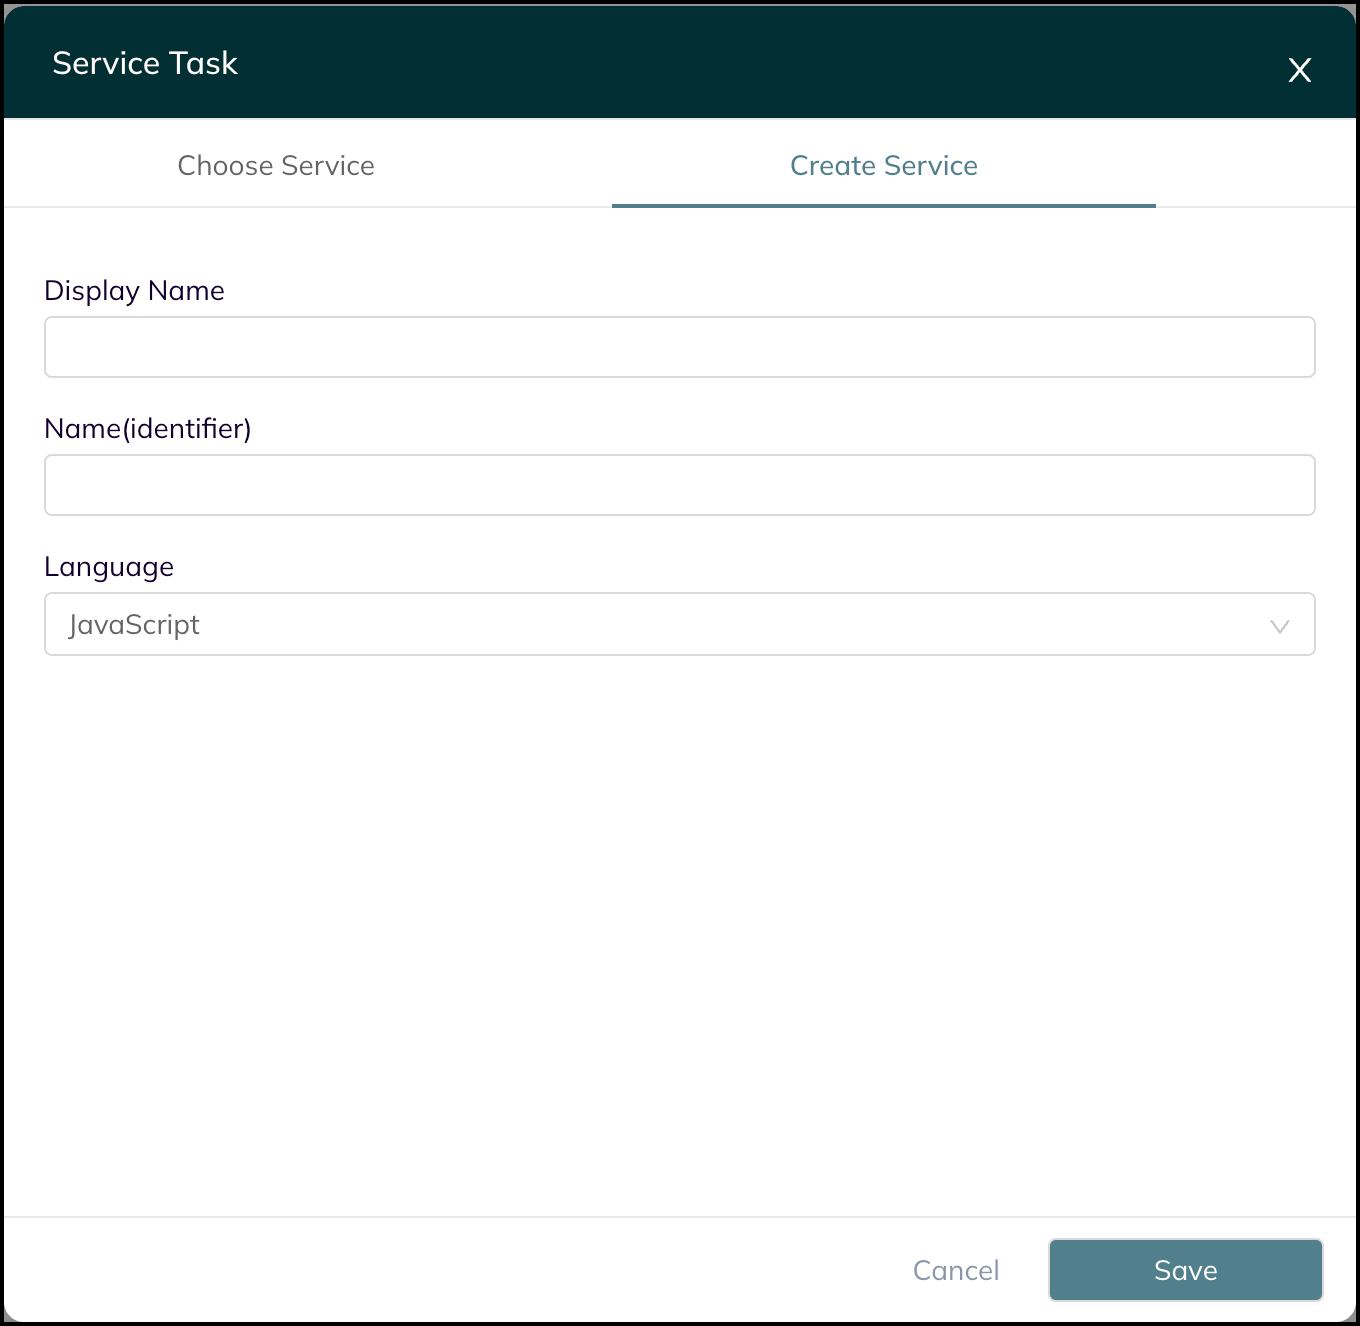
Name your Service: Give it a unique identifier (e.g.,
calc_refund_svc).Select Language: Choose TypeScript or JavaScript.
Click Save. A code editor opens:
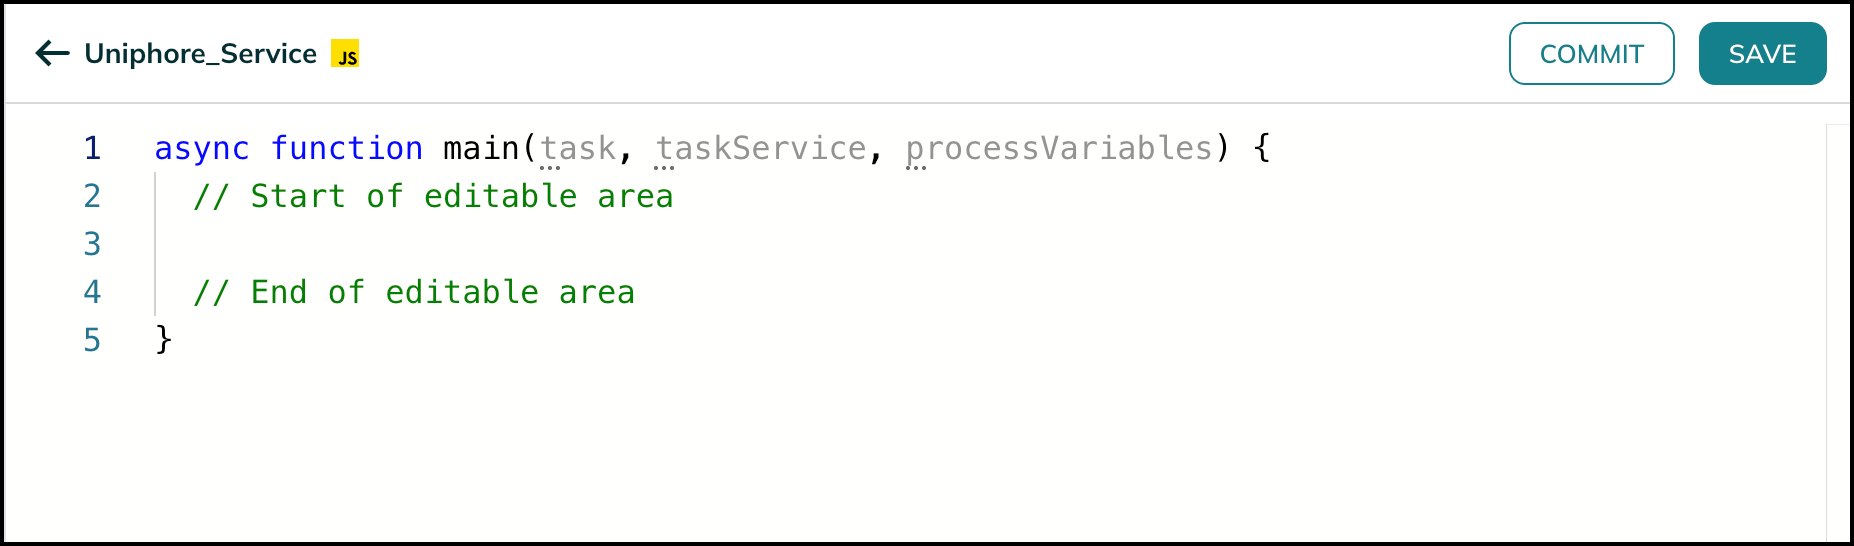
Write Logic: Enter your custom code in the main function. This function receives three key arguments:
task: The current task instance; use this to get variables viatask.variables.get("name").taskService: Methods to complete or fail the task.processVariables: Methods to set or update the workflow's data payload.
Click SAVE.
User Tasks Configuration
A User Task in a BPMN journey is an activity that requires human intervention in a business process. When a process instance reaches a user task, a job is created, and the process instance pauses until the job is completed. Users can be automatically assigned to these tasks, or a job worker can manually subscribe to them.
Attributes
User task attributes:
Attribute | Description |
|---|---|
ID: | The "ID" attribute is the user task's unique identifier. It corresponds to the task definition key in the BPMN model. |
Name: | The "Name" attribute defines the name or label of the user task. |
Assignments
Assignments determine who can handle the task and can include the following attributes:
Attribute | Description |
|---|---|
Assignee: Default: | The "Assignee" specifies the user who is assigned to the task. When values need to be determined dynamically during task execution, they're represented as Expression Language (EL) expressions. By default, it is |
Candidate Users: | The "Candidate Users" attribute can be used to specify a list of users who are potential candidates for completing the task. This field may remain empty or be populated with user identifiers based on the process requirements. |
Candidate Groups: | The "Candidate Groups" attribute allows you to specify groups of users who are eligible candidates for the task. This field may contain one or more group identifiers based on the process design. |
Scheduling
User tasks support specifying a task schedule, which helps define when users should interact with the task and includes:
Attribute | Description |
|---|---|
Follow Up Date: | The "Follow Up Date" attribute specifies the date when a follow-up action should be taken for the task. It can be expressed as an EL expression (e.g., |
Priority: | The "Priority" attribute can be used to set the task's priority level. The specific values for priority levels may be defined in accordance with the business process requirements. |
Due Date: | The "Due Date" attribute specifies the deadline for completing the user task. Similar to the "Follow Up Date," it can be expressed as an EL expression (e.g., |
Asynchronous Continuations
Use asynchronous continuations to control whether a task runs asynchronously:
Attribute | Description |
|---|---|
Asynchronous Before: | The "Asynchronous Before" attribute indicates if the task can be started asynchronously before other tasks or events in the process. |
Asynchronous After: | Similarly, the "Asynchronous After" attribute denotes whether the user task can be completed asynchronously after other tasks or events in the process. |
Webhook Tasks Configuration
A Webhook Task represents workflow activities that interact with external systems requiring asynchronous callbacks before the workflow can continue. Webhook tasks are typically used to model activities that initiate an outbound request to an external platform and then pause execution until a callback response is received, rather than requiring human interaction.
Webhook task attributes:
Attribute | Description |
|---|---|
Name | The "Name" attribute defines the name or label of the webhook task. |
Request | The "Request" attribute specifies the server-side function responsible for initiating the outbound request to the external system. This function triggers the external event and begins the asynchronous operation. |
Handler | The "Handler" attribute specifies the server-side function responsible for processing the callback response received from the external system once the external event is completed. Once invoked, the handler captures the result and updates the workflow state so that execution can continue. |
Managing Workflows
All existing workflows are accessible from the Agentic Workflows page, where you can view, edit, deploy, and execute them as needed.
Editing a Workflow
To improve workflow efficiency, the platform lets you update journeys directly from the Agentic Workflows page. This quick-access editing capability lets you make configuration changes on the spot, streamlining your workflow development process.
To update a journey:
Go to the Home page > Agents > Agentic Workflow.
The Agentic Workflows page opens and displays all workflow journeys in card view.
Enter the workflow journey name in the Search box to filter it.
Click the Ellipsis
icon on the workflow journey card.Click Edit.
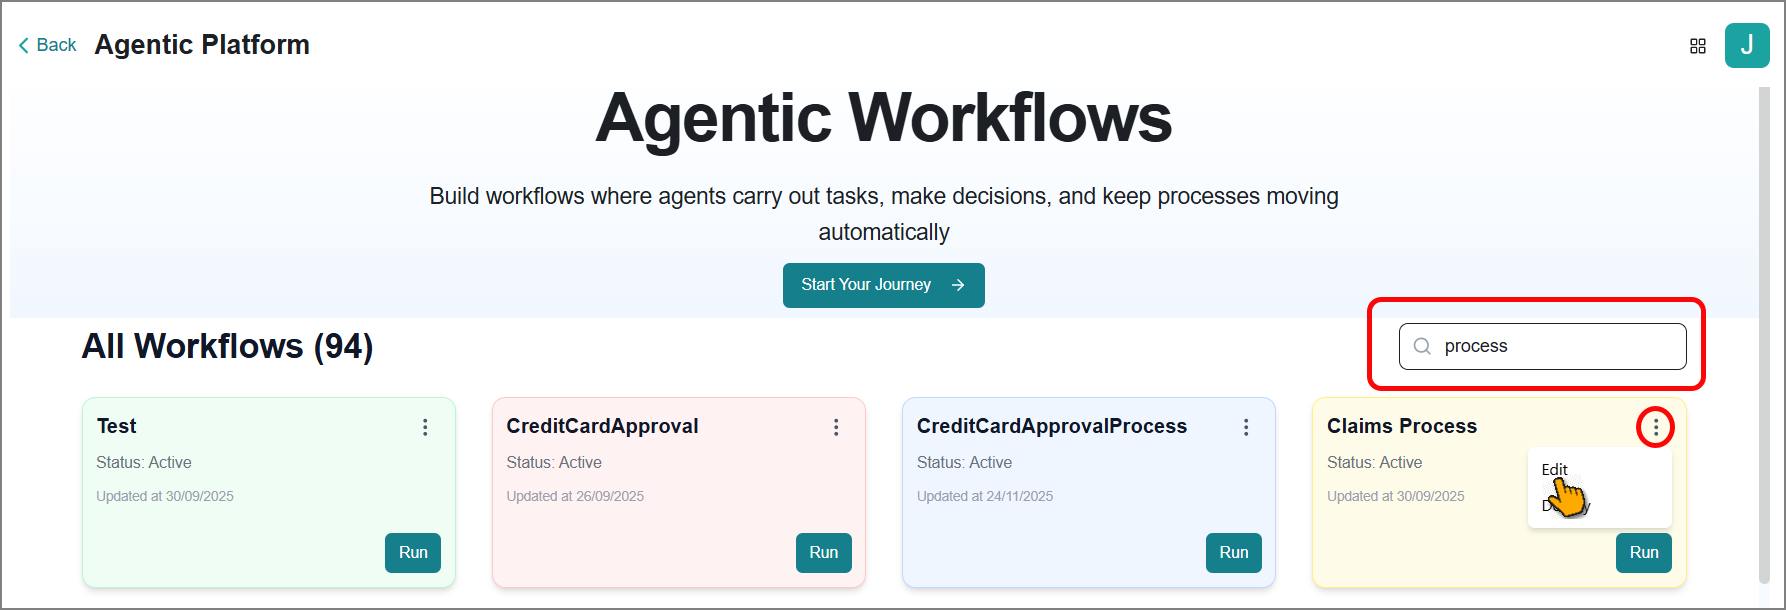
The Workflow Canvas page opens, allowing you to view and modify your workflow. Refer to Creating a Workflow Diagram for detailed instructions.
If the canvas is in read-only mode, you must manually activate edit mode to proceed with modifications.
Click CHECKOUT on the top-right corner of the canvas to enable editing.

The CHECKOUT confirmation box opens.
Click CHECKOUT.
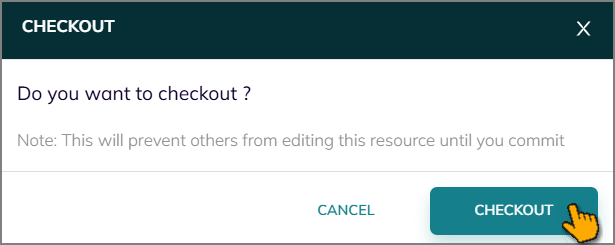
The platform switches the canvas from read-only mode to edit mode, allowing you to make changes. Refer to Creating a Workflow Diagram for detailed instructions.
Deploying a Workflow
Once you have created and finalized your workflow journey, the next step is deploying it to the runtime platform. The runtime platform is a separate environment that lets you test and execute your workflows, ensuring all processes run as designed.
There are two deployment modes:
Live - Use this for testing your workflow in a development environment. Any changes you make to workflow task properties are automatically applied to the runtime, allowing you to iterate and refine your workflow seamlessly.
Production - Use this to execute your workflow in a production environment for real-world operations.
Caution
Each app can have only one workflow journey deployed at a time.
To deploy a workflow:
Go to the Home page > Agents > Agentic Workflow.
The Agentic Workflows page opens and displays all workflow journeys in a card view.
Enter the workflow journey name in the Search box to filter it.
Click the Ellipsis
icon on the workflow journey card.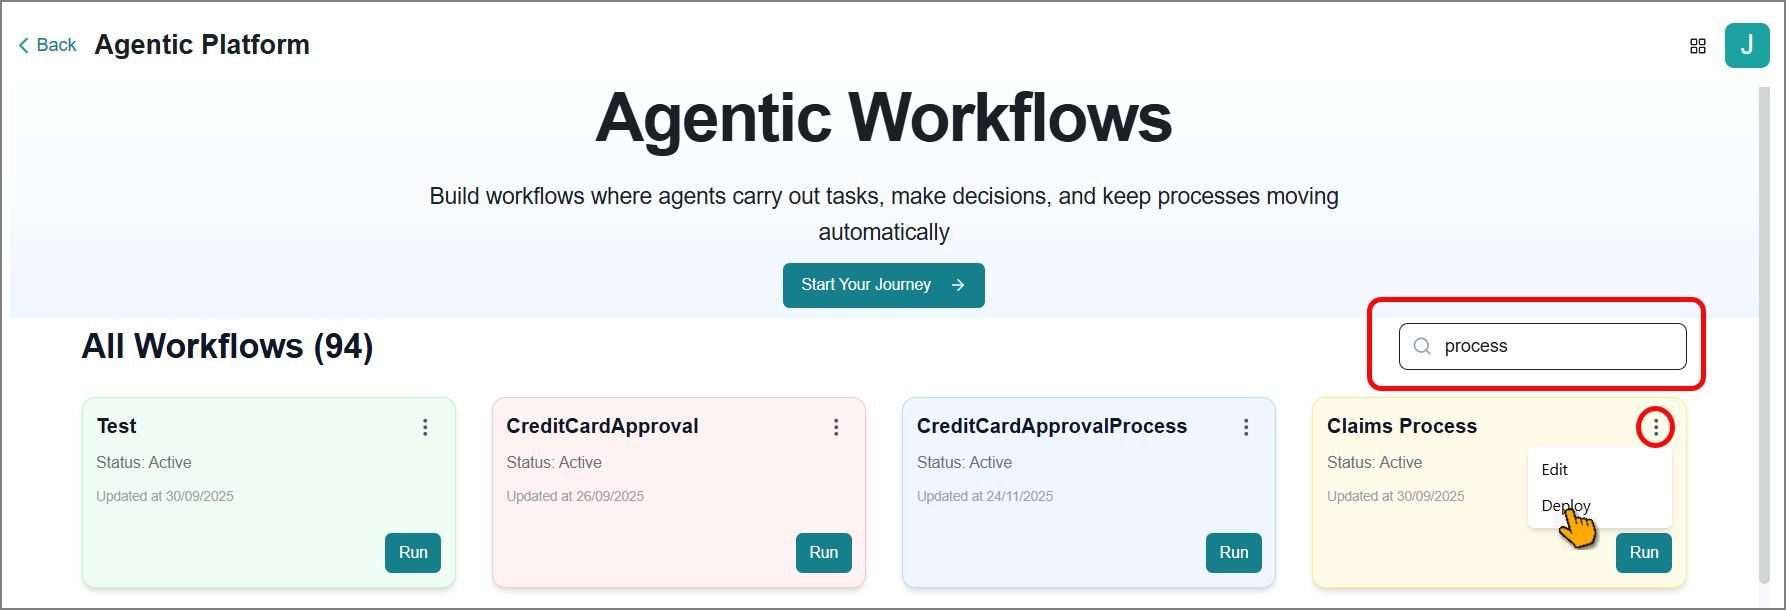
Click Deploy.
The Deploy Workflow confirmation window opens.
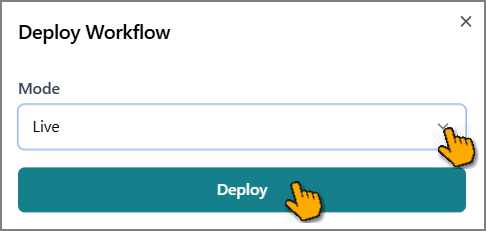
Choose your deployment mode from the dropdown:
Live - For testing the execution
Prod - For the operational execution
Click Deploy.
A success message appears confirming deployment.
Now that you have deployed your workflow, you can use Agent Evaluation to evaluate its performance against curated test scenarios and measure real outcomes, such as task completion rates, output quality, correctness of tool usage, and performance.
Running a Workflow
Running a workflow is the critical process of executing your designed workflow in a runtime environment separate from the design interface.
The runtime testing process serves multiple important purposes:
You can observe how your workflow executes in practice, verifying that tasks are executed in the correct sequence, data flows properly between tasks, and conditional logic functions as intended.
You can identify any issues, errors, or bottlenecks that may not be apparent during the design phase but become evident during actual execution.
You can analyze results to ensure the workflow produces the expected outcomes.
Based on the runtime process, execution results, and any challenges encountered, you can refine and improve your workflow to enhance its effectiveness. This iterative testing and refinement process ensures that your workflow functions correctly and efficiently before deploying it to production, where it will handle actual business operations.
To run a workflow:
Go to the Home page > Agents > Agentic Workflow.
The Agentic Workflows page opens and displays all workflow journeys in a card view.
Enter the workflow journey name in the Search box to filter it.
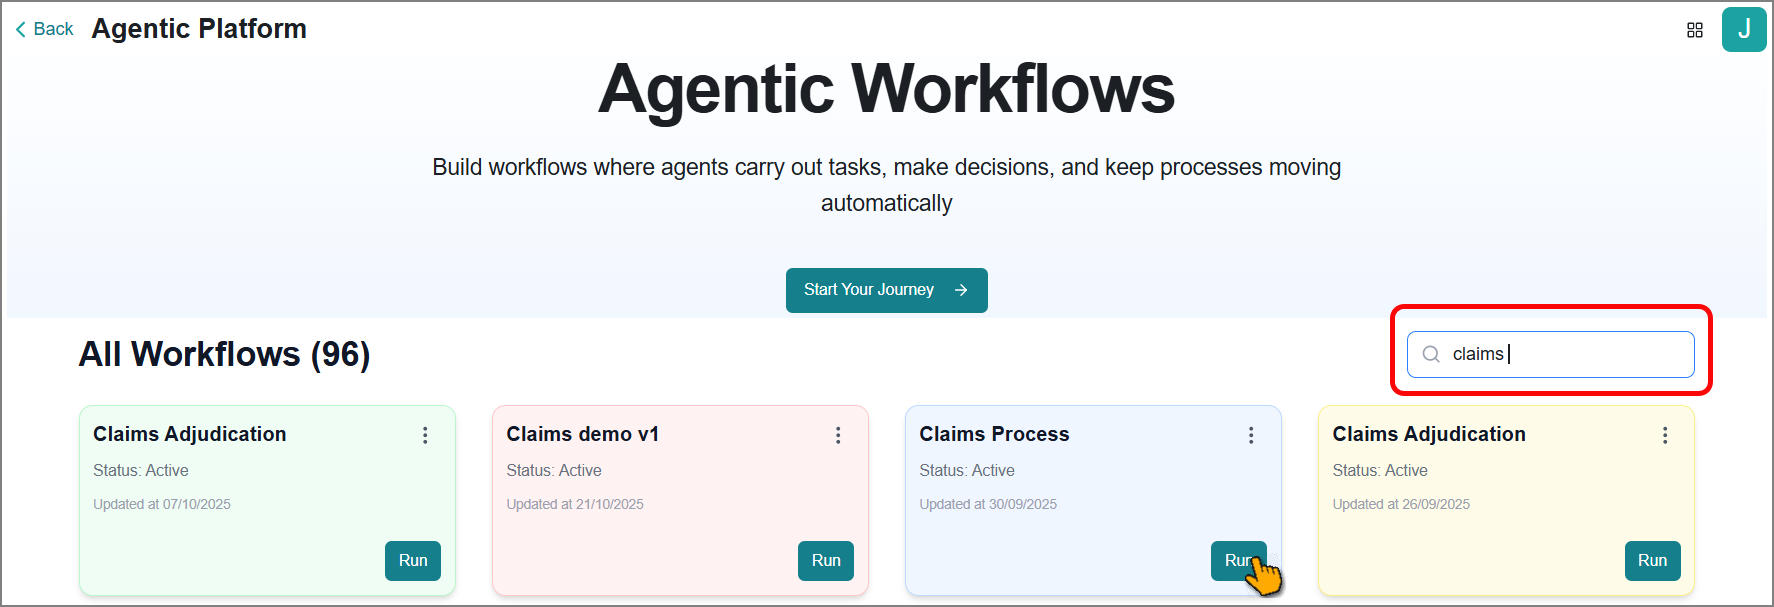
Click Run on the workflow journey card.
The runtime environment opens automatically in a new window.
Click the Add + icon at the bottom-right corner of the page.
A list of all deployed workflows appears in the right-side panel.
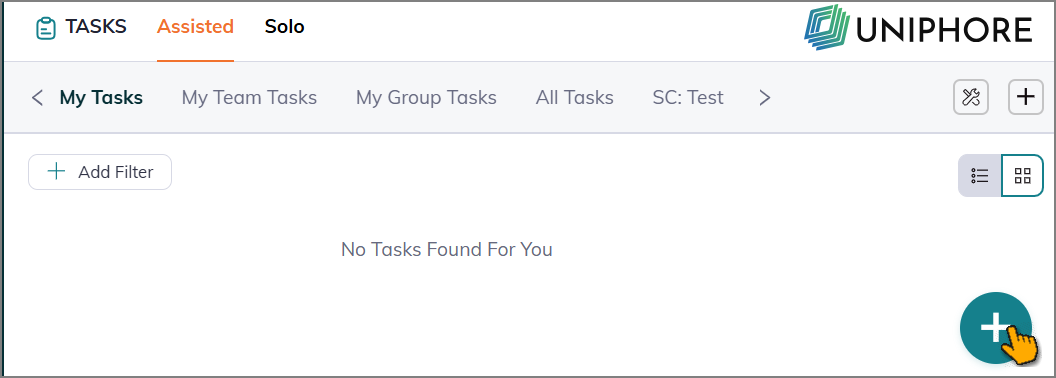
Enter the workflow name in the Search box to filter results.
Select the workflow you want to execute.
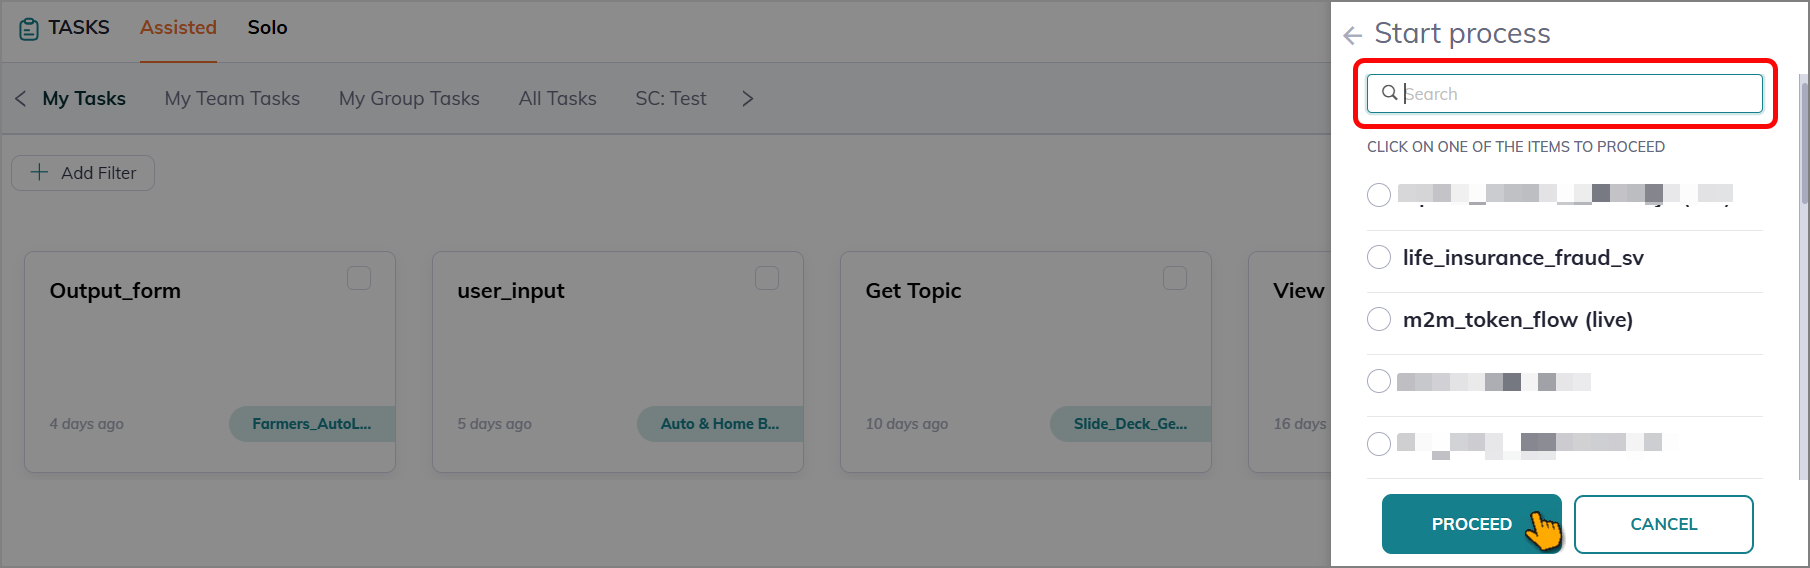
Click Proceed to initiate execution.
Once started, you can track and view the status of each task execution in real-time as the workflow progresses.
Suspending, Resuming, and Terminating Instances
You can suspend, resume, and terminate instances via the buttons at the top of the main panel.

To suspend an instance, click the Suspend button, then click Suspend on the confirmation dialog:
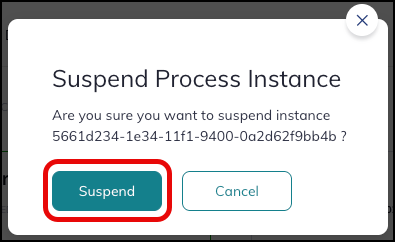
To resume an instance, click the Resume button, then click Resume on the confirmation dialog:
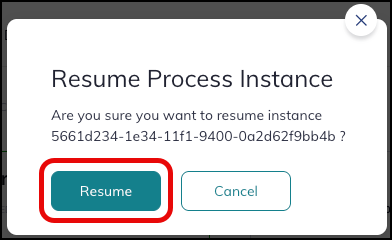
To terminate an instance, click the Terminate button, then click Terminate on the confirmation dialog:
Caution
This action is irreversible. A terminated instance cannot be recovered or resumed.
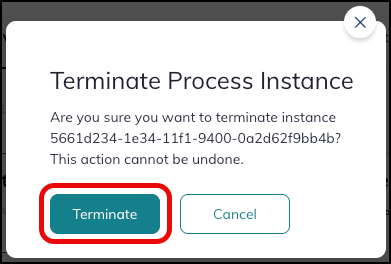
Terminating an instance permanently deletes it from the workflow engine and marks it as Externally Terminated. Use terminate only when you are certain the instance should no longer run. Terminated instances are moved to the Completed tab for audit visibility.
Viewing a Workflow Status History
Monitor the status of your workflow executions in real time by viewing comprehensive details for each run, including the workflow name, current execution status, timestamp, and a flowchart visualization.
To access the workflow's status history:
Click the Run History
 icon on the left side menu.
The History page opens and displays the latest details of the workflow execution status.
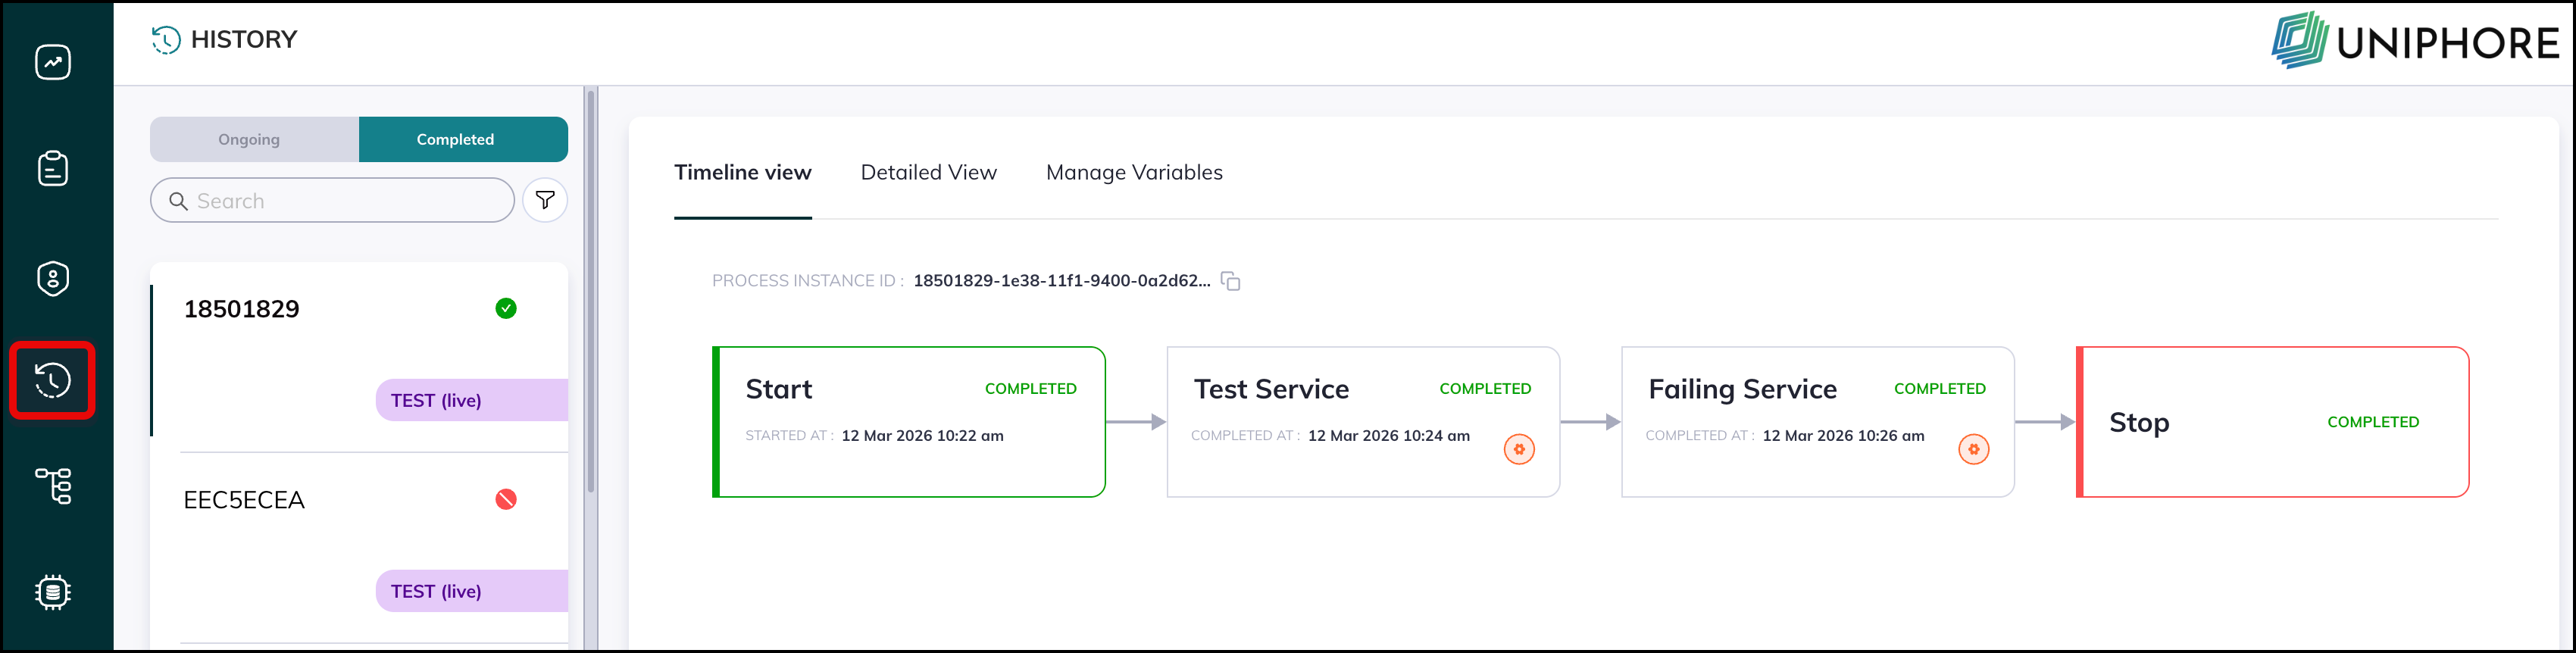
The left side panel organizes all workflow runs into two tabs:
Ongoing - Displays all suspended and currently executing workflows. Suspended workflows have an orange suspended
 icon.
icon.Completed - Displays all workflows that have finished execution or that have been externally terminated. Completed workflows have a green checkmark
 icon, and terminated workflows have a red canceled
  icon.
icon.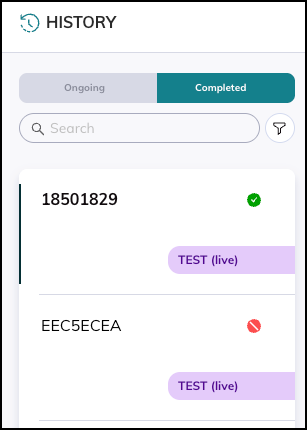
Use the search box and filters to quickly locate a specific workflow run, and then select to view the details in the right panel across these tabs:
Timeline View tab - Select to view execution progress with timestamped tasks and color-coded statuses.
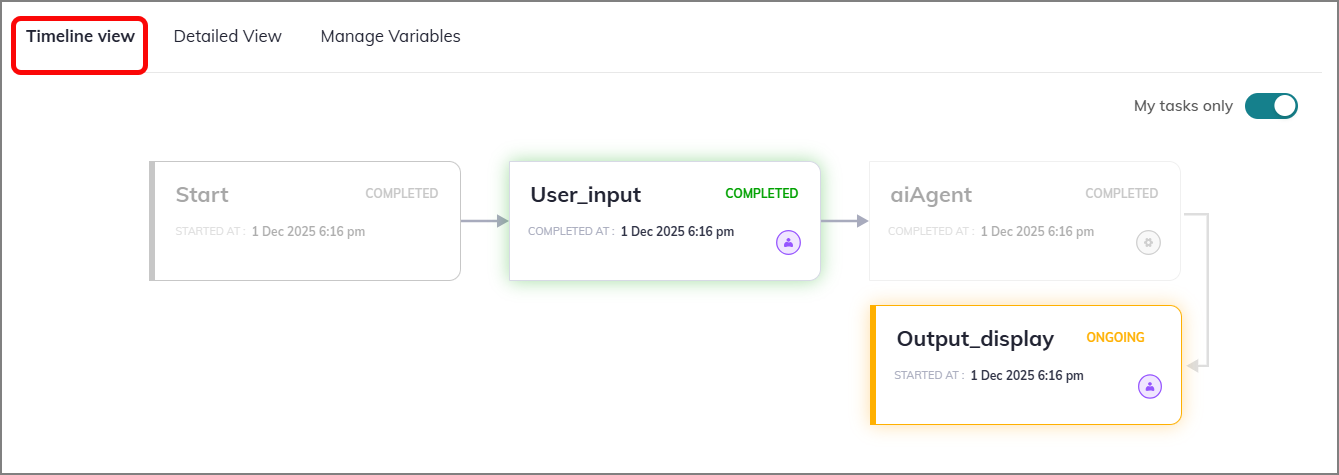
Detailed View tab - Select to view the complete workflow diagram with its current execution status.
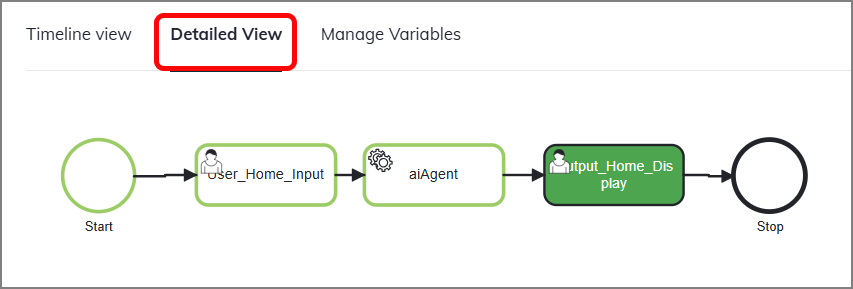
Manage Variables tab - Select to view all data and variables that were created during the workflow execution process. You can manage these variables as needed for debugging or analysis.
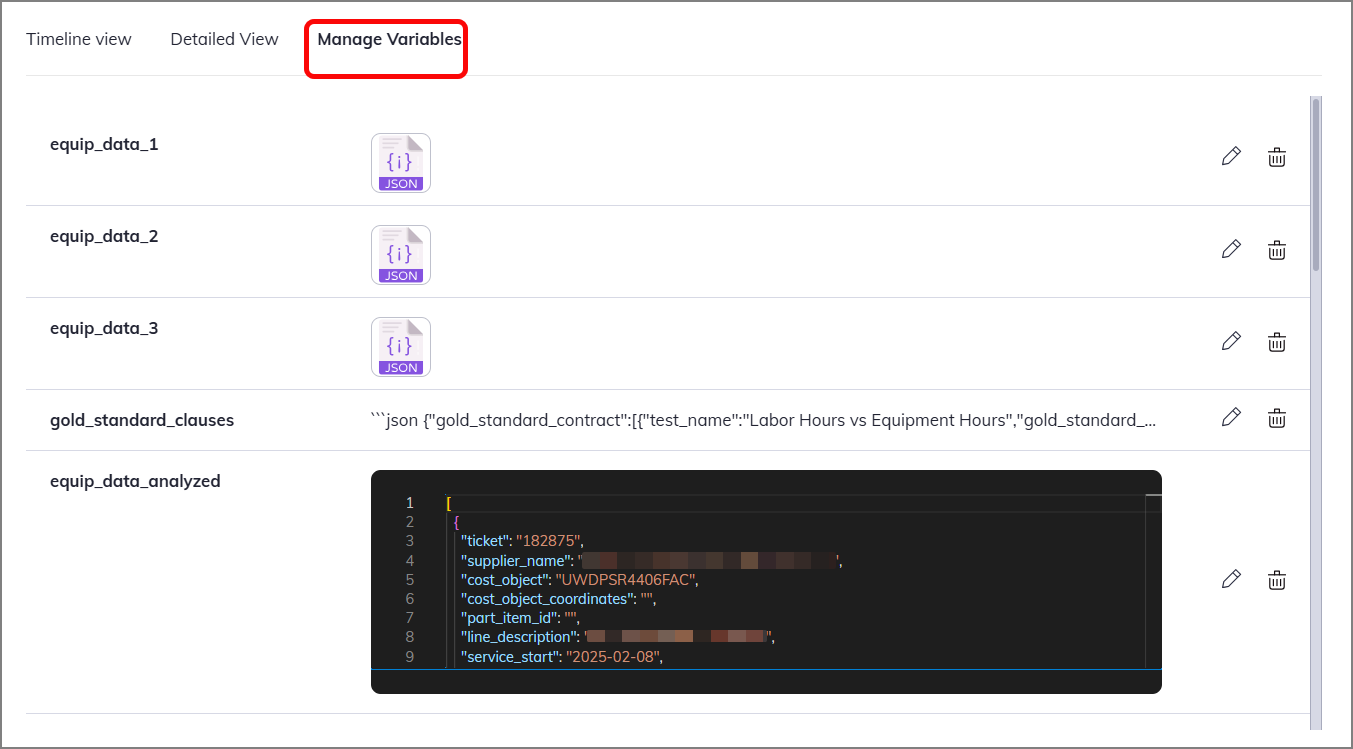
Incident tab - When an instance is suspended due to an external task failure, the Incident Detail tab appears in the right panel.
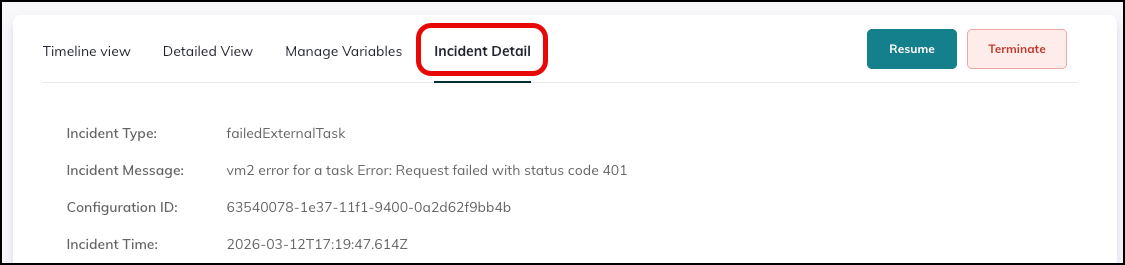
The Incident Detail tab shows:
Field
Description
Incident Type
Category of the failure (e.g.
failedExternalTask)Incident Message
Human-readable error description
Configuration ID
ID of the failed external task
Incident Time
Timestamp when the incident was recorded
Viewing the Workflow Execution History
The platform enables you to monitor and analyze agentic workflow performance through comprehensive execution information. Detailed execution logs show how your workflows process requests and generate results, helping you make informed optimization decisions.
Note
Execution history tracks only Service tasks, Action tasks, and AI Agent tasks.
To view the workflow execution details:
Click the Ellipsis
icon on the workflow journey card.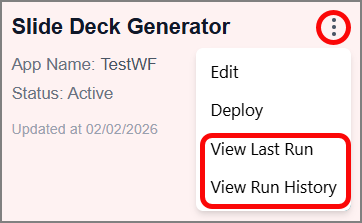
Click View Last Run.
A right panel opens, displaying metadata about the last execution, including input/output, execution sequence, time, and other performance metrics.
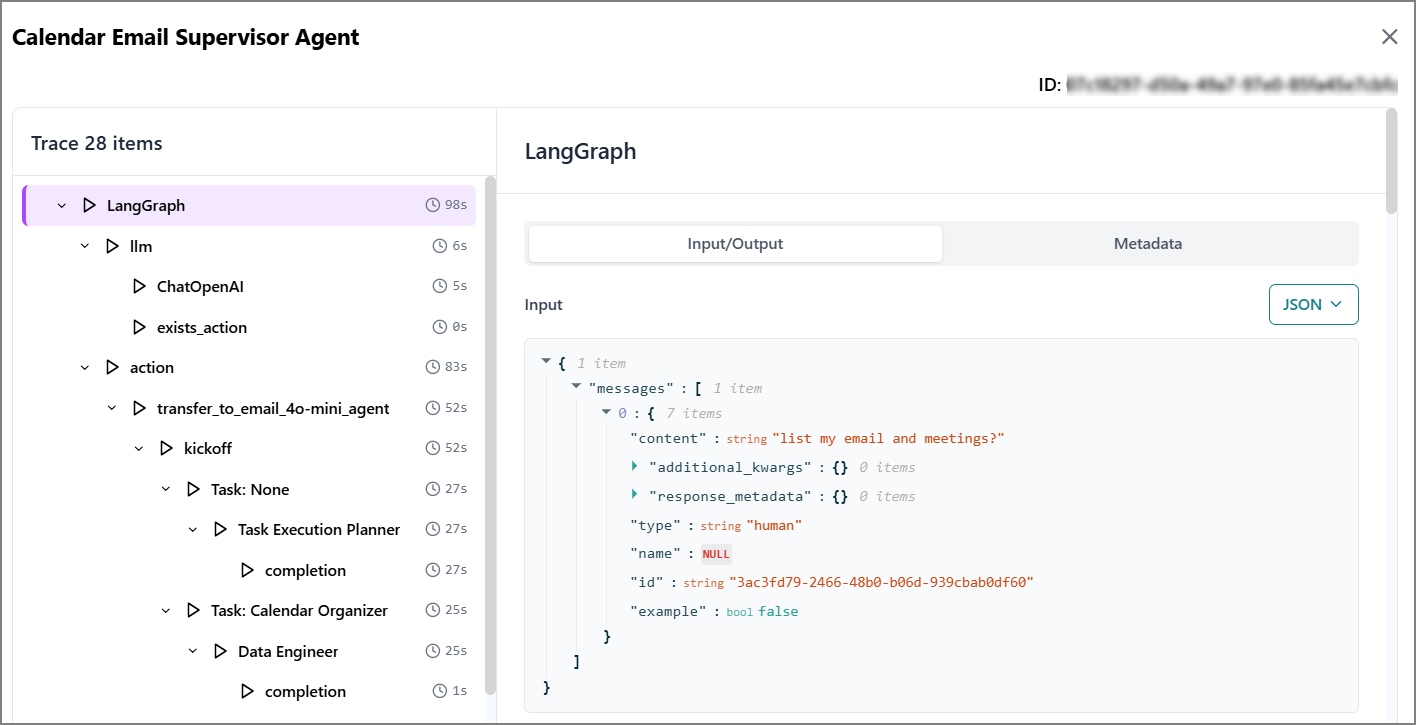
Click View Run History.
A right-side panel opens, displaying all its execution records for the last five runs.
To view the previous or next execution record, click << or >>.