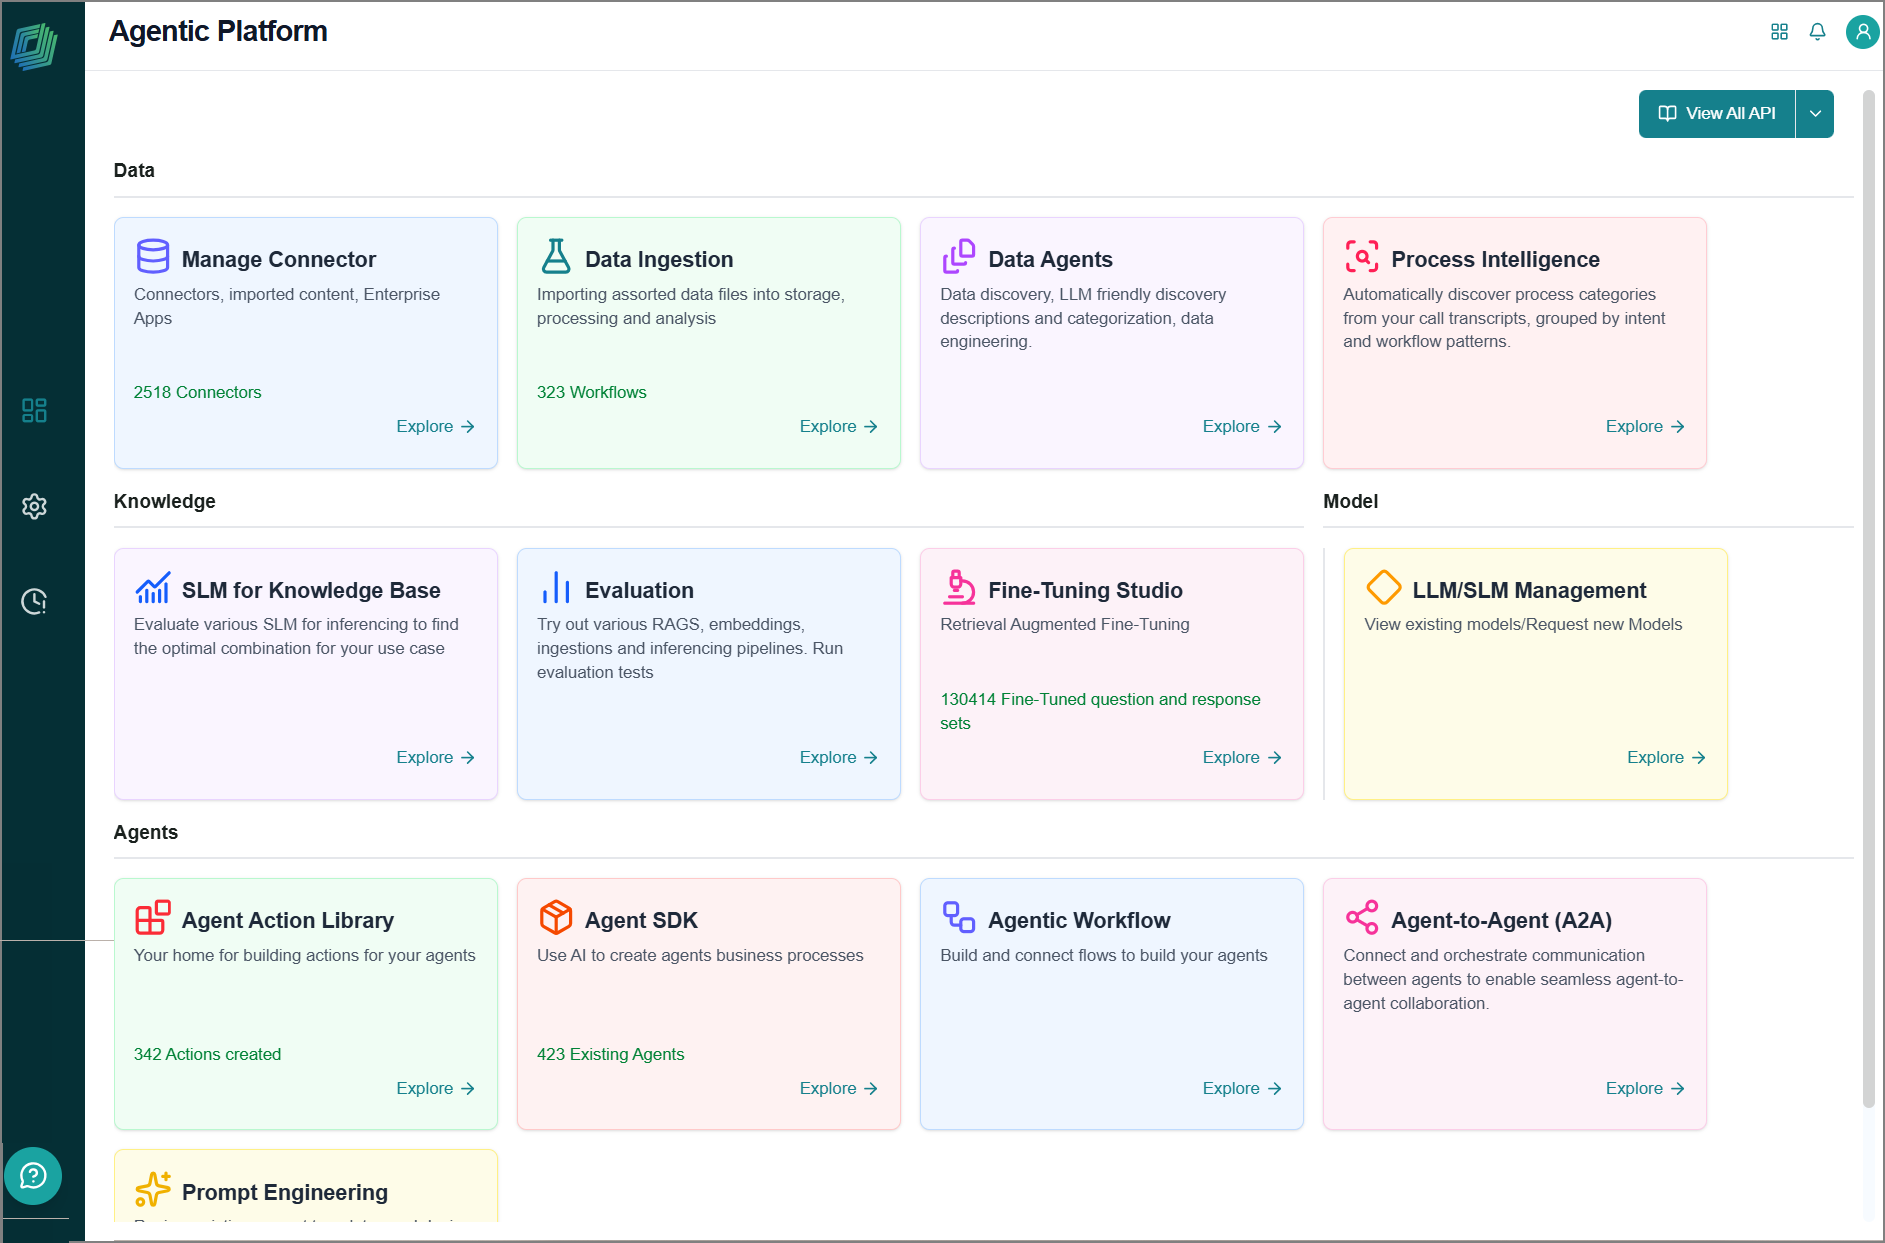
SLM for Knowledge Base
SLM for Knowledge Base is where you can pair each knowledge base with the SLM best suited to answer queries against it. The platform automatically benchmarks available SLMs using test queries for the selected knowledge base, evaluates their performance, and recommends the best match. This reduces manual testing effort and ensures each knowledge base is paired with a model that delivers accurate, high-quality responses.
Key Capabilities
Automatic SLM Matching - Evaluates available SLMs against your knowledge base and recommends the highest-scoring model, eliminating the need for manual trial-and-error.
Flexible Pairing Options - Choose between two pairing methods. Select a model yourself using Manual pairing, or let the platform identify and recommend the best match using Auto pairing.
SLM Re-Pairing - Switch to a different SLM at any time, even after the initial pairing is deployed. The platform supports both manual and automatic re-pairing without requiring changes to your knowledge base.
Pairing an SLM with Knowledge Bases
To access this feature:
Go to the home page > Knowledge > SLM for Knowledge.
The SLM Mapping to Knowledge Base page opens, displaying all KBs created in the data layer under the Knowledge Base without SLM tab.
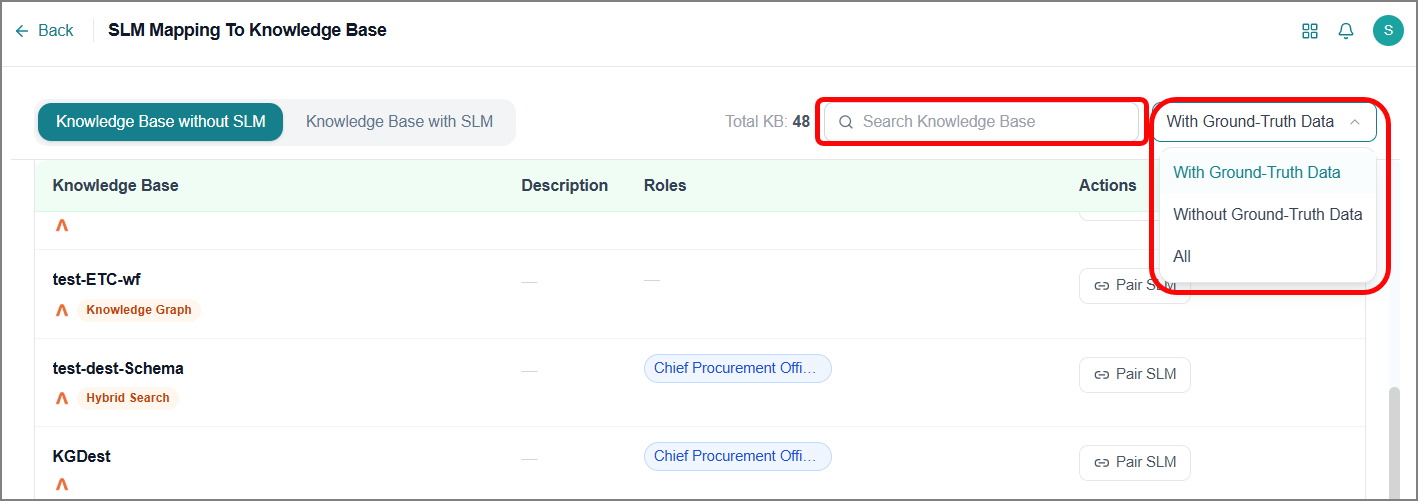
Apply one or both of the following filters to locate a specific KB:
Ground-Truth Data dropdown - Filter KBs by ground-truth data availability status.
Search box - Enter a KB name or keyword to perform a text-based search across the list.
Locate the KB, then click Pair SLM.
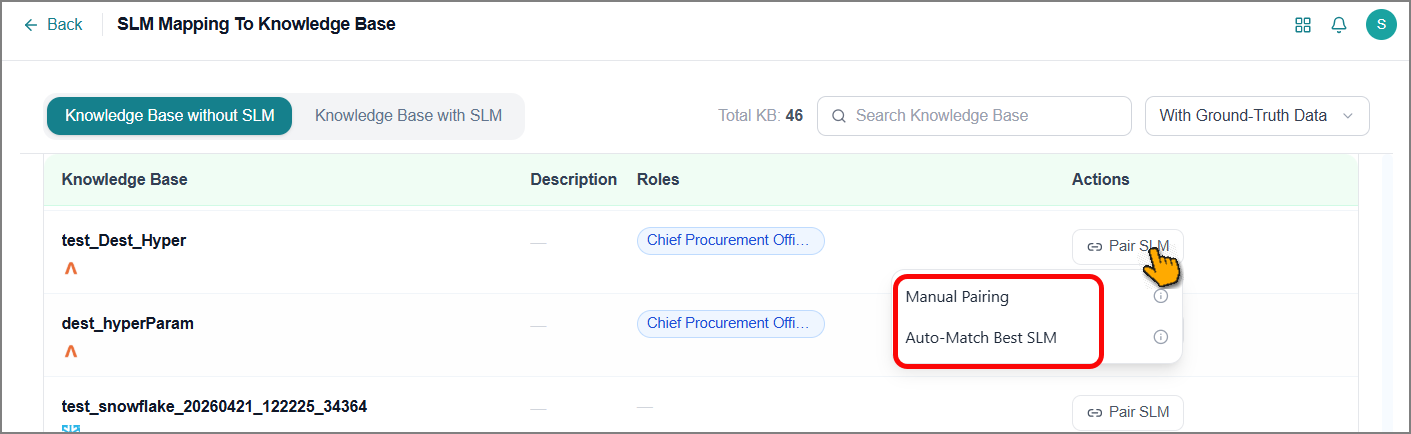
Select a pairing method:
Manual Pairing - Choose a specific model yourself. Refer to Manual Pairing for more information.
Auto-Match Best SLM - Let the platform suggest the best model fit for your KB.
Click Auto-match Best SLM.
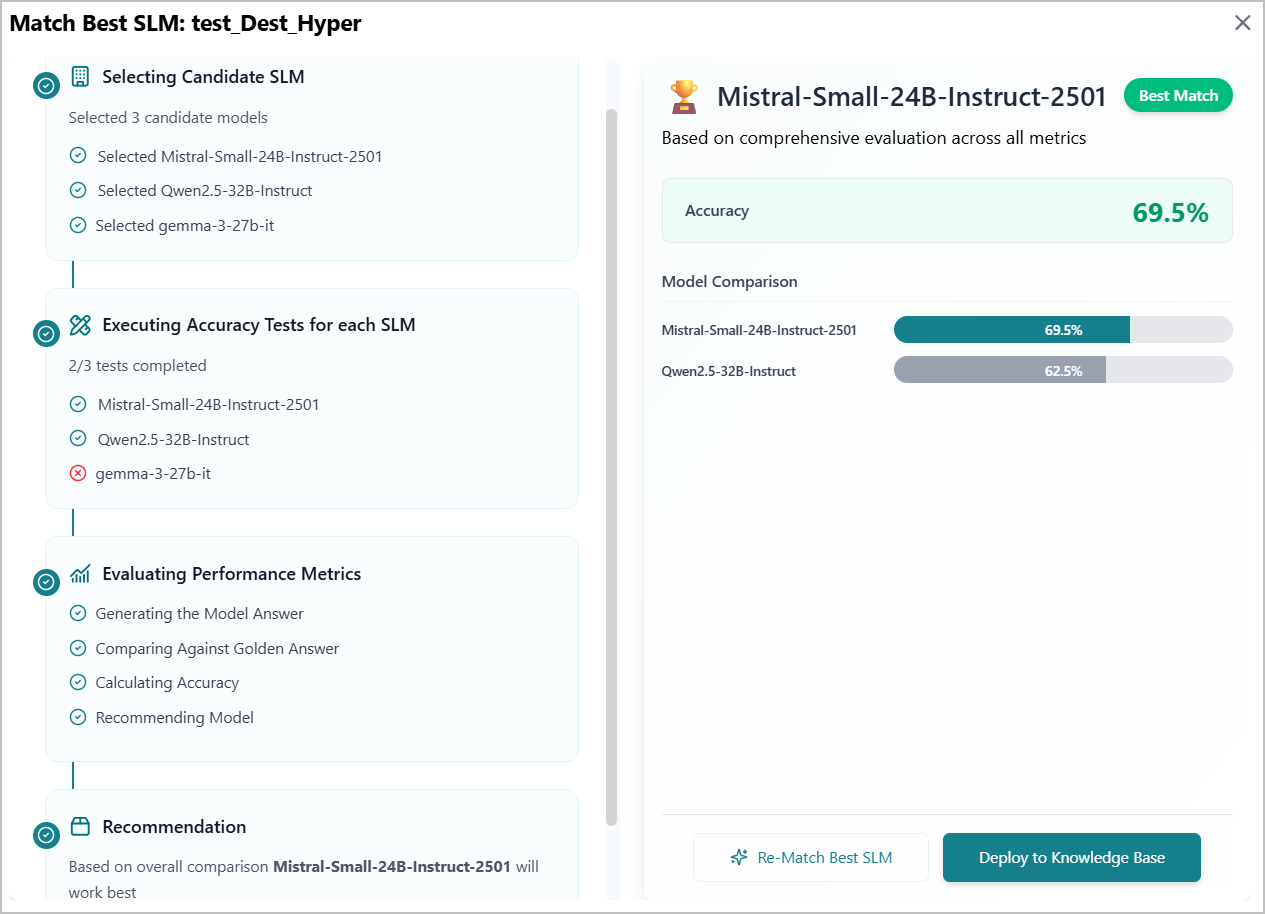
The Match Best SLM panel opens. The platform benchmarks the best models' responses against ground truth data, displays evaluation progress, and recommends the highest-scoring model to your Knowledge Base.
Important
If no ground truth is available, you must upload ground truth data to proceed with auto-pairing. Refer to Upload Ground Truth for more information.
To rerun the evaluation, click Re-Match Best SLM.
Click Deploy to Knowledge Base.
The Deploy to Knowledge Base window opens to create a new SLM.
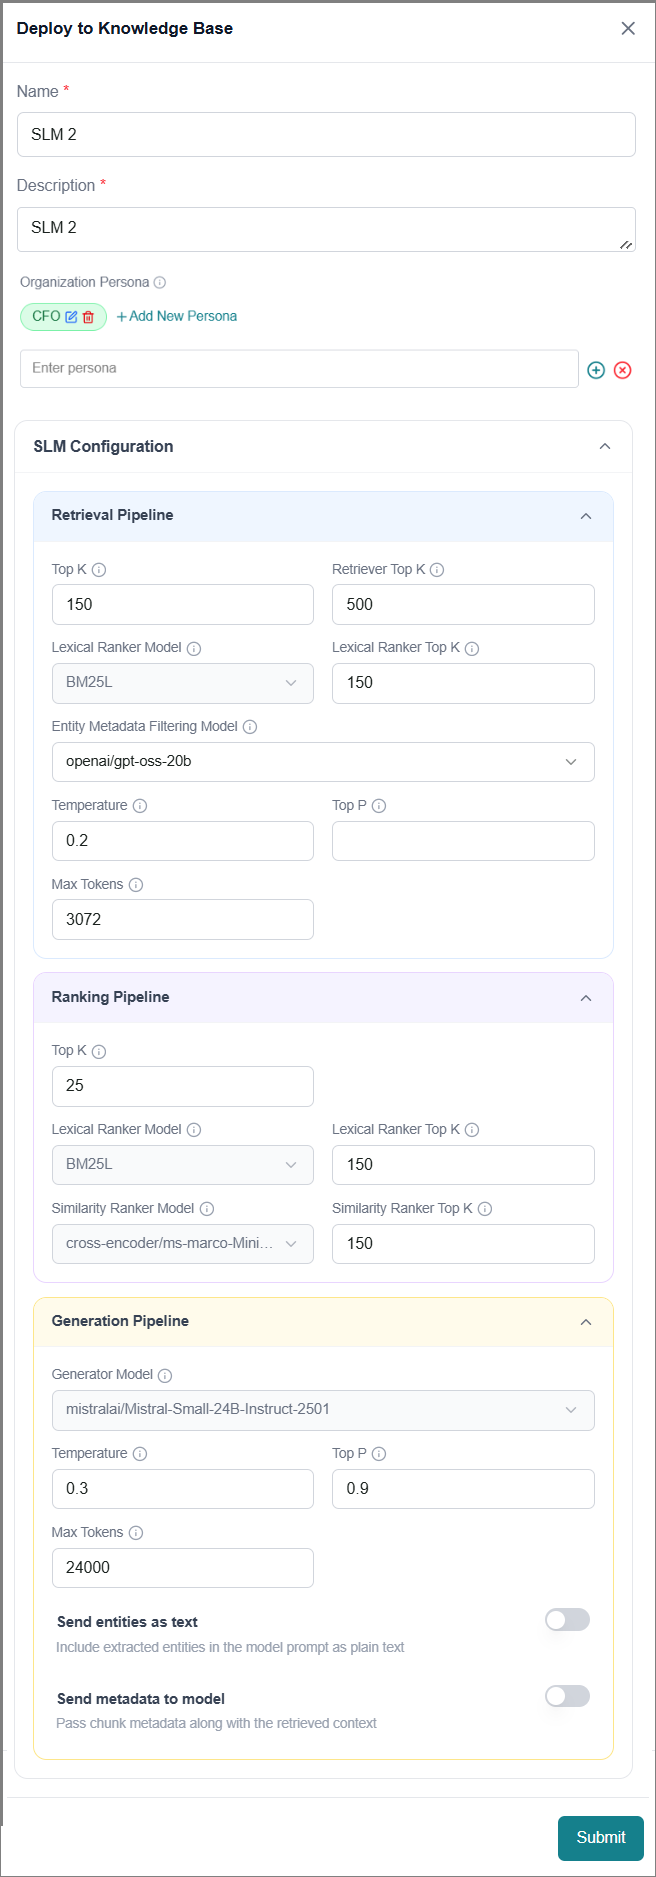
Enter a unique name for the SLM.
Enter a detailed description of the SLM.
Add a persona for the SLM. Use the info
 icon to view more information about the persona.
Click Add New Persona.
Enter the persona name associated with the KB.
Note
This enables the SLM to generate persona-based responses to user queries.
Click the Add
 icon to save the persona.
The persona is added to the list.
Tip
You can add multiple personas in the same manner.
Manage the persona configuration:
Click the Edit
 icon to edit the persona name.
Click the Delete
 icon to remove the persona from the list.
Click SLM Configuration to expand.
The default values are already available; you can update them if needed.
Tip
Use the info
icon to view more information about the settings.Click Submit to save the configuration.
A success message confirms the action, and the new SLM is created and paired to the KB.
Manual Pairing
To pair the model manually:
Click Manual Pairing.
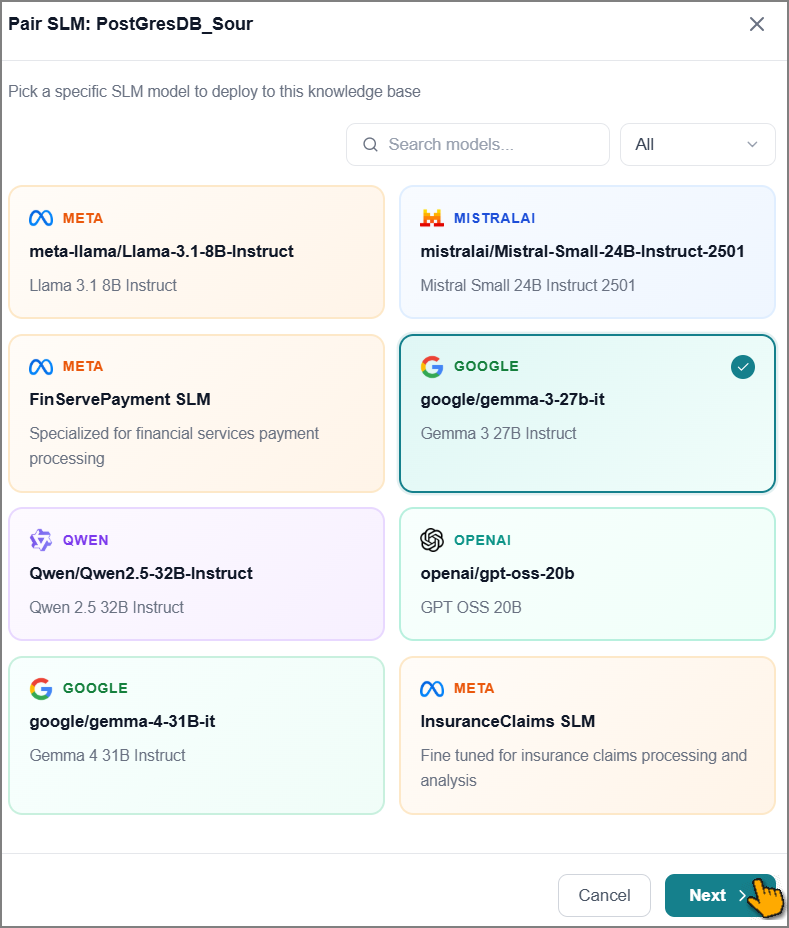
The Pair SLM panel opens from the right. The platform automatically displays a list of available models.
Use the filters to find and select the appropriate model, then click Next.
Enter a unique name for the SLM.
Enter a detailed description of the SLM.
Add a persona for the SLM. Use the info
icon to view more information about the persona.Click Add New Persona.
Enter the persona name associated with the KB.
Note
This enables the SLM to generate persona-based responses to user queries.
Click the Add
icon to save the persona.The persona is added to the list.
Tip
You can add multiple personas in the same manner.
Manage the persona configuration:
Click the Edit
icon to edit the persona name.Click the Delete
icon to remove the persona from the list.
Click SLM Configuration to expand.
The default values are already available; you can update them if needed.
Tip
Use the info
icon to view more information about the settings.Click Deploy to Knowledge Base.
A success message confirms the action, and the new SLM is created and paired to the KB.
Upload Ground Truth
To access this feature:
Click Auto Pairing.
The No Ground Truth Available window opens.
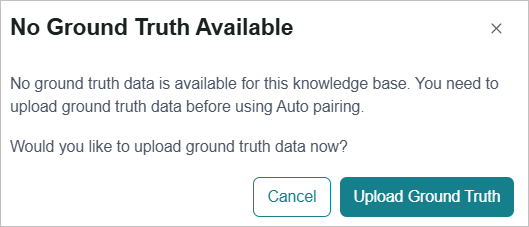
Click Upload Ground Truth.
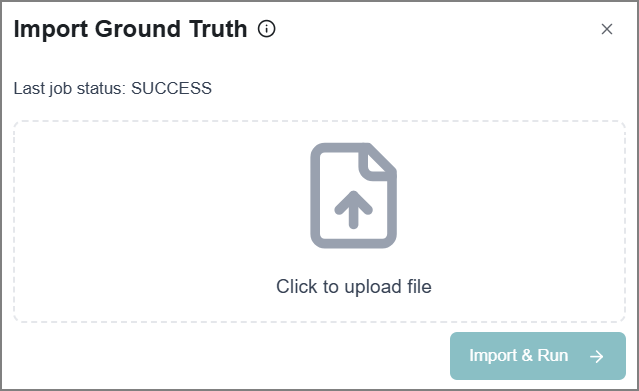
The Import Ground Truth window opens on the RAG Evaluation page.
Hover over the
 icon and select Download Sample File to download the predefined template for creating ground truth data.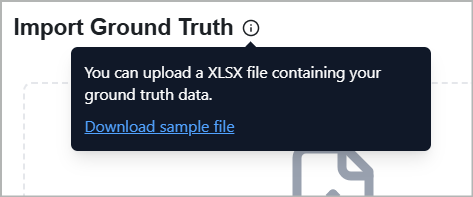
Select Click to Upload File.
Locate and select the ground truth file from your local system.
Notice
Only one XLSX file can be uploaded at a time. Uploading a new file will replace the existing one.
Click Import & Run.
The platform imports the file and initiates the evaluation process. Once the upload is complete, the Q&A is displayed for review.
Navigate back to the previous page and restart the Auto Pairing process.
Re-pairing an SLM with Knowledge Bases
You can easily switch to a different SLM for your Knowledge Base, even after the model has been deployed.
To access this feature:
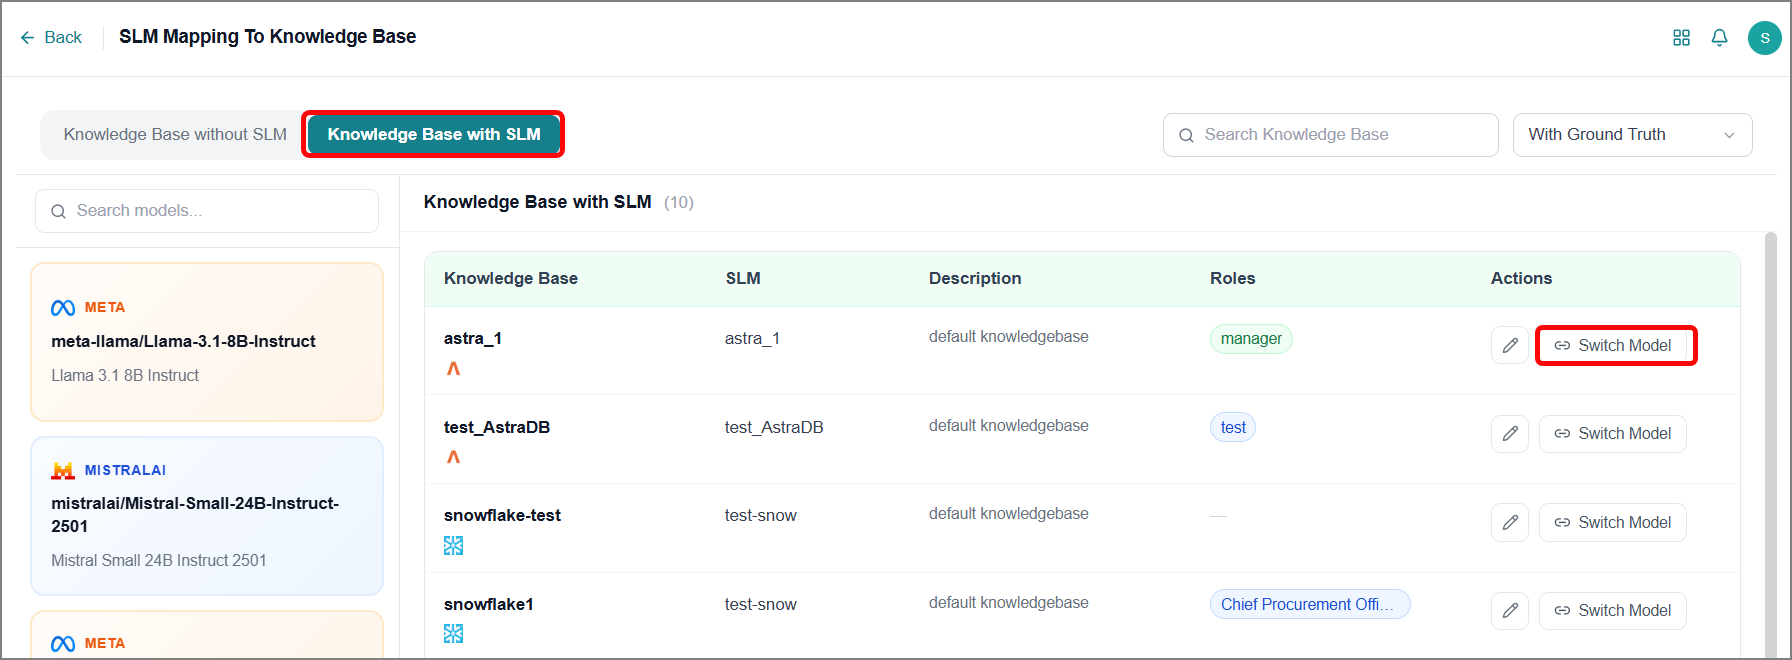
Switch to the Knowledge Base with SLM tab.
Apply the following filters to locate a specific KB:
Ground Truth dropdown - Filter KBs by ground-truth availability status.
Search Knowledge Base box - Enter a KB name or keyword to perform a text-based search across the list.
Search Models box - In the left panel, enter a model name or keyword to search the list. Select a model to view all related KBs tagged to it.
Click the Edit Knowledge Base
 icon to update the KB details. Refer to Modifying a Knowledge Base.
Locate the KB and click Switch Model.
Select a pairing method:
Manual Pairing - Choose a specific model yourself. Refer to Manual Pairing for more information.
Auto-Match Best SLM - Let the platform suggest the best model fit for your KB.
Click Auto-Match Best SLM.
The Match Best SLM panel opens. The platform benchmarks the best model responses against ground truth data, displays evaluation progress, and recommends the highest-scoring model to your Knowledge Base.
To rerun the evaluation, click Re-Match Best SLM.
To confirm and apply the recommended model, click Deploy to Knowledge Base.
Important
If no ground truth is available, you must upload ground truth data to proceed with auto-pairing. Refer to Upload Ground Truth for more information.
A success message confirms the action, and the new model is paired with the existing SLM in the KB.
Modifying a Knowledge Base
The platform allows you to update KB details created in the data layer.
To update a KB:
Click the Edit Knowledge Base
icon on the KB.The Edit Knowledge Base window opens.
Modify the KB name and description as needed.
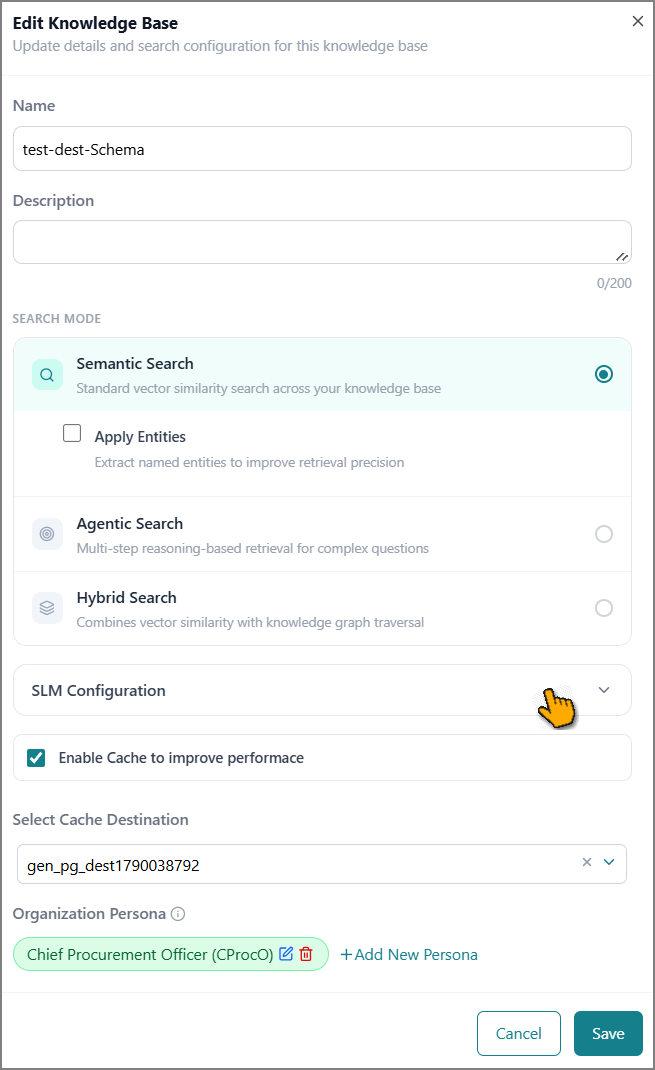
Select a Search Mode to control how AI agents retrieve information from this KB:
Semantic Search - The default search mode. Agents search for content based on meaning and context. Two optional enhancements are available with this mode:
Apply Entities - Enables agents to use global entities defined during Data Preparation for this source.
Agentic Search - Advanced search mode for complex questions. Instead of a single lookup, agents reason through multiple steps to build an answer. Select this setting to allow agents to use the Knowledge Graph for the KB.
Note
When you enable Agentic Search, a Knowledge Graph text appears on the KB card, indicating that the KB is configured for Knowledge Graph-driven search.
Hybrid Search - A smarter way to search that narrows down the right files first, then looks inside them for the answer. Agents use the Knowledge Graph to identify the files most relevant to your question, then search only within those files rather than across the entire knowledge base.
Important
The Agentic Search and Hybrid Search options are enabled only when the Knowledge Graph is created for the KB in the data workflow.
Important
The platform automatically updates the KB search mode settings once you apply the recommended search method returned by the Evaluation. Refer to Running an Evaluation for more information.
Click SLM Configuration to expand.
The default values are already available; you can update them if needed.
Tip
Use the info
icon to view more information about the settings.Select the checkbox to save Q&A caches and improve KB performance.
Select the same or a different vector destination from the dropdown to store the cache.
Add a persona for the SLM. Use the info
icon to view more information about the persona.Click Add New Persona.
Enter the persona name associated with the KB.
Note
This enables the SLM to generate persona-based responses to user queries.
Click the Add
icon to save the persona.The persona is added to the list.
Tip
You can add multiple personas in the same manner.
Manage the persona configuration:
Click the Edit
icon to edit the persona name.Click the Delete
icon to remove the persona from the list.
Click Save to apply the changes.
Viewing a Knowledge Graph
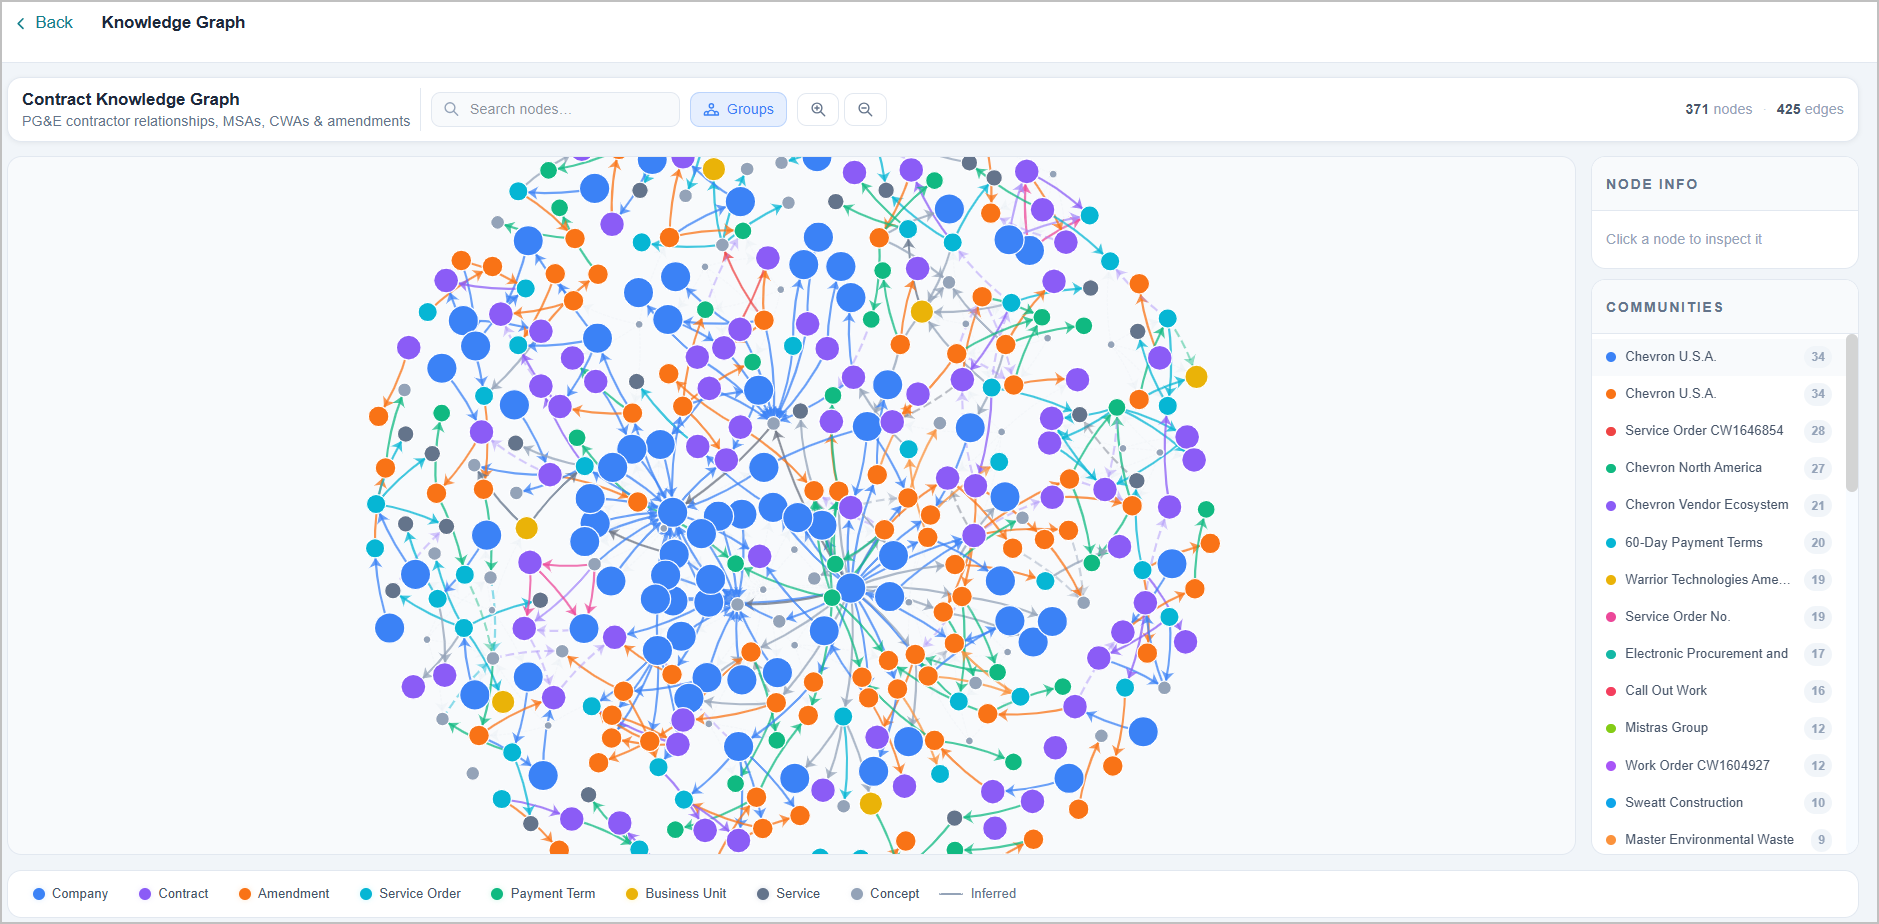
The Knowledge Graph gives you a visual map of how information in your knowledge base is connected. You can use it to explore relationships between topics, entities, and data points that the platform has automatically identified.
To view the KB Knowledge Graph:
Important
The Knowledge Graph option is available only when Agentic Search is enabled for the KB. To enable Agentic Search, refer to Modifying a Knowledge Base.
Click the Knowledge Graph option on the specific KB.
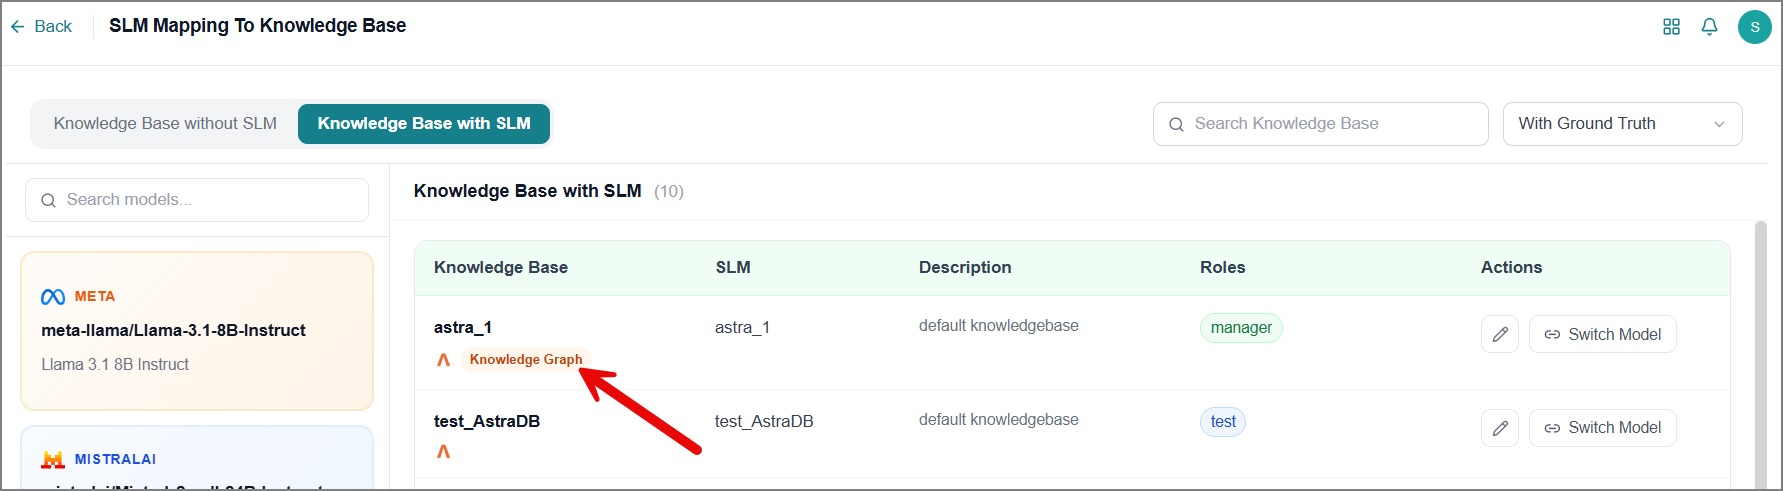
The Knowledge Graph page opens.