Refine Your Search
Filter by Dates
Filter your search results by time and date, click into the Calendar, and set the start and end dates/times for what you need. You can also select a “quick-pick” option, such as Last Week or Last Month.
The following video demonstrates how to filter your search results by selecting a start and end date window for your calls.
Using Advanced Search Filters
Create your own advanced search to find the specific results you need. Add multiple filters (using any metadata field), multiple conditions, and group and structure your filters. For a reminder of general search logic, see Search Rules.
A brief explainer video has been created to introduce you to Advanced Search Filters. See the Advanced Search Demo below.
Use advanced Search Filters:
Click the filter icon to the left of the search bar to open advanced search filters, where you can create a new advanced search.
Click + to add a new filter or filter group. Add as many as you need.
Click and drag the dots to the left of the filters/groups to rearrange them.
Click the remove Icon to the right of the filters/groups to remove them.
Filters – Select a metadata field, select a condition, and finally select or enter what to search for.
Filter Groups – Select whether you want to apply filters on an AND basis (results must match all) or an OR basis (results only need to match one).
Click Apply to perform the advanced search. Anything selected in the search bar is ignored; only the Advanced Search will be applied.
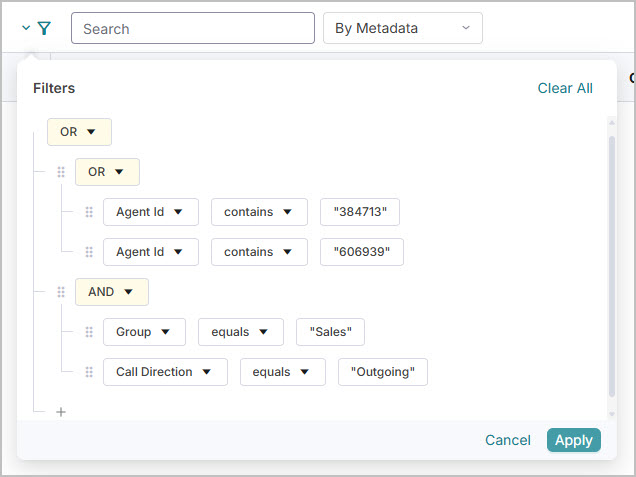
For example, in the advanced search example below, this returns all calls to/from any agent with 384713 or 606939 as part of their Agent Id, but also returns all Outgoing calls from agents who are part of the Sales team.
When you're done, click Clear All to clear the search.
 |
The following video demonstrates how to use advanced filters to search for specific calls.
Search Rules
Search logic allows you to set up complex searches. Here are the guidelines to help you create your own advanced searches:
Filter: A filter defines what type of data you want to search for, what data values you want to search for, and what condition the search regards as a match.
Condition: Defines what condition the search regards as a match. For example, contains the number 384 anywhere in a data field, or exactly matches (equals) the number 384 .
Group: AND/OR work as search operators. The graphic below illustrates how they work. In this example, you have three searches – A, B, and C.
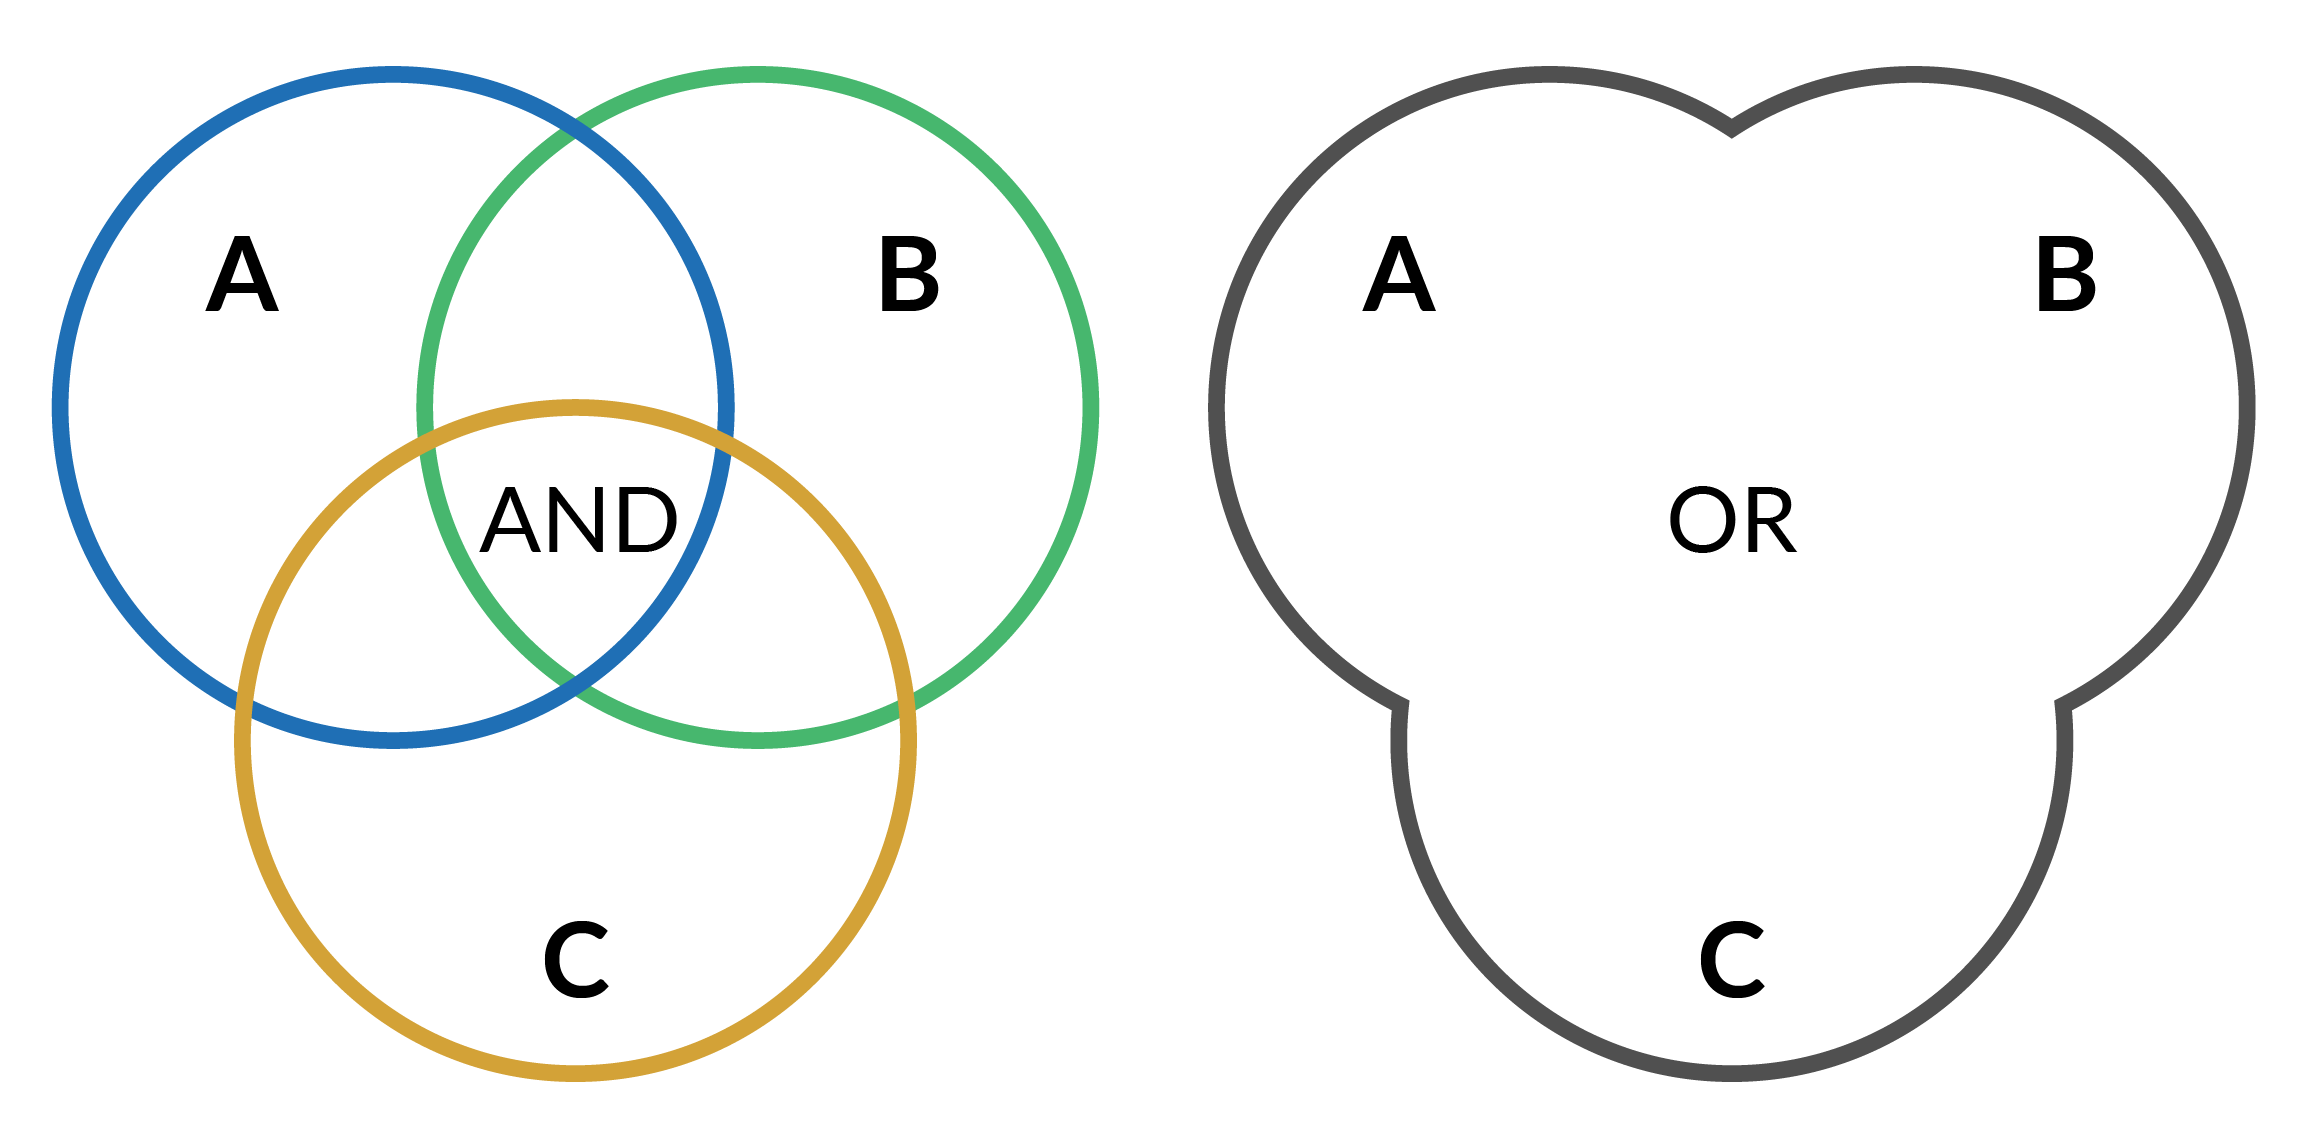 |
When you apply an AND to the searches, you’re saying the recording must match everything you’re searching for in A AND B AND C (the piece in the middle where all three circles overlap).
When you apply an OR to the searches, you’re saying the recording can match anything you’re searching for in A OR B OR C (anywhere, in any circle).
You can apply the AND and OR operators to multiple conditions and filters. For example, you could search B AND C, OR A.
Group (Nest) Filters: A little bit more complex. Whenever you group a set of filters using AND/OR, you’re saying search for all these things first and provide the result, then combine the result with any other filters you’ve defined. The example below groups all calls from two agents using OR, then groups a call Group filter (Sales) and a Call Direction filter (Outgoing) with AND, which provides all Outgoing calls from the Sales team. Using OR at the top means the results provide all calls by either agent (Agent 384713 OR Agent 606939) as well as any outgoing sales calls.
|
Search Results View
Edit your search results view to show only what is important at the time by controlling which order data is displayed in and which data to omit from the results.
Note
If you remove columns from your search results and then export the metadata of selected calls, the export will not be limited to the columns visible in your search results. Instead, the export contains all the captured metadata for those calls.
Remove or change the order of columns from your search results:
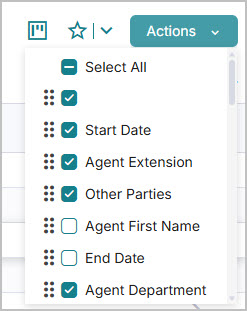
When viewing search results, click the Column Reorder icon in the top right. Changes here are reflected in the search results view immediately.
Deselect any columns that you don’t want to display, and select any that you do want to display. Use Select All to display or hide all the columns.
Click and drag the six-dot icon next to the column name to move it up and down the list, and in turn, move the columns left and right in the results panel.
Note
You can go back into the Column Reorder menu to tweak your display further. Any deselected columns remain where you left them, so you don't have to go and find them again if you want them back.
Tip
Click and drag the column separator to the left of the column title to change the width of your columns.
 |
Save View and Load View
When you're happy with your Search View, save it for later. You can save it for others to use or just for you.
To save a View:
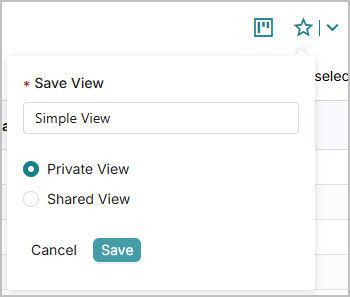
Click the Save View (star) icon in the top right.
Enter a friendly name for the View.
Select if you want the View to be available for just you (Private View), or if you'd like the View to be shared with other users (Shared View).
Click Save to save the View.
 |
To load a View:
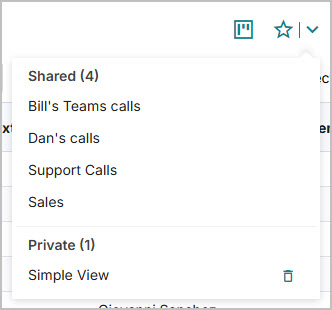
Click the dropdown to the right of the Save View (star) icon to display a list of Private views and Shared views.
Click one of the options from the list to load the View.
Note
If you want to delete a View, click the Delete icon to the right of the saved View. You are prompted for confirmation before the view is deleted.