Create a New Flow
A Flow defines the workflow, routing logic, and agent handoff sequence used to manage customer interactions across multiple AI agents.
Click Create Flow in the upper-right corner of the Flows page. The Create Flow window is displayed.
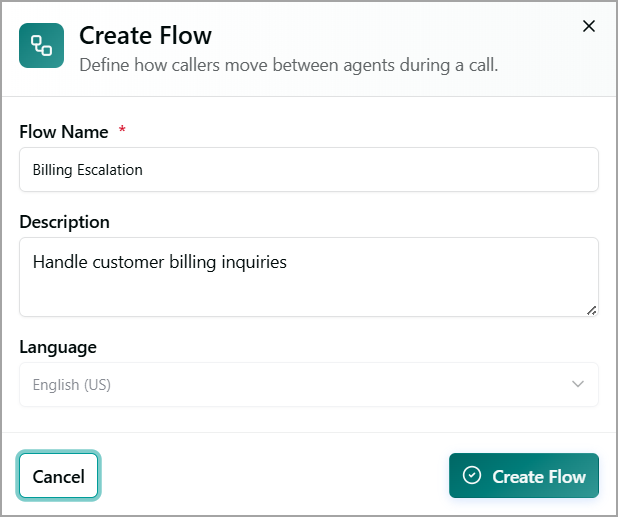
In the Flow Name field, mention a unique name for the flow.
In the Description field, mention a brief summary of the flow's purpose, workflow, or business process.
From the Language dropdown, select the language that will be used for the flow.
Click Create Flow. The new flow is created and opened in the Flow Designer, where you can add agents, define handoff paths, and configure workflow logic. To cancel your activity at any time without saving, click Cancel.
Adding AI Agents to a Flow
After creating a flow, you can add AI agents to define how customer interactions are handled throughout the workflow. A flow can include Telephony Agents, Guidance Agents, and External Agents, which can be connected together to create multi-agent customer experiences.
In the Flow Designer, click the type of agent you want to add from the bottom toolbar:
Telephony Agent
Guidance Agent
External Agent
The Add Agent panel is displayed on the right side of the page for Telephony and Guidance Agents. For an External Agent, the External Transfer node is displayed instead. Use this node to transfer an active customer interaction from the current AI-guided flow to an external destination, such as a live agent, another contact center queue, or a third-party telephony system.
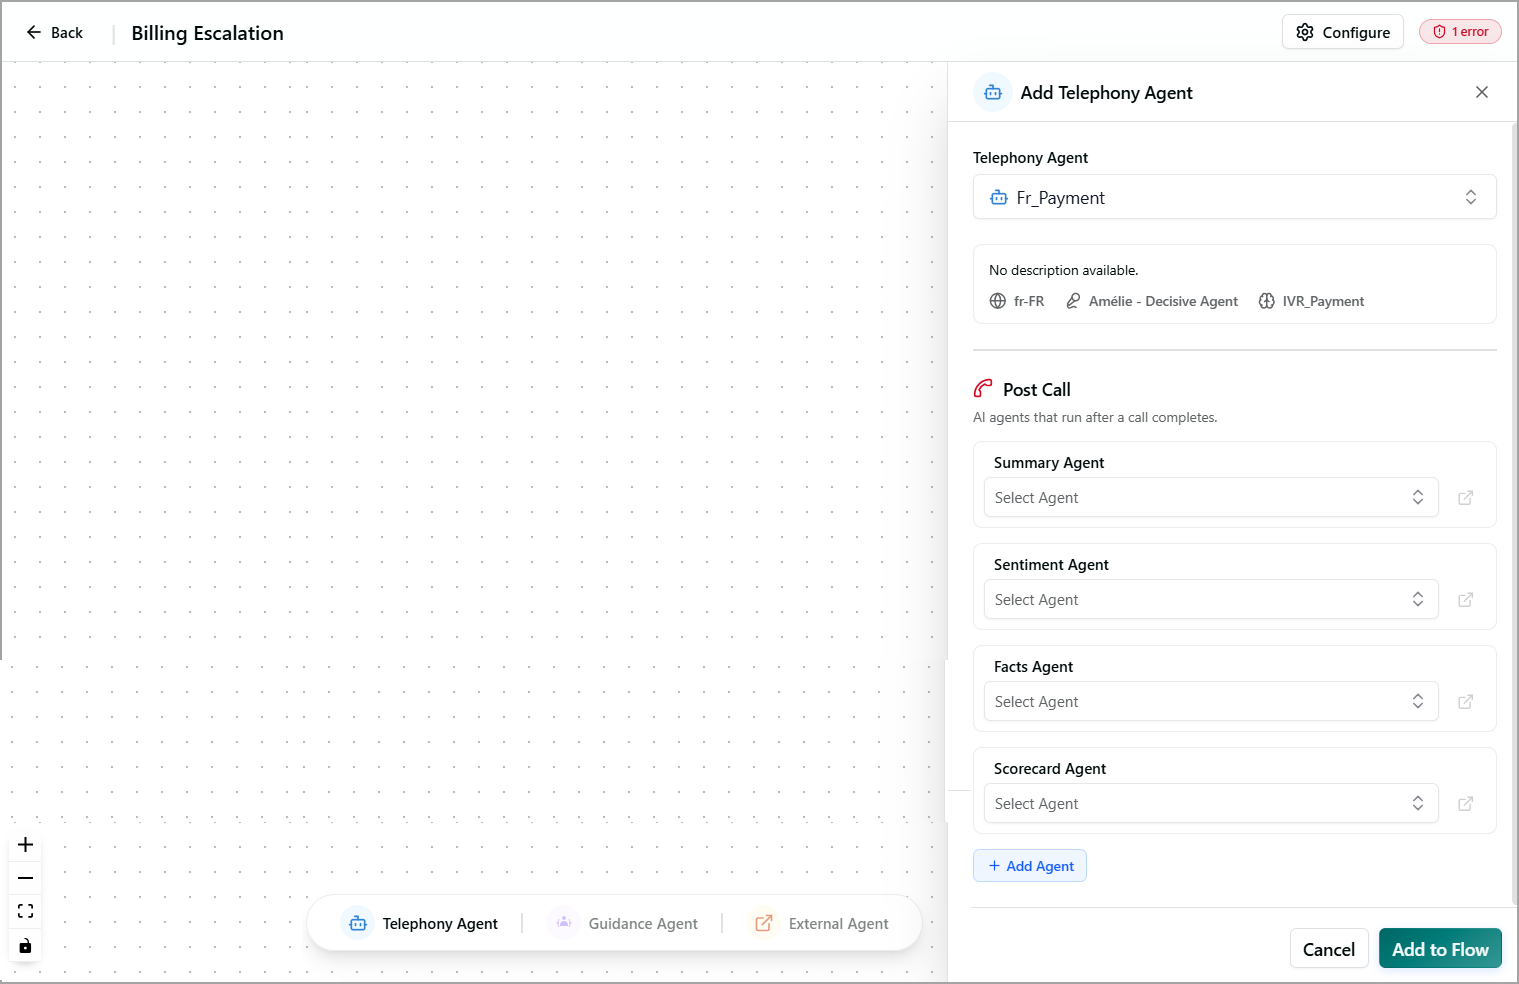
Provide the following information for the selected Agent Type:
Telephony Agent:
In the Telephony Agent dropdown list, select the specific Telephony Agent for the flow. The dropdown lists all telephony agents created in Agent Studio. When you select an agent, the following information is displayed:
Agent description
Supported language
Selected voice for your agent
Assigned AI Agent
In the Post Call section, configure the AI agents that execute automatically after the conversation ends. By default, you can configure the following AI agents:
Summary Agent – Generates a conversation summary.
Sentiment Agent – Analyzes the overall customer sentiment.
Facts Agent – Extracts key facts and important information from the conversation.
Scorecard Agent – Evaluates the agent's performance against predefined key performance indicators.
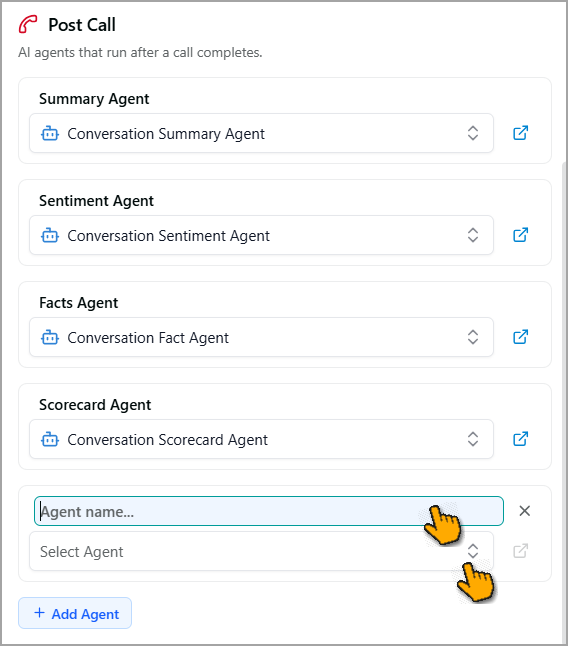
If required, click Open (
 ) next to the corresponding agent to view or modify an existing AI agent's configuration.
If required, click + Add Agent to add additional post-call agents.
In the Agent Name field, mention the name of the post-call agent.
From the Agent dropdown, select AI Agent to be used for post-call analysis.
Guidance Agent:
In the Guidance Agent dropdown list, select the specific Guidance Agent for the flow. The dropdown lists all guidance agents created in Agent Studio. When you select an agent, the following information is displayed:
Agent description
Supported language
Selected voice for your agent
Assigned AI Agent
In the Pre Call section, click + Add Agent to add the AI agents that execute before a customer conversation begins. These agents retrieve contextual insights from the customer's previous conversations, enabling the guidance agent to begin the new interaction with relevant customer context.
In the Agent Name field, mention the name of the pre-call agent.
From the Agent dropdown, select AI Agent to be used for pre-call analysis.
If required, click Close (
 ) next to the agent to remove a pre-call AI agent.
If required, click Open (
) next to the corresponding agent to view or modify an existing AI agent's configuration.In the Post Call section, follow the steps b through d mentioned above in adding telephony agents.
External Agent:
You can use an External Transfer to:
Continue customer assistance outside the current AI-guided flow.
Transfer customers to a live agent.
Transfer interactions to an external telephony system or third-party contact center.
Click Add to Flow in the Add Agent panel to add a telephony or guided agent to the flow. To cancel your activity at any time, click Cancel.
Configuring Transfers Between Telephony, Guidance, and External Agents
Transfers enable you to route customer conversations between telephony agents, guidance agents, and external destinations. When you connect two agents in the Flow Designer by linking their connection points, the Transfer configuration panel is displayed on the right side of the page, where you can configure transfer details.
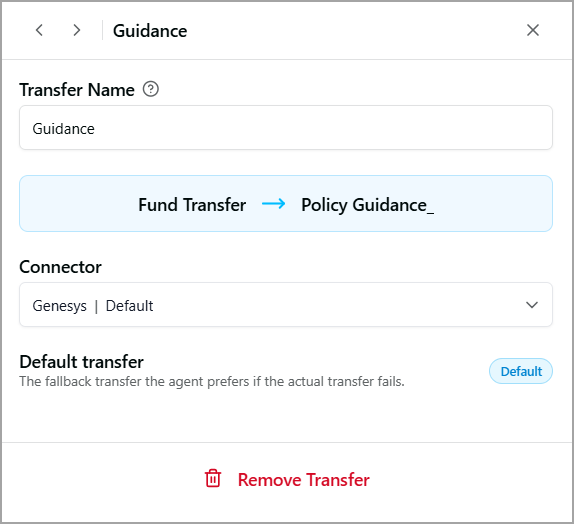
In the Transfer Name field, mention a descriptive name for the transfer connection. This name helps identify the purpose of the transfer within the flow.
The source node and destination node connected by the transfer are displayed below the Transfer Name.
From the Connector dropdown, select the telephony connector that contains the SIP address and trunk configuration required to perform the transfer.
If the transfer should be used as the fallback option when the preferred transfer fails, enable the default transfer. Only one transfer can be set as the default at a time.
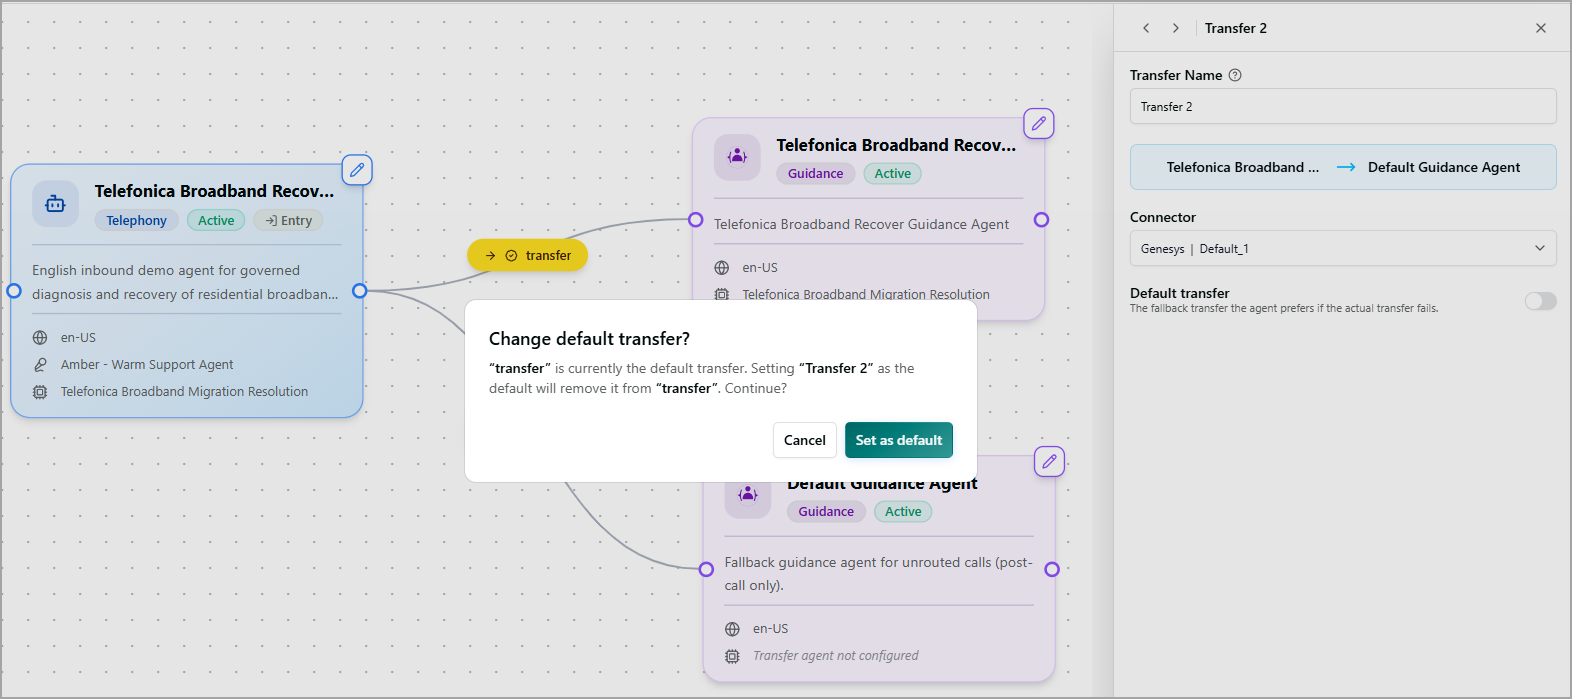
If another transfer is already set as the default, a confirmation dialog appears. Click Set as default to confirm, , or click Cancel to keep the existing default unchanged.
After you confirm, the default transfer is set to On for the selected transfer, and the setting for the previous default transfer automatically changes to Off.
Editing an Existing AI Agent in Flow
You can edit an AI agent that has already been added to a flow to update its configuration, replace the linked AI agent, or modify the associated pre-call or post-call AI agents.
Open the required flow in the Flow designer.
On the designer, locate the AI agent that you want to edit.
Click Edit (
 ) on the AI agent card. The Edit Agent panel is displayed on the right side of the page.
Modify the required settings depending on the type of Agent.
Removing an AI Agent from a Flow
Open the specific AI agent, and then click Remove from Flow at the bottom of the Edit Agent panel. Alternatively, click Delete (
 ) on the AI agent card to remove the agent from the flow. A confirmation message is displayed.
Click Remove to delete the AI agent from the flow. To cancel your activity at any time, click Cancel.
If the selected agent is the entry agent, the Remove Entry Agent confirmation dialog is displayed.
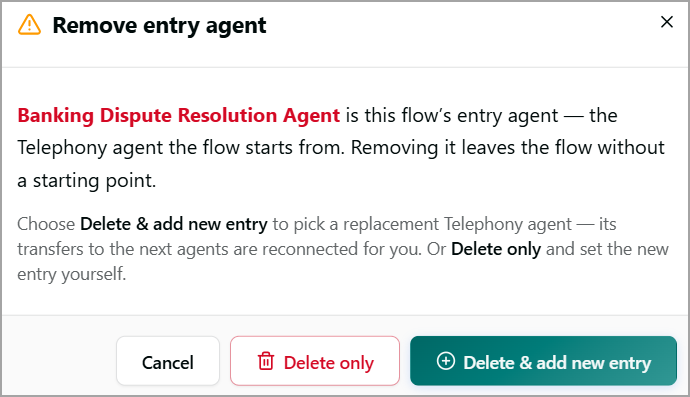
Select one of the following options:
Delete & add new entry – Removes the current entry agent and allows you to select another telephony agent as the new entry point. Any existing transfers to downstream agents are automatically reconnected.
Delete only - Removes the entry agent without assigning a replacement. After the agent is removed, you must manually designate another telephony agent as the flow's entry point.
Cancel - Closes the dialog without making any changes.