Conversation Locks
Conversations can be locked while they're being captured, once they're captured, automatically using Locks Policies, and in bulk. Locks prevent manual or automated deletion of your conversations, which is great for legal holds, complaint resolutions, specialized retention, etc. Conversations can then be unlocked to allow deletion. This article details everything you'll need to know when working with locks.
For information on Locks Policies, click here.
Lock Recorded Conversations
To lock a captured conversation, in the Properties panel, either:
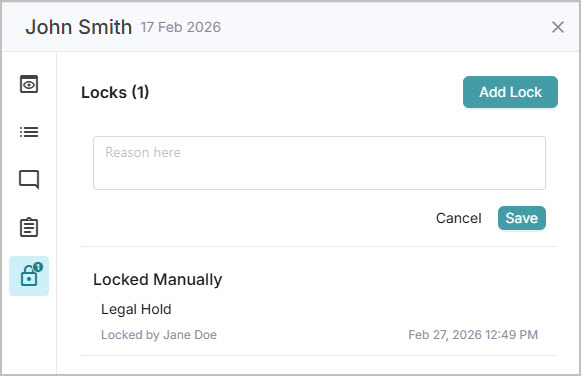
Click the Locks icon, then click Add Lock and enter a reason for the lock (used to identify individual locked items) and click Save.
In the Summary tab, click Actions > Add Lock and enter a reason for the lock (used to identify individual locked items) and click Add Lock.
Tip
Try to keep the reason for your lock short, simple, and consistent (e.g., LegalHold#245 or Complaint#347).
Lock reasons can be searched for in the Recorded tab, just select by Transcript, Annotation & Lock Reason in the search dropdown and enter your text in the search bar. Your results are then filtered for matching conversations.
The Locks icon shows a number that indicates any current locks applied to the recording: 0 if no locks are present and a number greater than zero if there are locks. Click the Locks icon to show all current locks, add another lock, or remove a lock (if you're authorized).
 |
Tip
In your search results, a Lock flag is displayed to the left of all calls that have locks. For more information on flags, see Flags.
The following video demonstrates how to lock and unlock captured conversations.
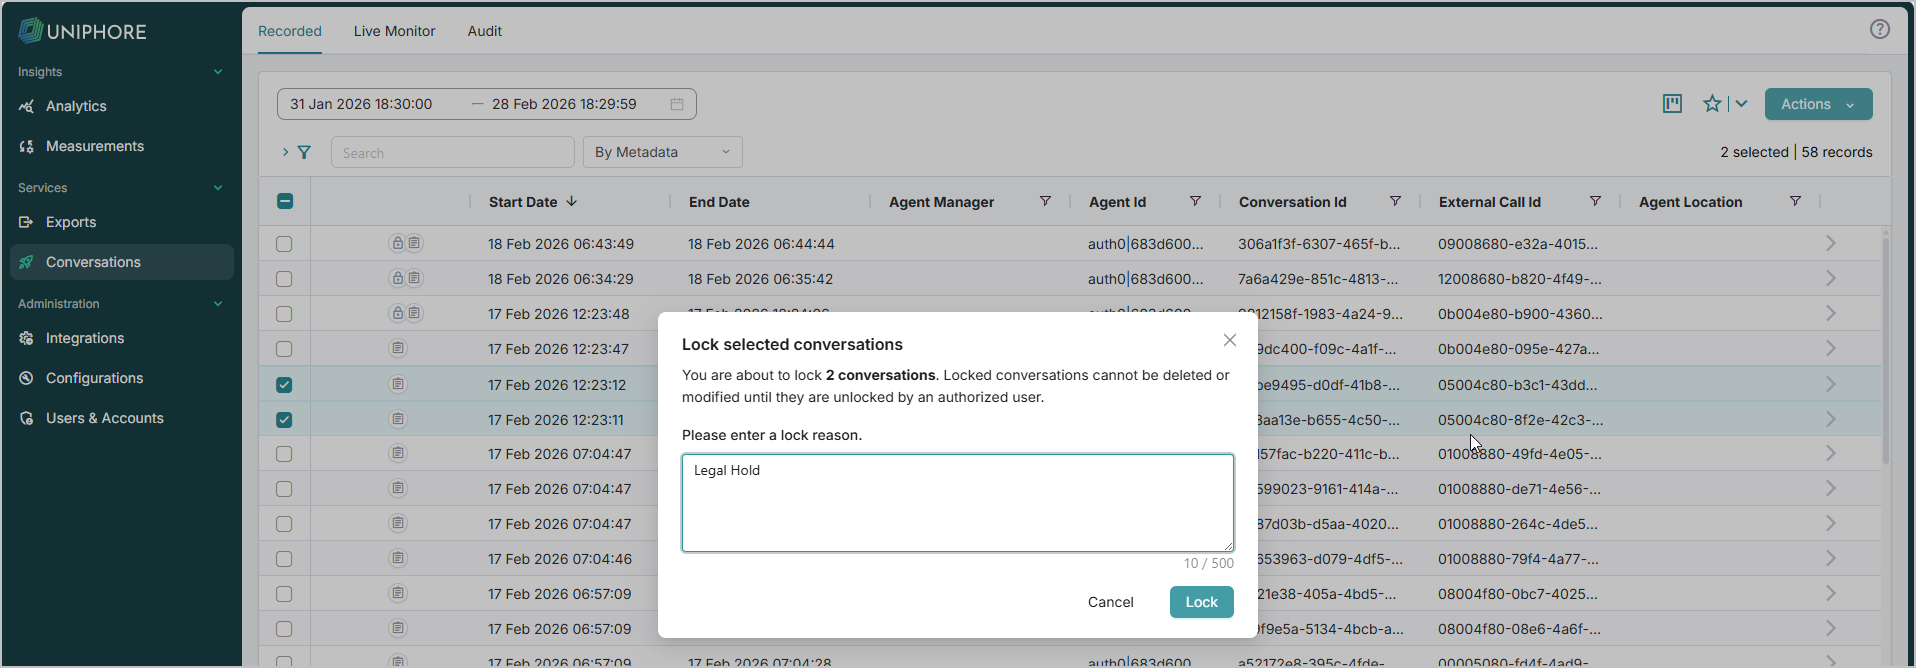
Conversations can also be locked in bulk. To lock multiple conversations at once, using the same lock reason, go to Conversations > click Recorded at the top if you’re not there already. Then use the selection boxes to the left of each call to select the conversations to lock, click the Actions dropdown, and select Lock. In the dialog box, review the quantity of conversations that are to be locked and enter a lock reason, then click Lock to confirm.
Lock Live Conversations
To lock an ongoing conversation in Live Monitor:
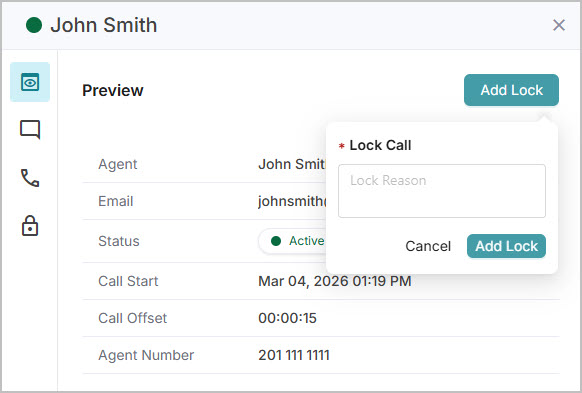
Click Lock in the Summary tab and enter a reason for the lock (used to identify individual locked items), and click Add Lock to confirm.
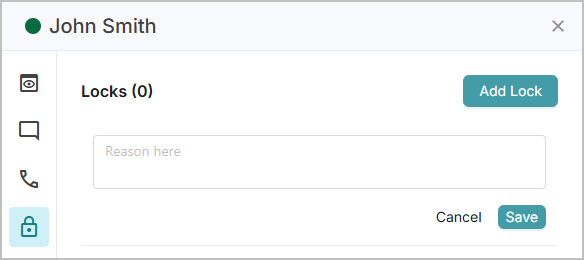
Click the Locks icon to go to the Locks tab, then click the Add Lock button and enter a reason for the lock (used to identify individual locked items), and click Add Lock to save the lock.
Tip
Try to keep it short, simple, and consistent, for example: LegalHold#245 or Complaint#347.
Lock reasons can be searched for in the Recorded tab, just select by Transcript, Annotation & Lock Reason in the search dropdown.
The Locks icon includes a number that indicates any current locks applied to the recording, 0 if there are no locks, and a number greater than zero if there are locks. Click the Locks icon to show all current locks, add another lock, or remove a lock. Once the locked call has ended in Live Monitor, use Recorded to review the locks.
 |  |
The following video demonstrates how to lock an agent's live call to prevent it from being automatically or manually deleted.
Export Locked Conversations
Exporting locked conversations works the same as any other conversation export. When exporting locked conversations, separate metadata files are included for each conversation containing lock-specific information such as lock status and descriptions. The type of file exported depends on the export settings, either CSV or JSON.
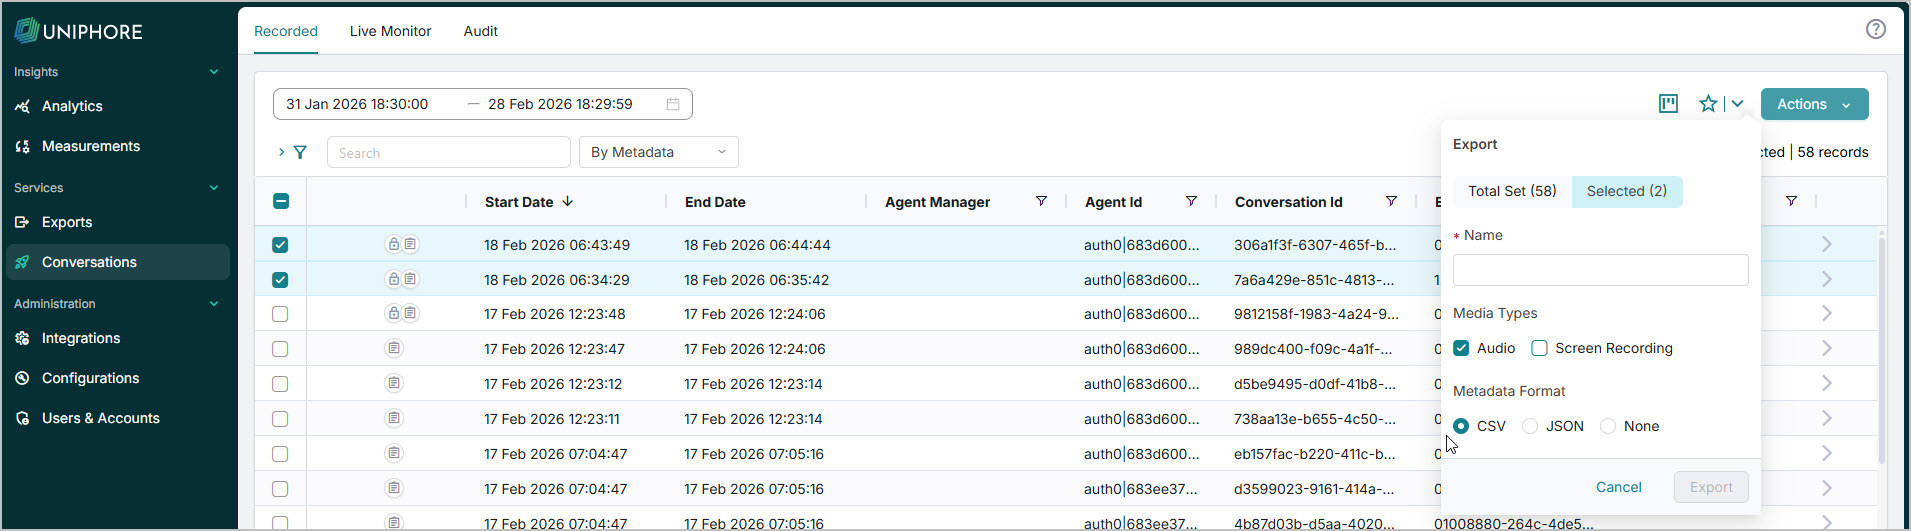
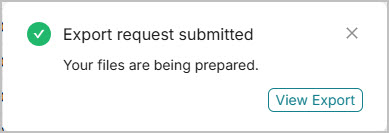
To export, go to Conversations > click Recorded at the top if you’re not there already. Then use the selection boxes to the left of each call to select the conversations to export, click the Actions dropdown, and select export. Enter a name for your export, select your Media Types, and Metadata Format, and click Export. Your export is then available on the left, under Exports.
For more information on exporting your conversations, click here.
 |
Unlock Locked Conversations
For a conversation to be unlocked and made ready for deletion, all locks must be removed.
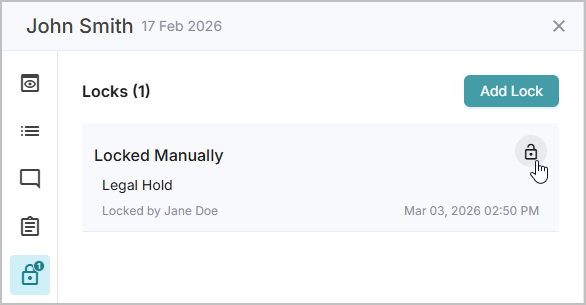
When an Account Administrator removes the locks for a conversation, all locks can be viewed and removed in bulk or individually, allowing the conversation to be deleted, either manually or automatically via Purge Policy. When a user with fewer than Account Administrator permissions removes the locks for a conversation, the user can only view and remove the locks they created. Other locks may still be applied to the conversation that they can not see, preventing it from being deleted.
Locked conversations display the Lock flag in the conversation list. This flag is visible to all users who can view the conversation. If a user does not have the required permission to view the locks on a conversation (because another user added a lock and they are not an Account Administrator), the Lock flag is still displayed.
To unlock conversations, go to Conversations > click Recorded at the top if you’re not there already. Then either:
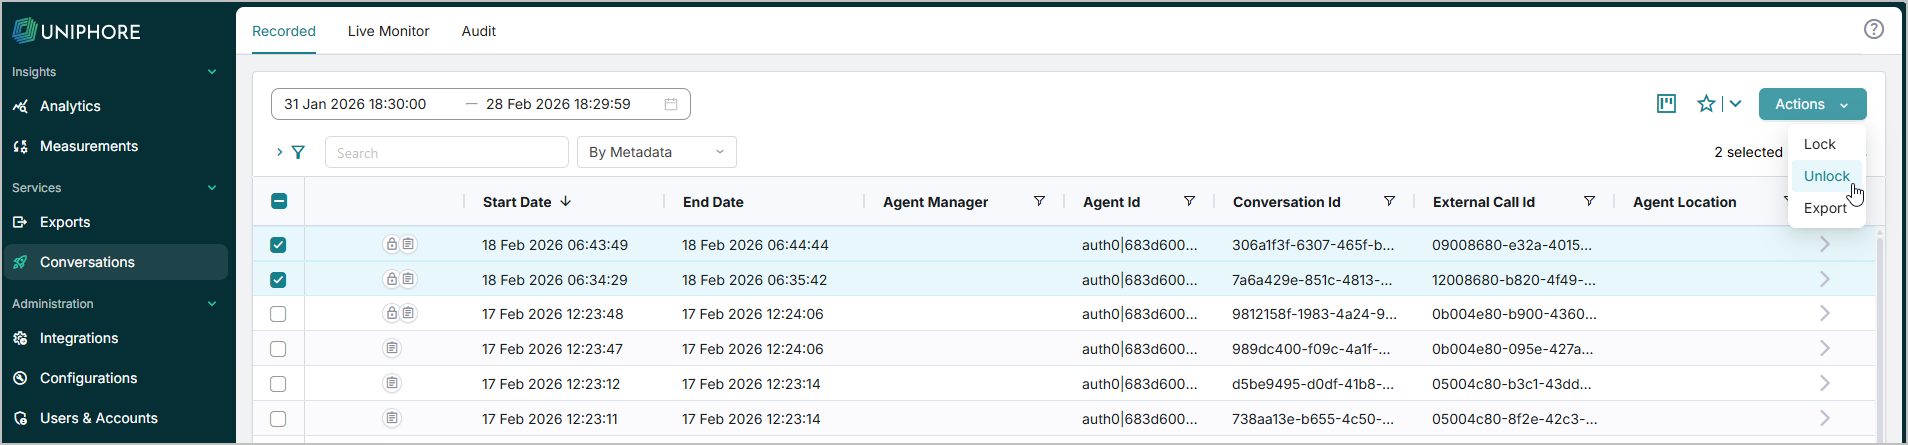
Unlock in bulk, select the conversations you want to unlock using the selection boxes to the left of each call, click the Actions dropdown, and select Unlock. Then, in the confirmation dialog, see the quantity of conversations you are about to unlock, and select Unlock to confirm.
Click > to the right of a conversation to open the Properties panel. Select the locks tab to see a list of locks applied to the conversation. Hover over the lock to remove and click the Unlock icon, then select Yes to confirm.