Connector Configuration
The Connector Configuration page lets you select a telephony platform and configure a SIP trunk connector. You can map SIP addresses to route voice calls through the selected platform.
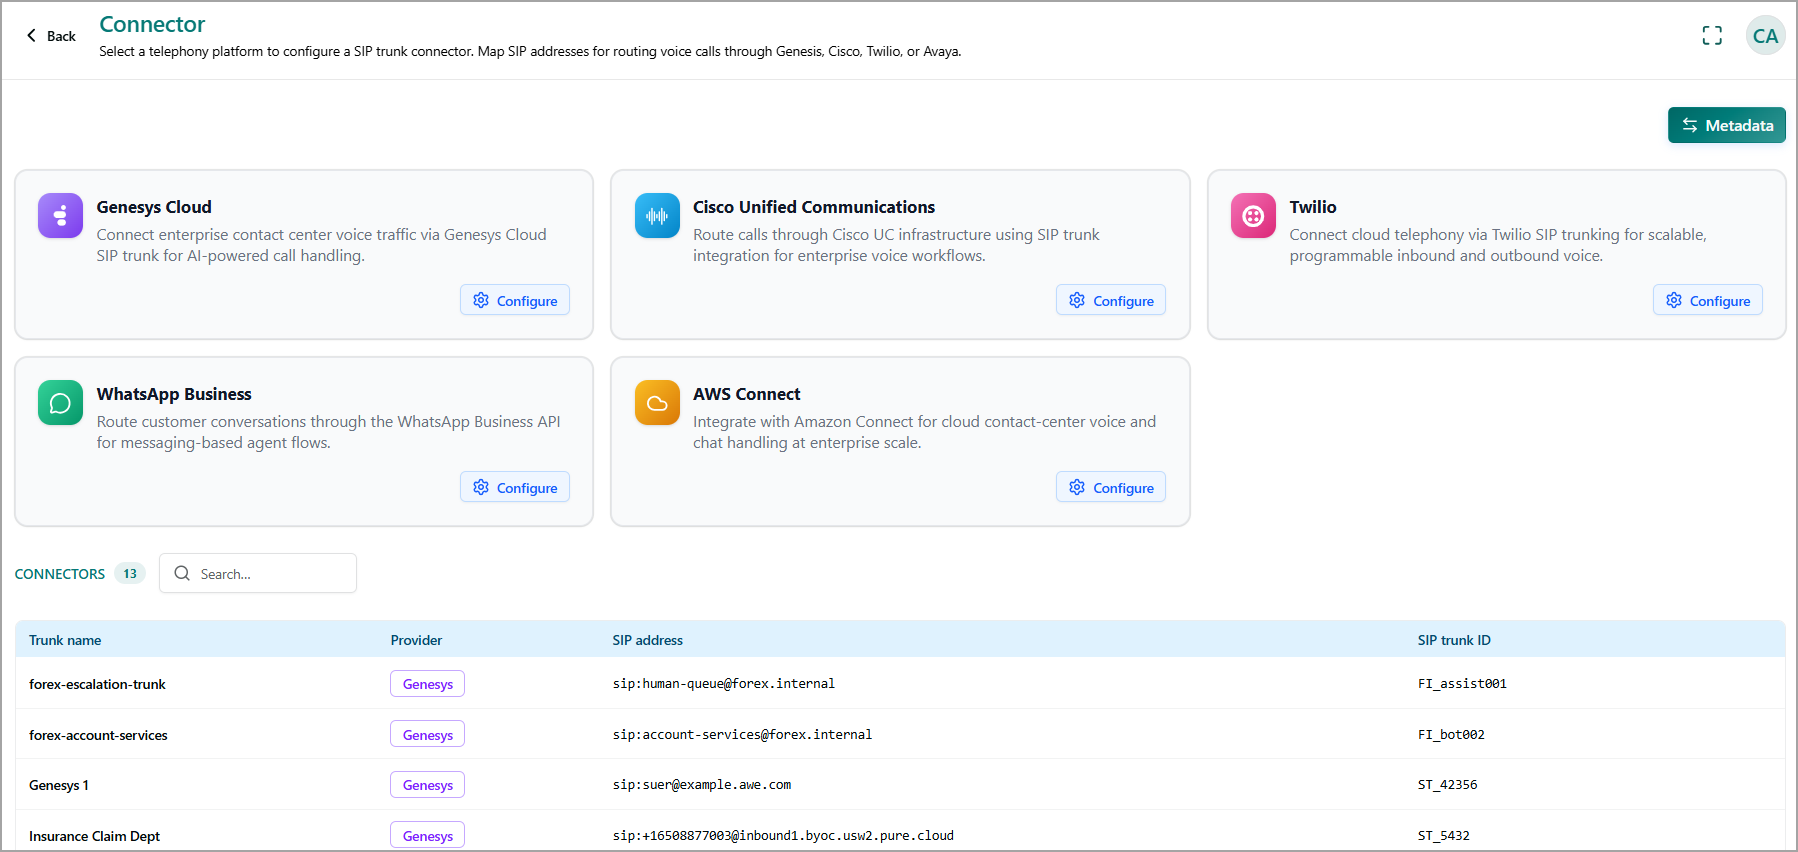
The page displays a card for each supported telephony or messaging platform:
Genesys Cloud
Cisco Unified Communications
Twilio
WhatsApp Business
AWS Connect
Each card provides a brief description of the integration and includes a Configure button. Click Configure for the platform you want to use and follow the configuration steps.
Configured Connectors
The Connectors section displays the SIP trunk connectors that you have already configured. A count badge indicates the number of configured connectors.
Use the Search field to quickly find a connector. The table provides the following information:
Trunk Name - Name assigned to the SIP trunk connector.
Provider - Telephony or messaging platform associated with the connector.
SIP Address - SIP address configured for the connector.
SIP Trunk ID - Unique identifier assigned to the SIP trunk.
To update an existing connector, hover over the corresponding connector row and click Edit. You can update the Trunk Name, SIP Address, or SIP Trunk ID.
To remove an existing connector, click Delete in the corresponding connector row.
Configured connectors are used when setting up transfers between Telephony, Guidance, and external agents in Flows. For more information about flows, refer to Create a New Flow.
Configure a Connector
You can configure a SIP trunk connector for a supported telephony platform.
In the Connector Configuration page, select the platform you want to configure.
Click Configure on the corresponding platform card. The Configure <Platform> dialog opens. Fields marked with an asterisk (*) are required.
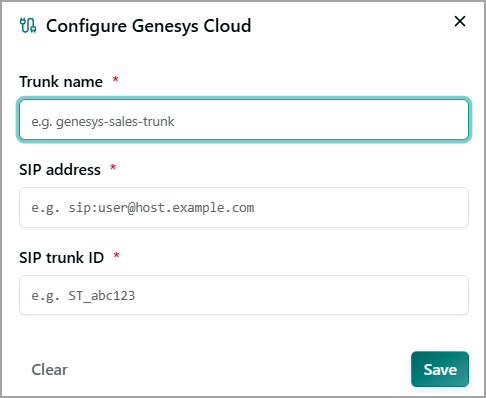
Enter the required connector details:
Trunk Name: Enter a unique, descriptive name for the SIP trunk. For example, genesys-sales-trunk.
SIP Address: Enter the SIP address used to route calls. Use the following format: sip:user@host.example.com.
SIP Trunk ID: Enter the identifier of the SIP trunk. For example, ST_abc123.
Click Save. The connector is saved and added to the Connectors list. To cancel the configuration without saving your changes, click Clear.
Connector Metadata Generalization
Connector Metadata Generalization lets you map SIP headers from a telephony platform to Uniphore standard keys. This mapping normalizes metadata from different connectors, such as Twilio and Genesys Cloud, into a consistent set of fields that Customer Service AI can use regardless of the platform that originated the call.
View Connector Metadata Mappings:
From the Connector Configuration page, click Metadata to open the Connector Metadata Generalization panel.
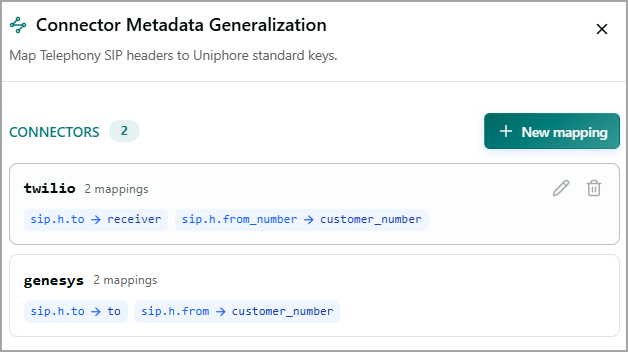
This panel displays the following information:
Connectors count - A badge showing the number of connectors that currently have metadata mappings defined.
Mapping Cards - A card is displayed for each connector that has existing metadata mappings. Each card shows:
The connector name.
The number of mappings, such as 2 mappings.
Each metadata mapping as a chip in the following format:
telephony_header → uniphore_key
Add a New Mapping:
You can create one or more metadata mappings for a connector by mapping telephony SIP headers to Uniphore standard keys.
Click New mapping to open the New Connector Generalization section.
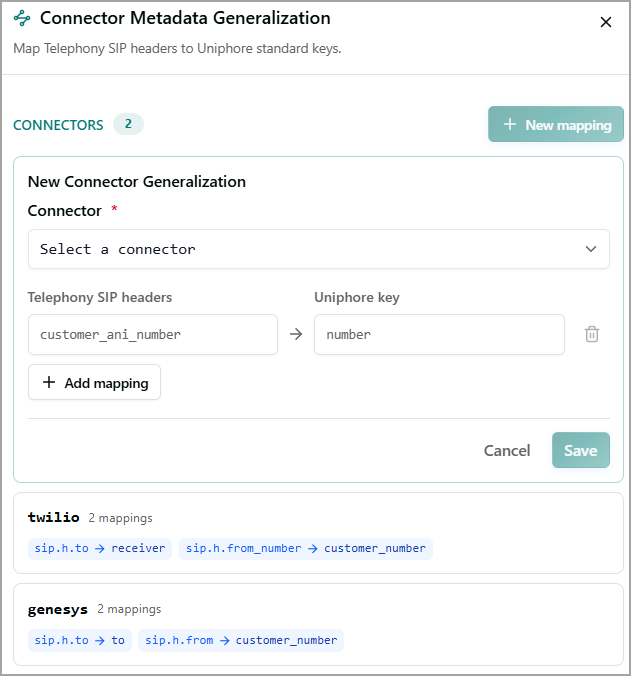
From the Connector dropdown, select the connector to which the mapping applies.
In the Telephony SIP headers field, enter the SIP header name provided by the telephony platform.
In the Uniphore key field, enter the corresponding Uniphore standard field name.
To add another SIP header for the same connector, click Add mapping and enter the corresponding header and Uniphore key.
To remove a mapping before saving, click Delete
 next to the mapping.
Click Save to save the mappings. To cancel your activity at any time without saving, click Cancel.
Edit Connector Metadata:
Click Edit in the respective mapping card to edit existing metadata mappings.

Update the required SIP header or Uniphore key, and then save your changes.
Delete Connector Metadata
Click Delete in the respective mapping card to delete the existing metadata mappings. All mappings configured for the selected connector are removed.