Add Integrations to an Account
To bring data into your account, you need to configure an integration. The steps below explain how to add an integration using the Uniphore Admin Portal.
Important
Prerequisite and subsequent steps may be required depending on the integration. Please see the relevant Integration topic for full instructions on configuring an Integration.
To Add the Integration to an Account:
Go to https://ng.uniphore.com/admin and log in with Partner Admin credentials:
Enter the Organization Name for your Partner Admin Portal.
Enter your Email address and Password, select the I'm not a robot check box, and then click Continue.
Tip
If you know the account Tenant ID, go to https://ng.uniphore.com/admin/account/ followed by the Tenant ID and skip to Step 6 below. For example https://ng.uniphore.com/admin/account/8ff60843-9420-4d52-a4a0-c187ebfd99c4.
Go to Users & Accounts and click Accounts at the top.
Using the Search box, search for and find the account that you want to add the integration to.
Click the > arrow to the right of the account to open the Account Details page.
Click the Integration icon
 in the panel menu and click Edit Integrations.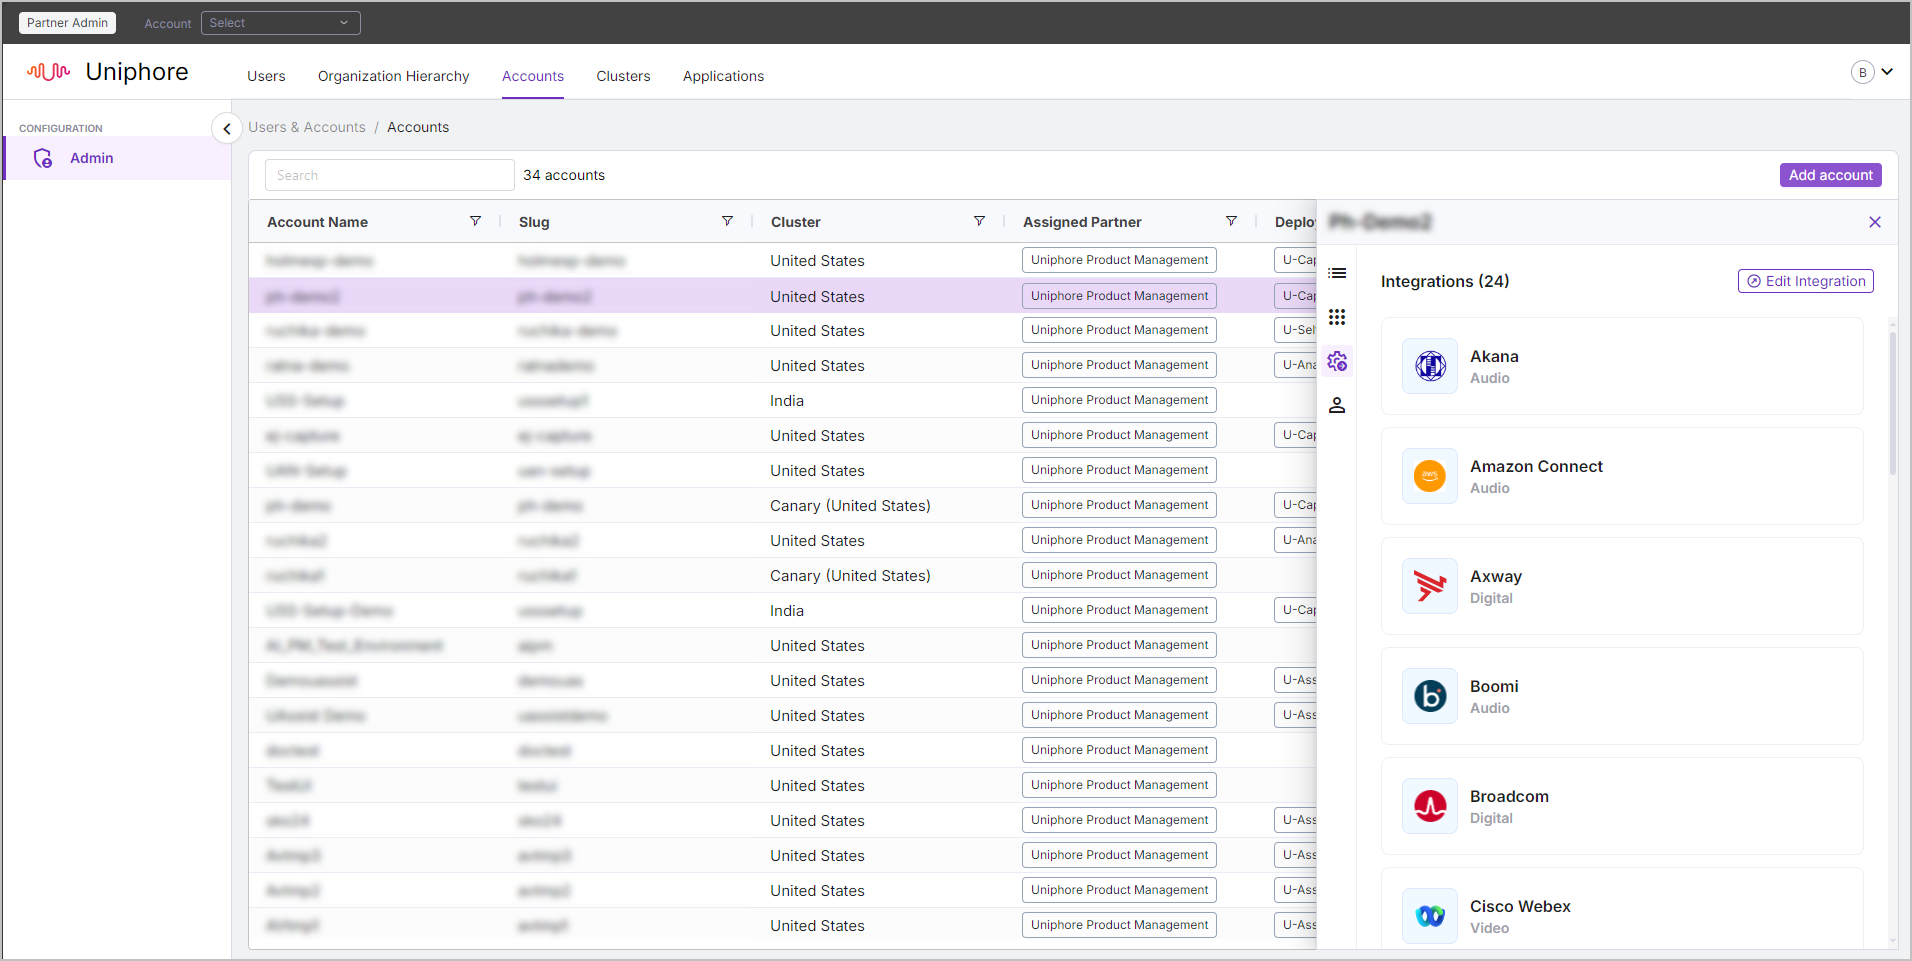
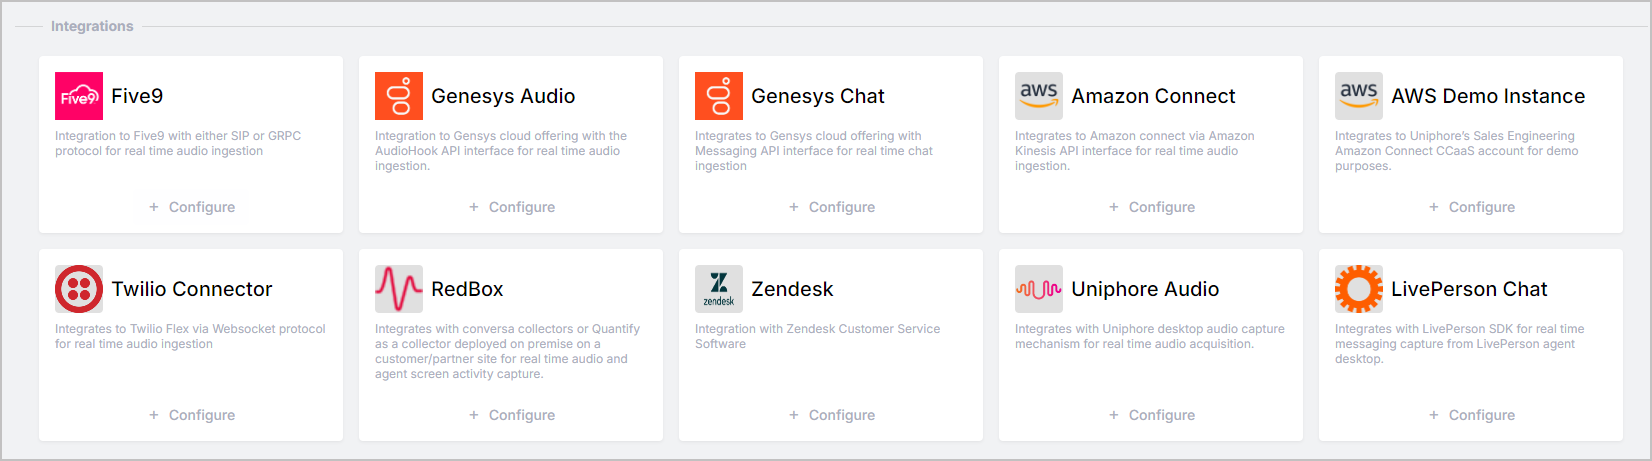
Under Integrations, find the Integration you want to add and click + Configure under the relevant integration.
Note
Integrations that connect directly through the Audio Connector — such as Genesys Cloud — have their own media integration. For integrations that connect through one or more Collectors, use the Red Box integration.
Tip
If you're setting up a demo account, configure the Red Box integration, select the required products from the Products dropdown, set the Channel ID to the Tenant ID of the account, set Default Language Code to EUU (English- USA-Uniphore), and set Environment to Prod.
Enter the required settings for the media integration. These settings may vary depending on the type of integration:
The required settings for integrations connecting directly through the Audio Connector are covered in the relevant Integration topics, see the specific integration document under Deployment of Integrations here.
The required settings for integrations connecting through one or more Collectors are covered in Set Up a Collector Integration below.
Tip
Depending on the Products selected in the integration settings, the Save Audio setting is available. If selected then the captured audio from your integration is stored in S3 storage.
If U-Self Serve is the only product selected, you don't need to consider this setting.
If Real-Time Guidance Agent is selected, then the setting is available and optional.
If Communication Recording Agent is the only product selected, then the setting is ticked by default and can not be un-ticked.
Once you've reviewed and confirmed the details, click Save.
The media integration has been added to the account, but there may be additional steps to complete the configuration. For full details, refer to the relevant integration guidelines topic, see the specific integration document under Deployment of Integrations here.
Set up a Collector Integration
The steps below outline how to add a Collector integration to an account via the Uniphore Admin Portal. Collector integrations use the "Red Box" Media Integration. Prerequisite and follow-up steps may be required depending on the specific Collector integration. For detailed configuration instructions, refer to the relevant Integration Guidelines topic here.
To Add the Media Integration for a Collector Integration:
Go to https://ng.uniphore.com/admin and log in with Partner Admin credentials:
Enter the Organization Name for your Partner Admin Portal.
Enter your Email address and Password, select the I'm not a robot check box, then click Continue.
Note
If you know the account Tenant ID, go to https://ng.uniphore.com/admin/account/ followed by the Tenant ID and skip to Step 6 below. For example https://ng.uniphore.com/admin/account/8ff60843-9420-4d52-a4a0-c187ebfd99c4.
Go to Users & Accounts and click Accounts at the top.
Using the Search box, search for and find the account that you want to add the integration to.
Click the > arrow to the right of the account to open the Account Details page.
Click the Integration icon
in the panel menu and click Edit Integrations.Under Integrations find Red Box and click + Configure.
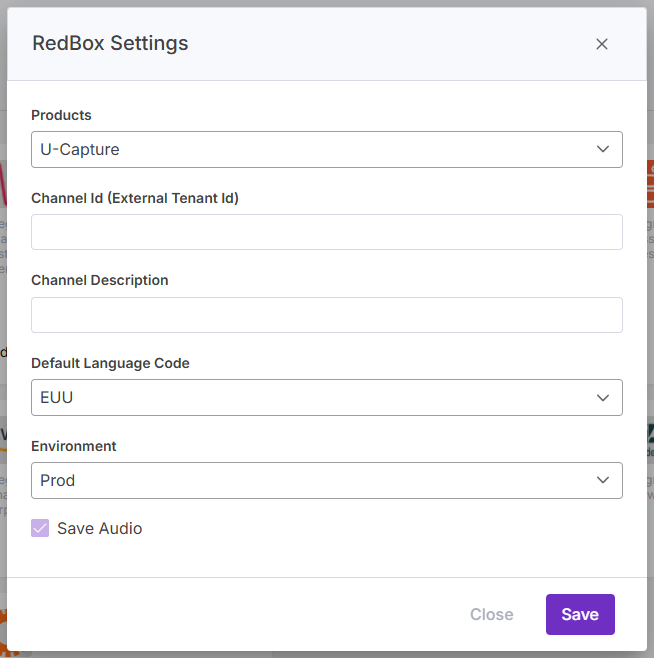
Configure the Integration settings:
Products - Select Communication Recording Agent from the dropdown.
Channel ID - Enter the channel ID used by the integration.
Channel Description - Enter a friendly description for the channel.
Default Language Code - Select a default language code for your integration from the dropdown. If the integration provider does not provide a language then the default language code is used to determine what language the ASR used to transcribe the call.
For English-USA, select EUU (EU-Uniphore) from the dropdown.
Environment - Select the required environment from the dropdown, Dev for development / engineering, Prod for production, or Test for testing / QA.
Note
The Save Audio option is enabled by default for Communication Recording Agent integrations. This ensures that captured calls are retained in the S3 storage location (subject to Recording Policies).
Once you've reviewed and confirmed the details, click Save.
The media integration has been added to the account, but there may be additional steps to complete the configuration. For full details, refer to the relevant integration guidelines topic here.