Working with Channels
Channels serve as a communication interface connecting AI Agents to end users. Currently, Self Serve supports Chat and Voice channels, which are available by default.
Chat: The Chat channel allows the AI Agent designer to test the conversation flow of the AI Agent in text format through a web browser-based URL.
Voice: The Voice channel enables you to deploy an AI Agent, allowing users to call a designated phone number (DID) and speak directly with the AI Agent. To enable this, you need to configure the DID (Direct Inward Dialing) number in the Enterprise Customer's Telephony system and add a routing plan to SIP transfer the calls landing in the DID to the Self-Service Agent SIP URL, where the voice call will be processed. In the Self-Service Agent UI, you need to configure the ASR, TTS, and CX settings, enabling the caller to engage in a two-way voice conversation with the Self-Service Agent.
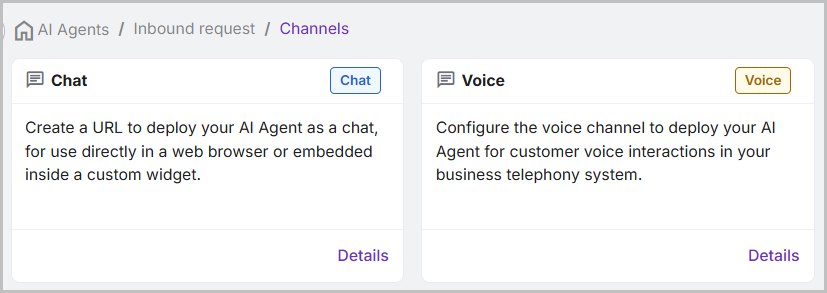
To configure a Channel for an AI Agent, select the AI Agent of your choice and click Details.
Click the Channels tab, and the default Chat and Voice channel cards will appear.
Click Details in the Chat or Voice channel, respectively, to configure the settings.
Configure Chat Channel
In the Chat channel, Connectivity settings and UI customization can be configured, and a URL can be generated for deployment.
Connectivity
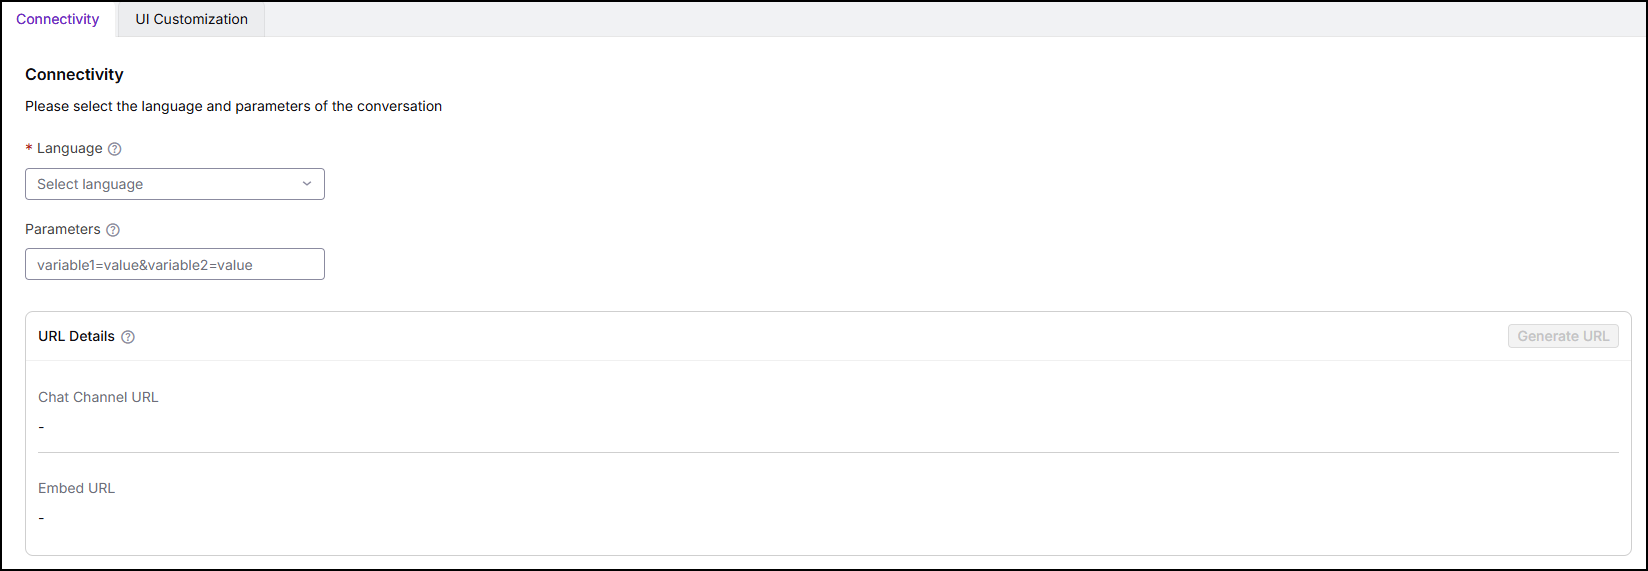
In the Connectivity section, you can configure the following:
Language: Select the language of conversation from the dropdown. Currently supports English-US only. This is a mandatory field.
Note
The Parameters field is currently unavailable.
Click Generate URL, to create a chat URL based on the selected language and parameters. The Chat Channel URL and Embed URL will be displayed. You can copy the Chat Channel URL to open the chatbot in a browser to start testing the conversation flow.
UI Customization
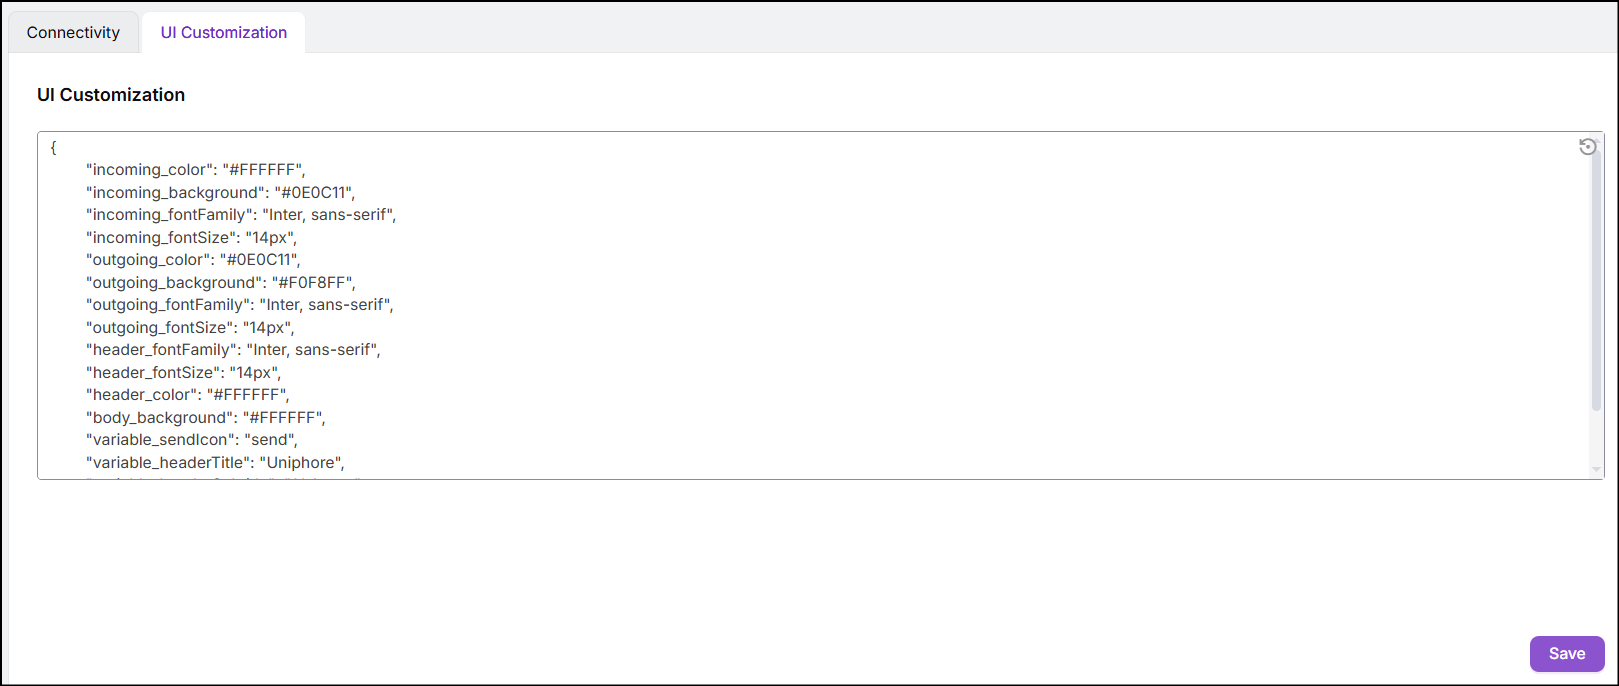
In the UI Customization tab, you can personalize the chat page interface by modifying the default values to suit your specific requirements.
Click Save to apply the UI changes.
Configure Voice Channel
To configure a Voice channel for an AI Agent, you should set up Trunk settings, SIP headers, ASR/TTS Settings, and CX Settings.
Trunk Settings
In the Trunk Settings, you should configure the DID Number and CIDR blocks of the source telephony system from which the SIP requests will be received.
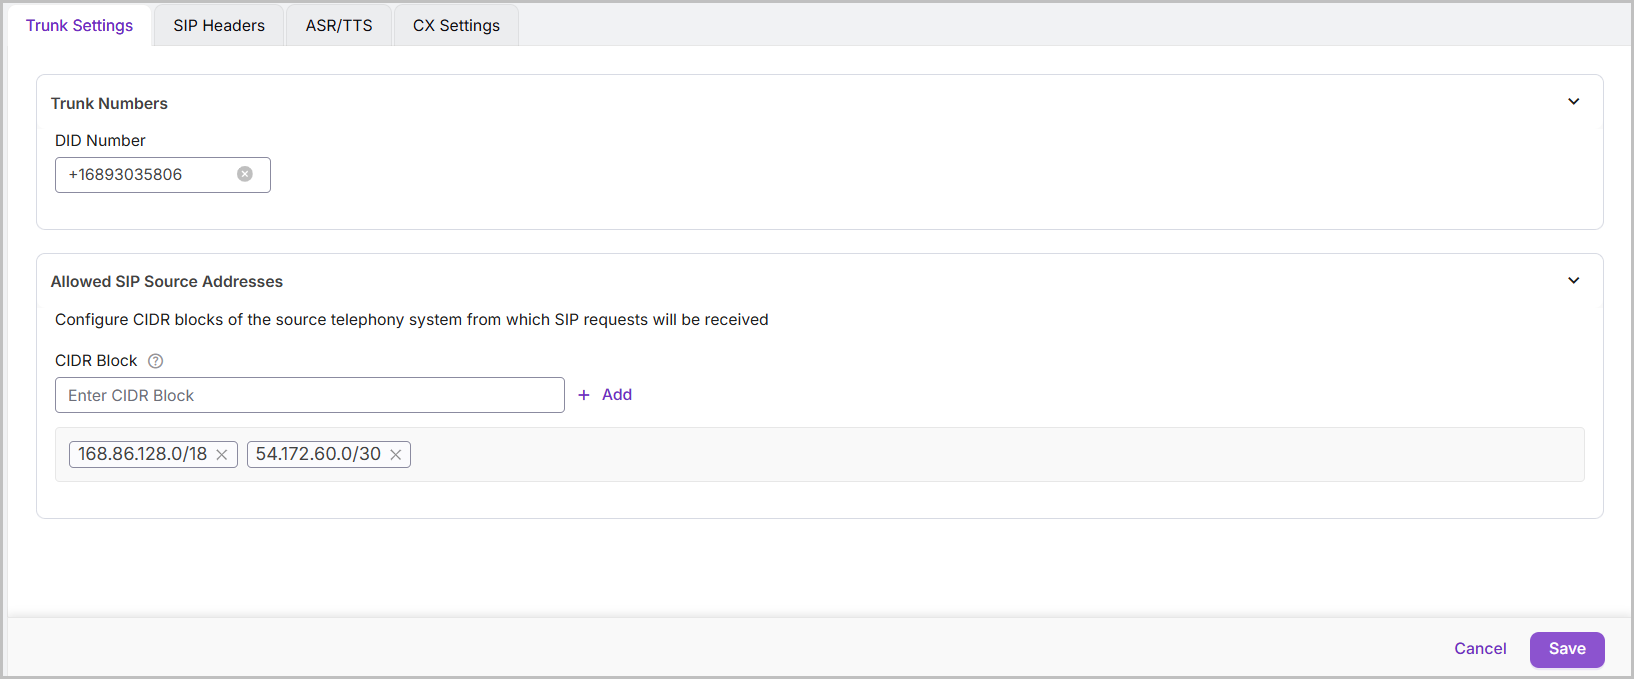
In the Trunk Numbers section, enter the DID Number.
In the Allowed SIP Source Addresses section, enter the CIDR Block and click +Add. Add the CIDR blocks of the source telephony systems that are allowed to send SIP requests. To know the CIDR Blocks, refer to your source telephony provider's documentation.
SIP Headers
In the Incoming SIP header data, you can map a SIP Header Name to a Session State Variable defined in Agentic Systems > Session State. For example, if a SIP header, such as SIP.phone number, contains the caller’s phone number in the SIP transfer, it can be mapped to a Session State Variable, like Phone number, defined in Agentic Systems Session State. For Outbound calls, parameters such as Caller.Firstname can be mapped to the corresponding Session State Variable, which represents the caller’s first name.
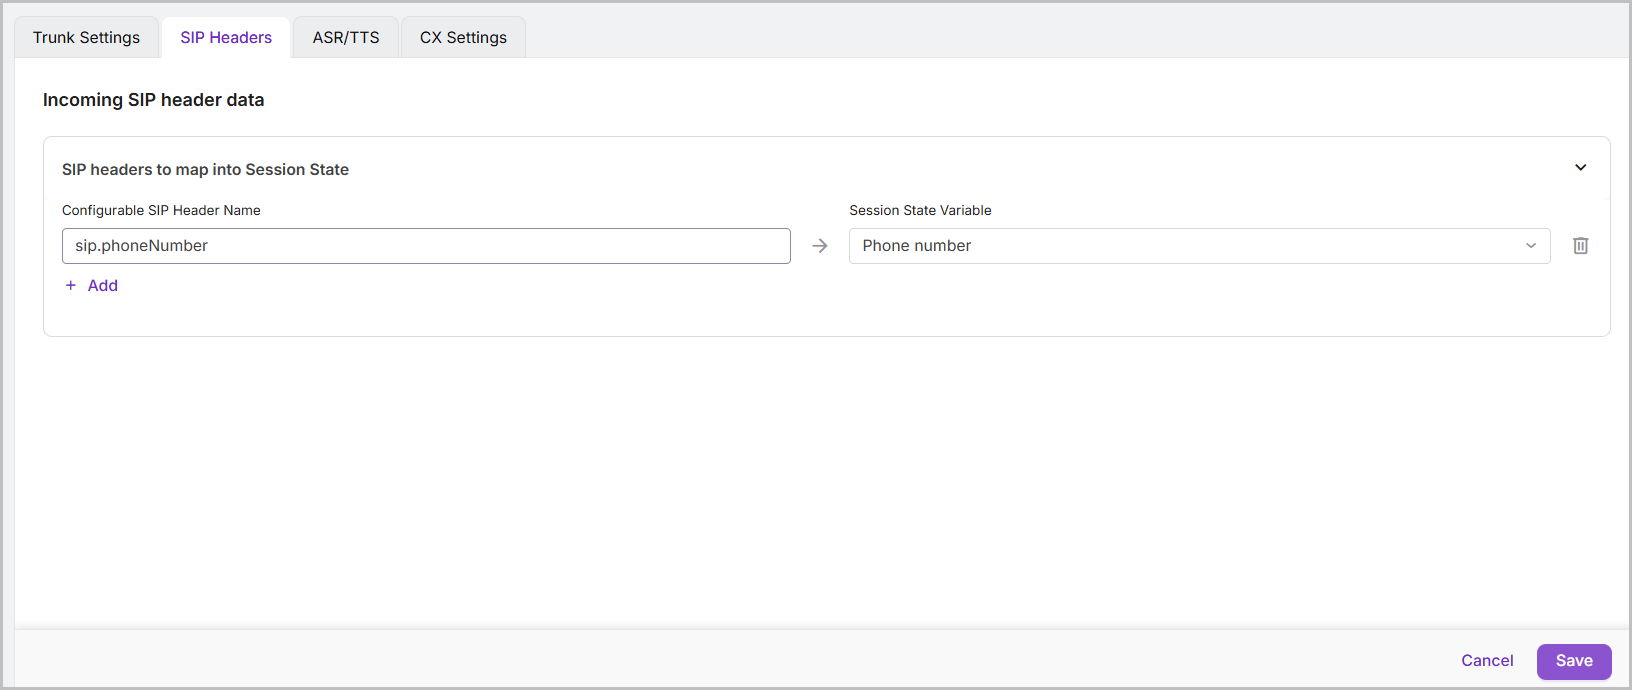
In the Configurable SIP Header Name, enter the SIP header parameter that you need to map to a session state.
In the Session State Variable, select the corresponding value defined in the Agentic Systems > Session State.
Click + Add to add more SIP headers and click Delete to delete a SIP header.
Click Save.
ASR/TTS Settings
In the ASR/TTS tab, you can configure the ASR engine and TTS settings. The ASR and TTS license details should be added during tenant provisioning.
Note
Reach out to your Uniphore support representative to add ASR and TTS licensing details.
Important
Select the language for which the ASR/TTS settings need to be configured.
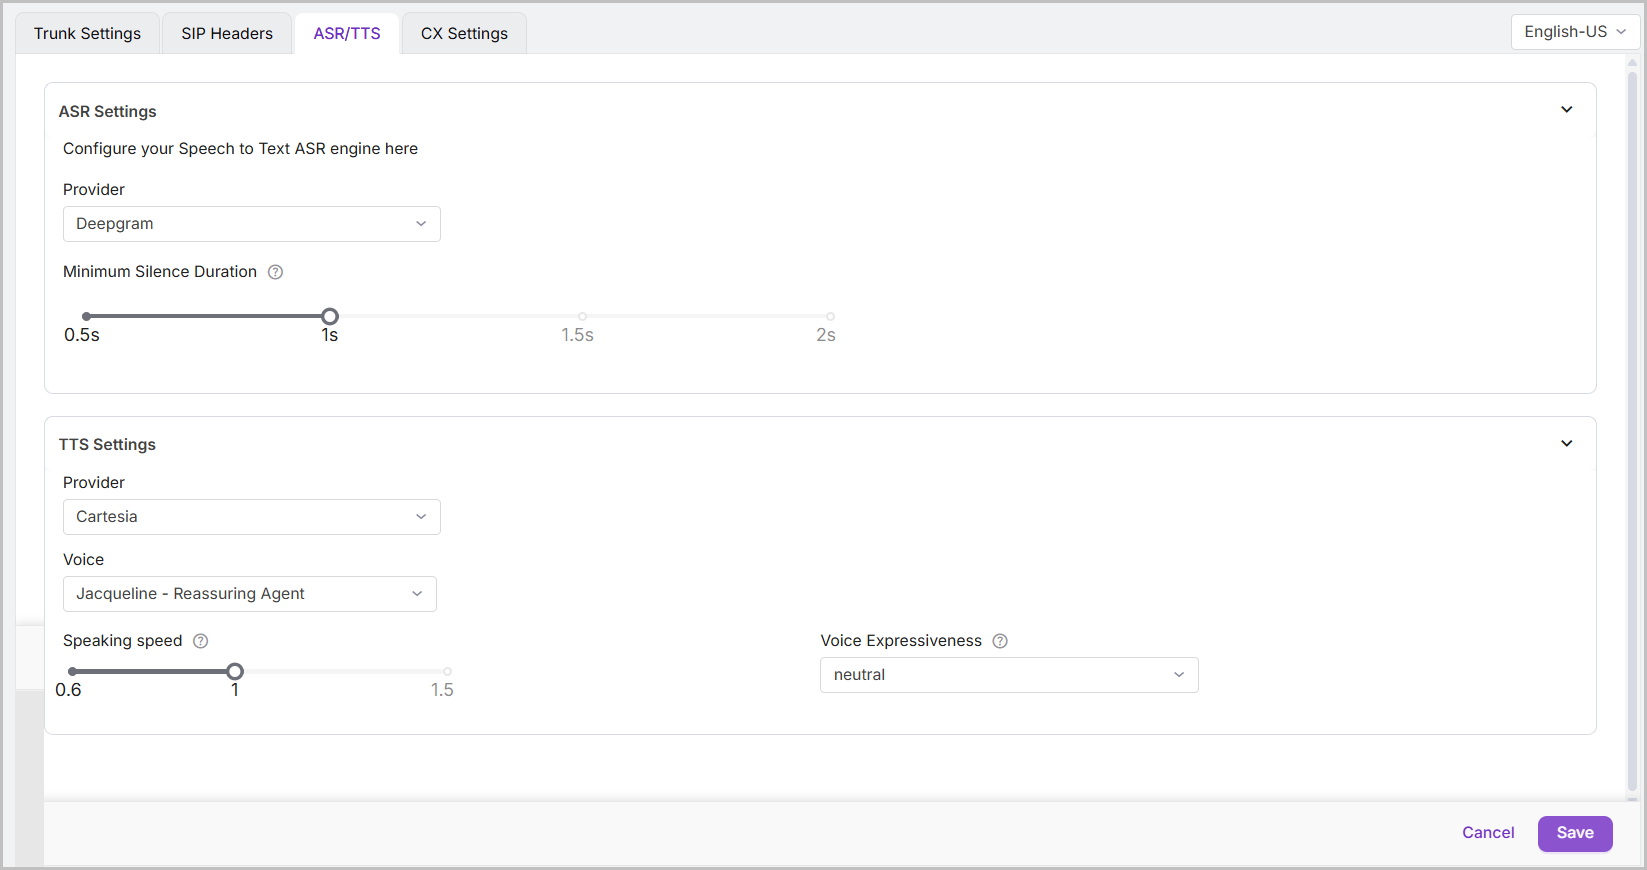
In the ASR Settings section, you can configure your Speech to Text ASR engine.
Select the ASR Provider from the dropdown. Currently supports Deepgram only.
Adjust the Minimum Silence Duration as per your requirement. This duration of silence (in seconds) is considered as end of user input. For example, if 1.0 seconds is set as the Minimum Silence Duration, and if the user speaks after the specified time, the input given by the user will be ignored.
In the TTS Settings, select a Text to Speech Provider from the dropdown. Currently supports Cartesia only.
In Voice, select the voice of your choice from the dropdown.
On the Speaking speed bar, adjust the speaking speed for the voice according to your requirements. The available range is between 0.6 and 1.5. The default range is set to 1.0. The AI Agent's response is based on the set speed.
In Voice Expressiveness, select a voice emotion to change the original speaker's tone. The available emotions are neutral, angry, excited, content, sad, and scared.
Click Save to complete the ASR/TTS configuration.
Configure CX Settings
In the CX Settings tab, you can configure parameters related to the customer experience.
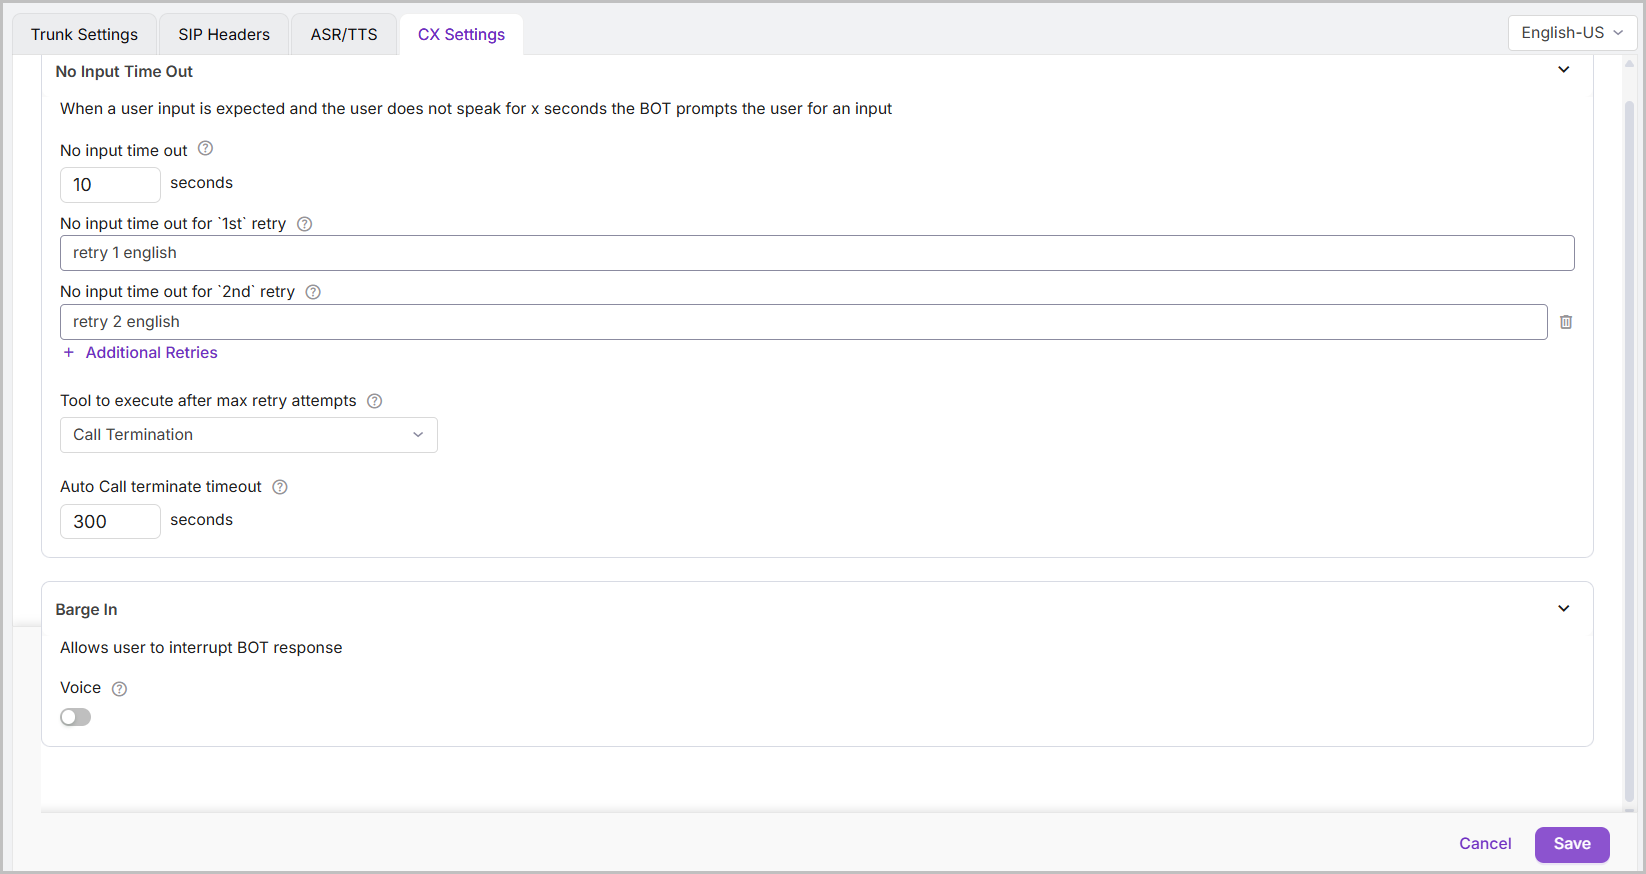
In No input time out, enter the time in seconds. The AI Agent will wait for the user's input for the specified number of seconds before playing the no input prompt. This is a mandatory field.
In No input time out for `1st` retry, you can enter the first message to be played. The AI Agent waits for the specified duration and plays the no-input prompt if no user input is received. At least one message is required. Click + Additional Retries to add subsequent messages. Click
 (Delete) next to the message to delete that specific message.
Note
Up to 5 retry messages can be added.
Ensure the retry message is entered in the language for which ASR/TTS is configured. The selected language is displayed at the top right corner of the tab.
Select the Tool to execute after max retry attempts from the dropdown. The dropdown includes Call Transfer and Call Termination. After playing all of the configured No Input Time Out retry messages. Based on the select tool, the call will either be transferred to a human agent or terminated.
In the Auto Call terminate timeout, set the timeout in seconds before the call automatically terminates. The minimum value can be 60 seconds, and the maximum is 500 seconds.
In Barge In, you can enable or disable the Voice. When Barge In is disabled, the users cannot interrupt the BOT's response. When Barge-In is enabled, user input provided during a BOT's response will be processed.
Click Save to save the CX settings.