User Management
Important
Only account Administrators have access to the User Management.
The User Management feature controls who can access different knowledge bases and agents in Business AI Cloud, as well as the actions they can perform within the platform. Access is managed through user groups that define specific permissions and entitlements for Organizations and Categories. Every user in Business AI Cloud, must be assigned to a group.
When you assign a user to a group, that user automatically receives all the features and permissions that group includes. Group assignments are managed by Administrators based on each user's job function and responsibilities.
Business AI Cloud provides a default group for each role. Administrators can also create custom groups to meet specific organizational needs and assign them to users according to their roles.
You can access this feature on the home page> Admin icon> User Management card.
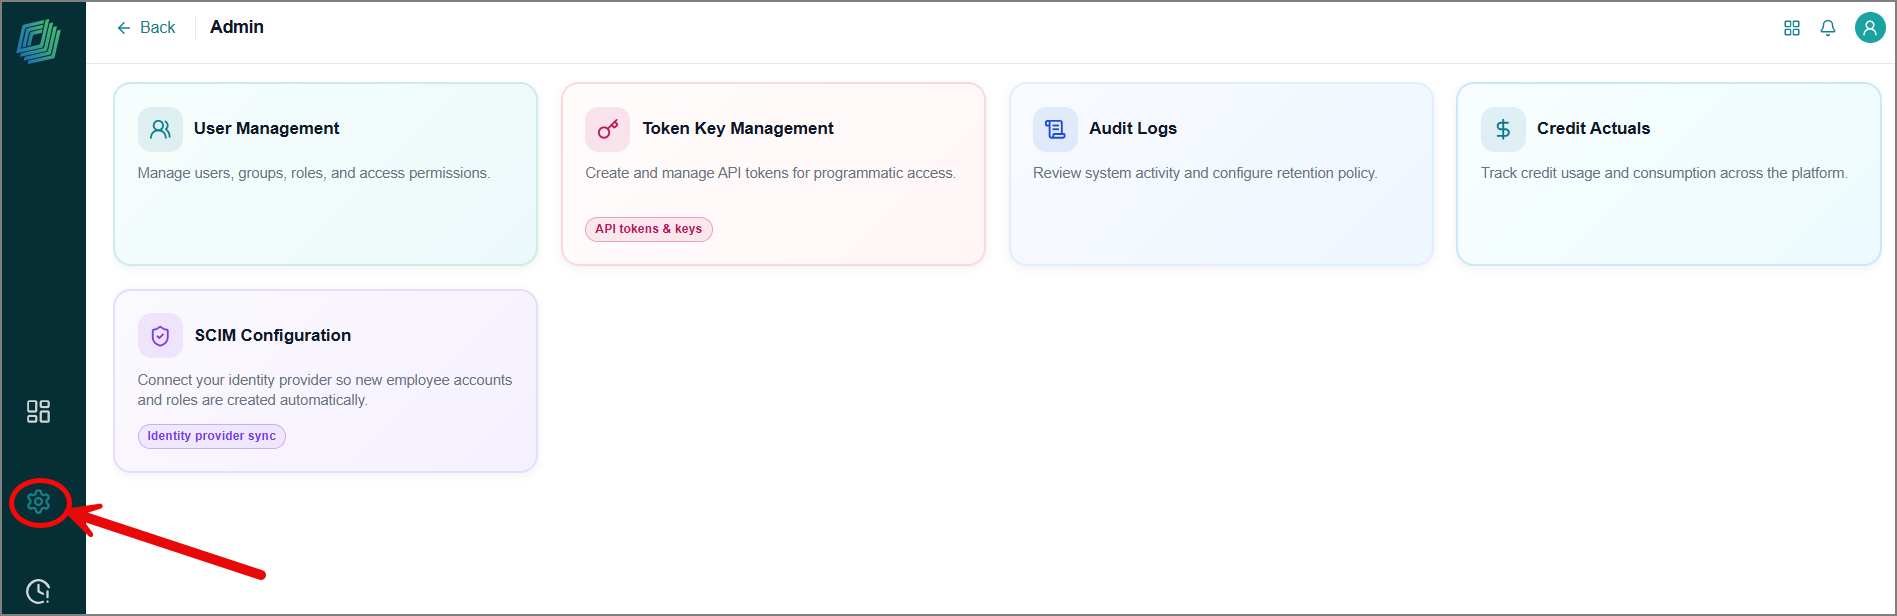
Creating Users
You can create new users directly from the Admin page.
To create a new user:
Click the Users tab.
It displays a complete list of users associated with your account.
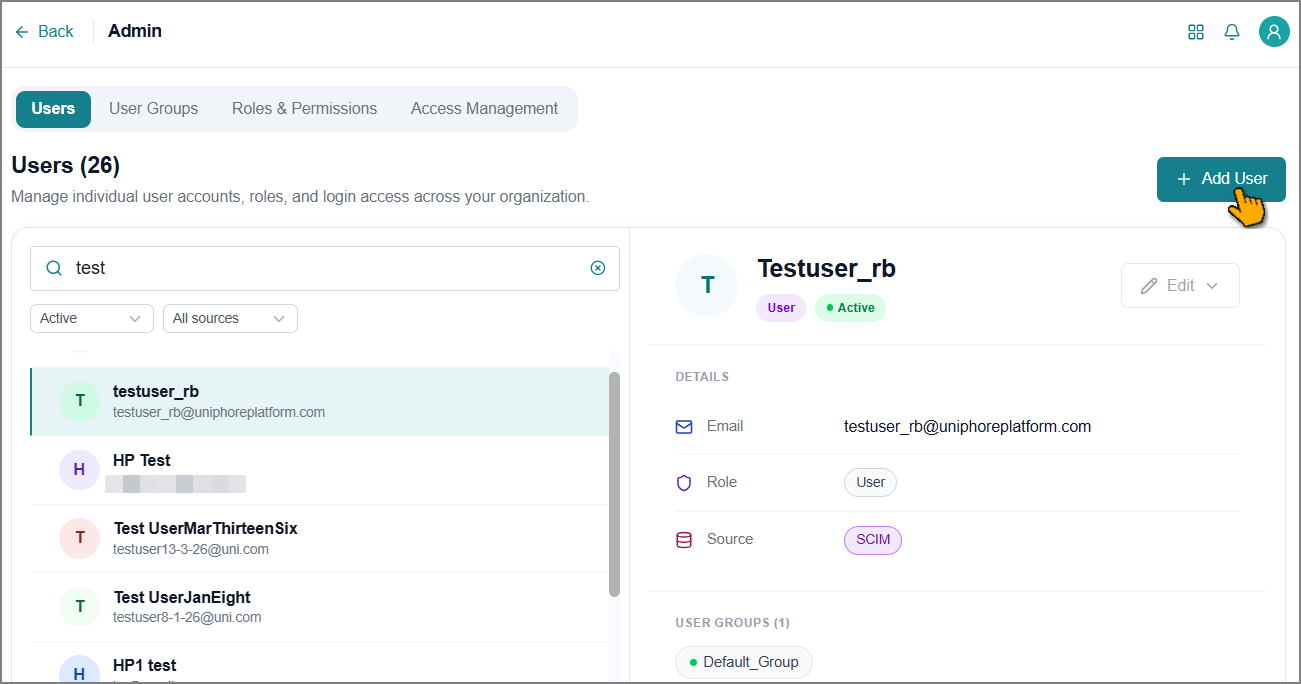
Click + Add User.
The Add User window opens.
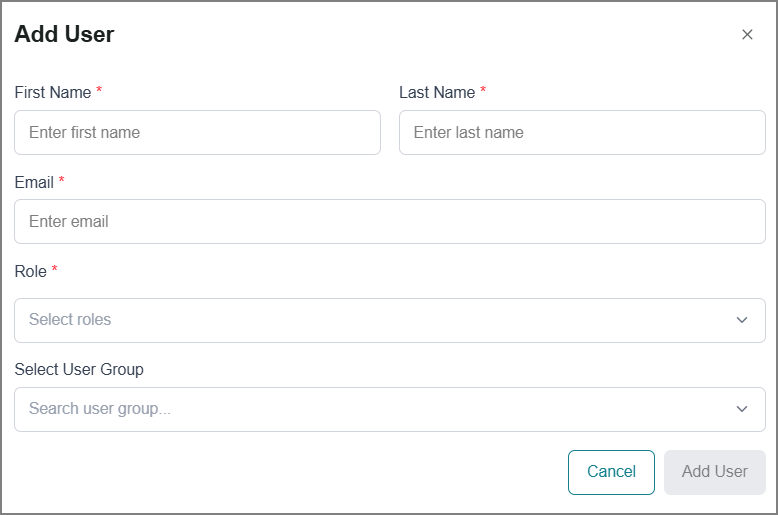
Enter the user's first and last name.
Enter the user's organization email address.
Select one or more roles from the dropdown:
User - Standard access with permissions defined by the default user group.
Administrator - Full access to User Management and platform configuration.
Other predefined roles. Refer to Roles & Permissions for more information about it.
Select one or more user groups from the dropdown.
Tip
The dropdown displays all user groups created in your account. To create a new group, refer to Creating User Groups.
Click Add User.
A success message confirms the new user has been created and associated with your account.
Viewing User Details
The platform lets you manage user accounts across your organization. You can view a user's details, update their profile information, reset their password, change their group membership, and deactivate accounts that no longer need access.
To find a user:
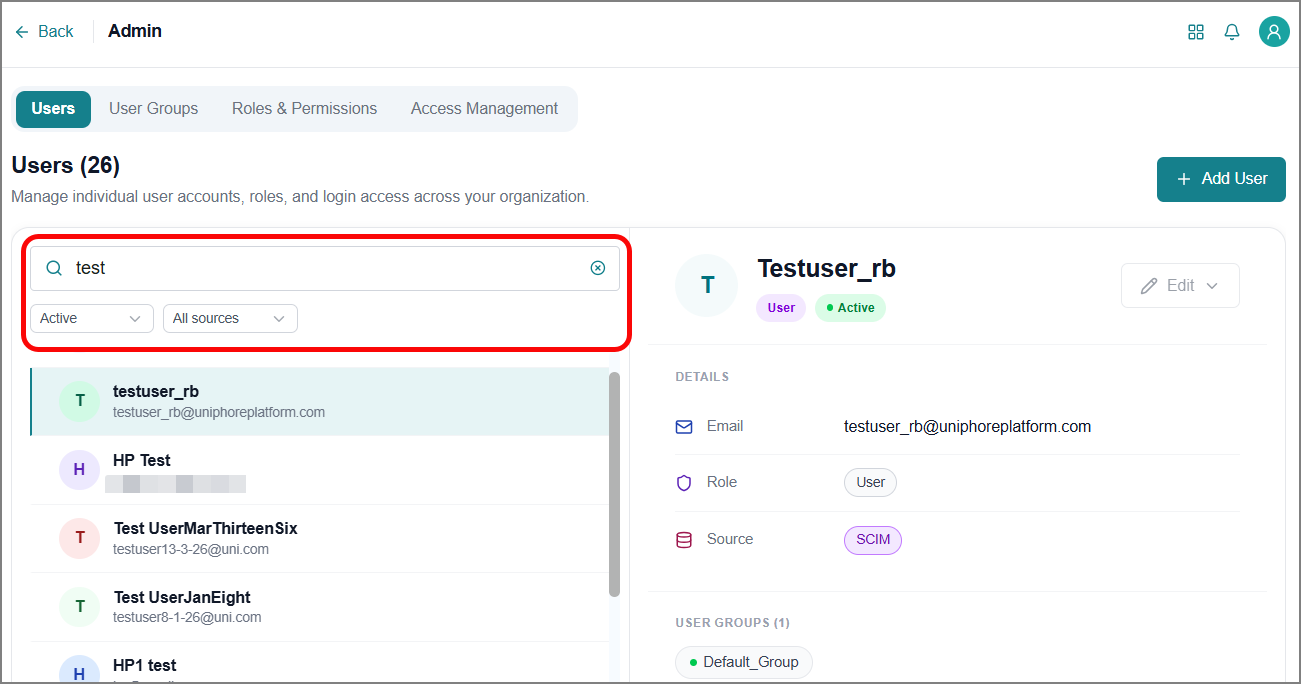
Switch to the Users tab.
Use the filters on the left to find the user you're looking for.
Click the user's name.
The user detail opens on the right side.
Modifying User Details
Click Edit on the right panel.
A dropdown list of edit options opens.
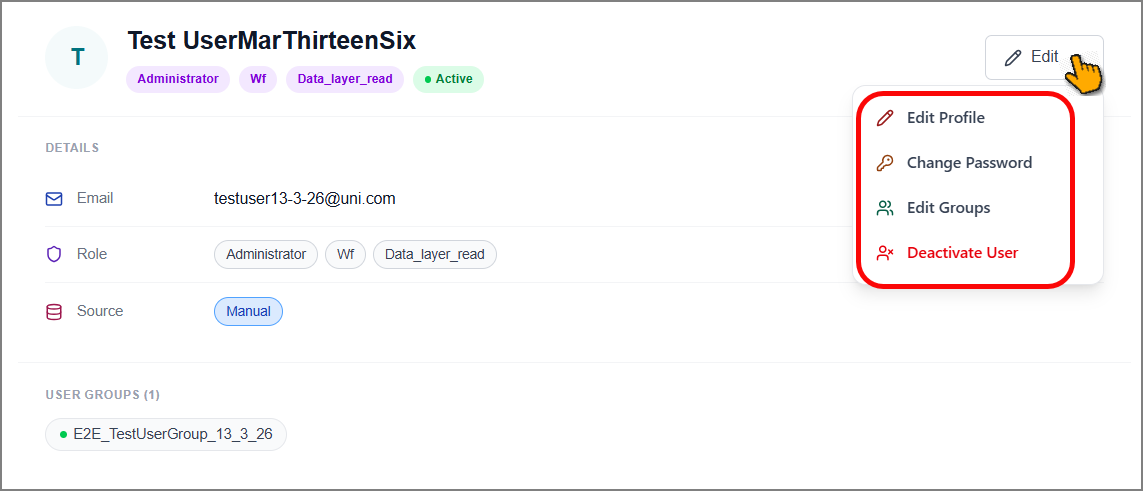
To update the user profile:
Click Edit Profile.
The Edit Profile window opens.
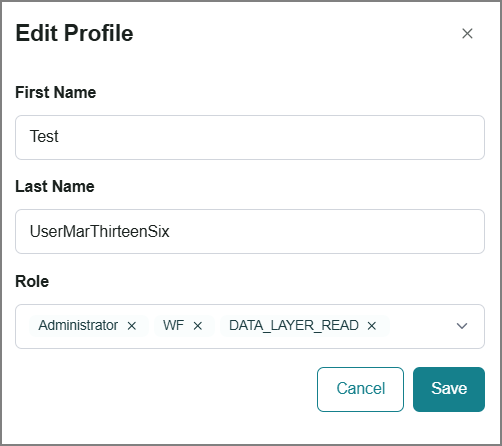
Update the user's name and roles as needed.
Click Save to apply the changes.
To update the password:
Click Change Password.
The Change Password window opens.
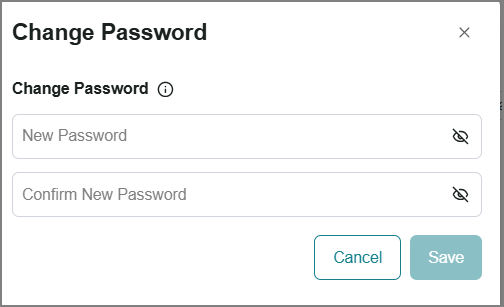
Tip
Click on the info
 icon to view password requirements.
Enter a new password.
Re-enter the same password to confirm.
Click Save to apply the changes.
To update the user group:
Click Edit Groups.
The Edit Groups panel opens on the right, displaying a list of predefined groups.
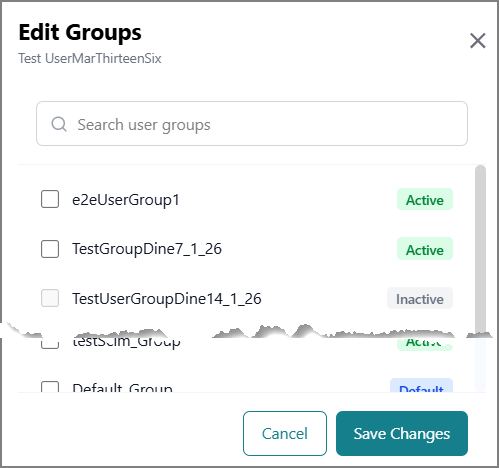
Select one or more groups as needed.
Click Save to apply the changes.
To deactivate the user:
Click Deactivate User.
The Deactivate window opens.
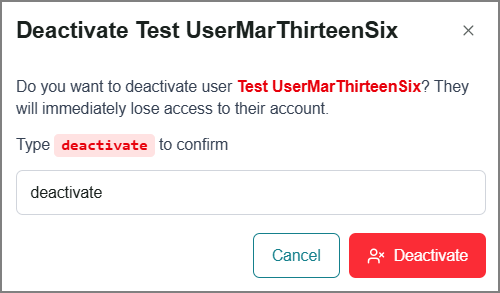
Enter deactivate in the text box.
Click Deactivate.
The user's status changes to Inactive.
Creating User Groups
A User Group is a collection of users who share the same access permissions and entitlements. You can create new user groups directly from the User Management page.
To create a new user group:
Switch to the User Groups tab.
It displays a complete list of user groups associated with your account.
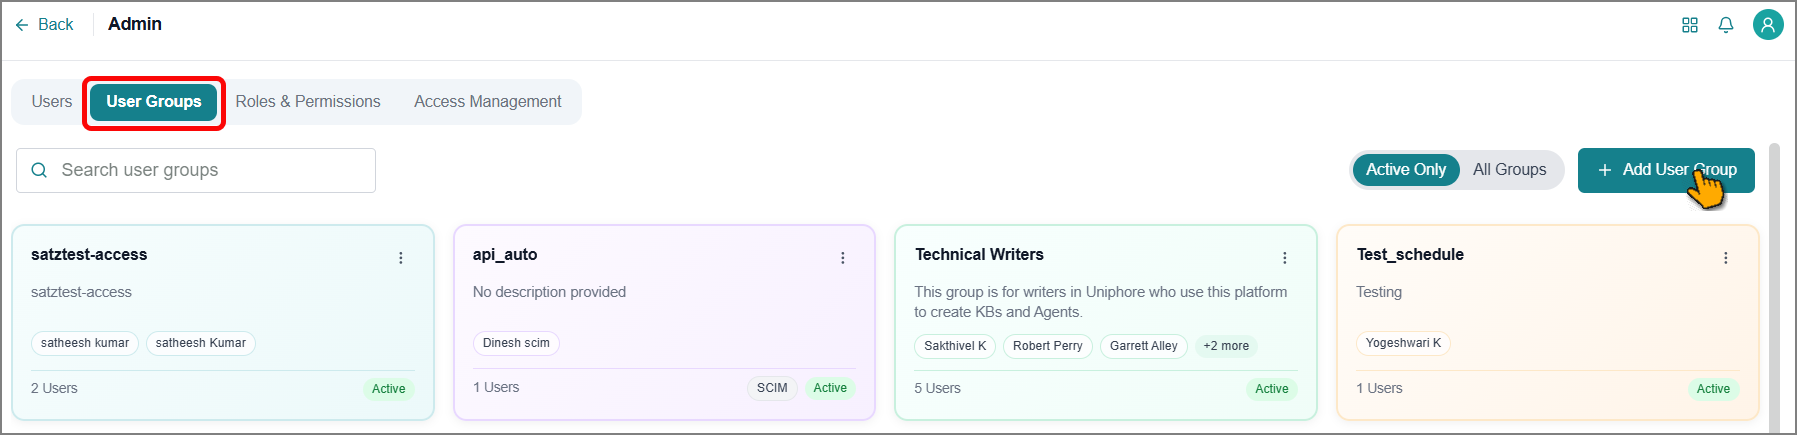
Click + Add User Group.
The Add New User Group window opens.
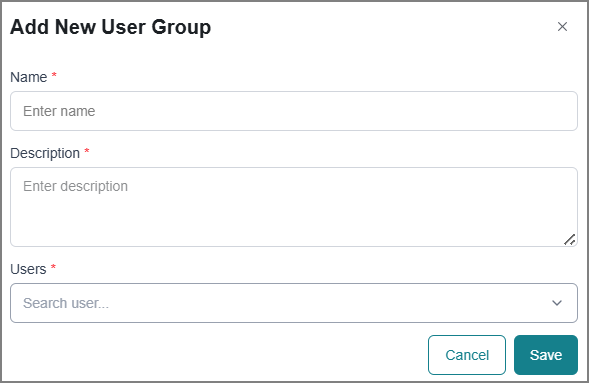
Enter a name for the group that reflects its purpose or the team it represents.
Enter a detailed description of the group.
Select one or more users from the dropdown.
Click Save to apply changes.
The new user group is created and added to your account.
Viewing and Modifying User Groups
The page displays the users assigned to each group, along with each user's status, providing a comprehensive overview of your access structure.
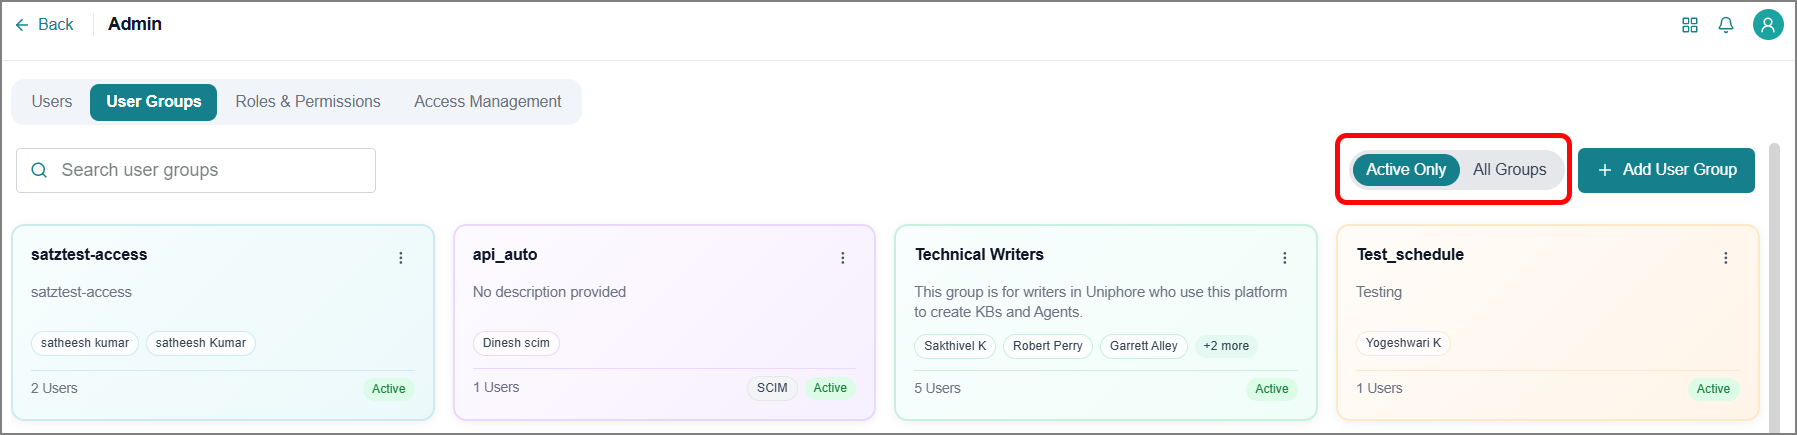
Use the following filters to view user groups by status and easily locate specific groups.
Active Only - Displays only groups with an active status.
All Groups - Displays all groups in your account, including active and inactive.
To modify the user group:
Hover over the user group card and click
 .
.The Edit User Group window opens.
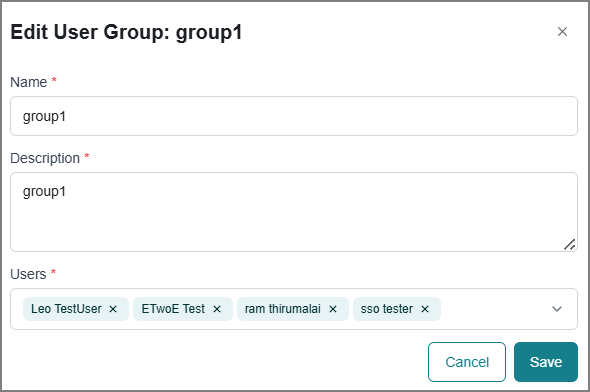
Update the group name, description, and list of group users as needed.
Click Save to apply changes.
The user group is updated with the new information.
Remove User Groups
Hover over the user group card and click
 .
.The confirmation dialog opens.
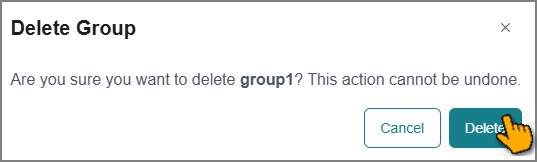
Click Delete.
The success message displays, and the group is marked inactive in the list.
Re-activate User Group
When you delete a user group, it is marked as inactive. You can reactivate deleted groups from this page.
Click the All Groups filter.
It displays all active and inactive groups.
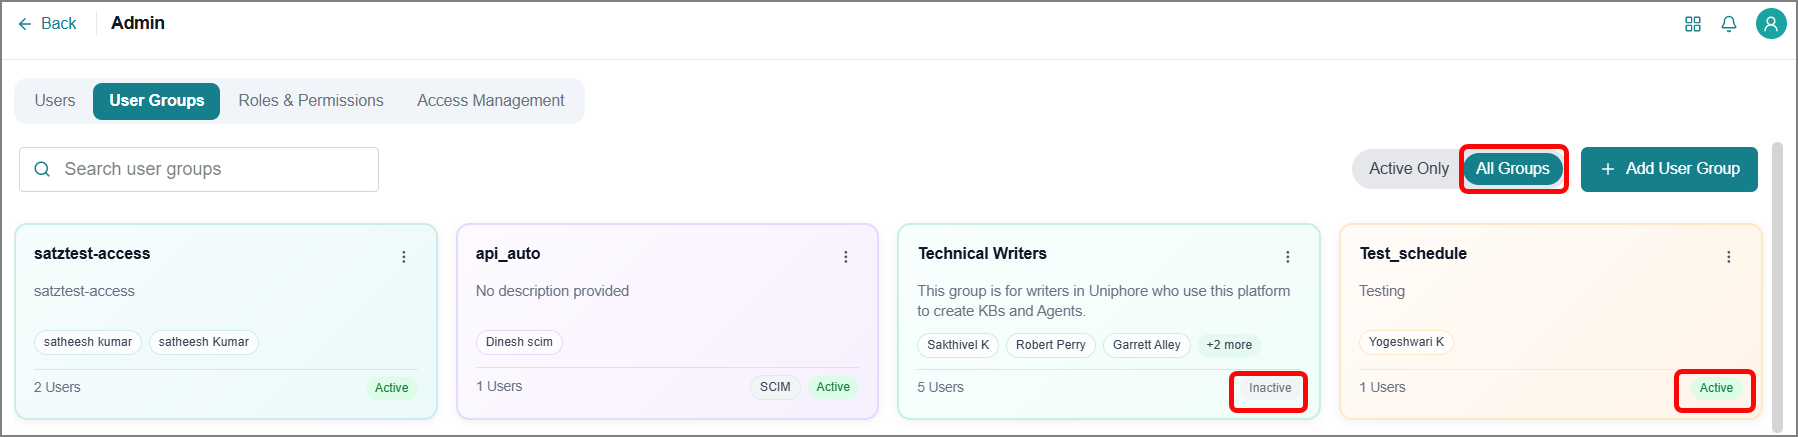
Hover over the inactive user group card and click
 .
.The Activate User Group window opens.
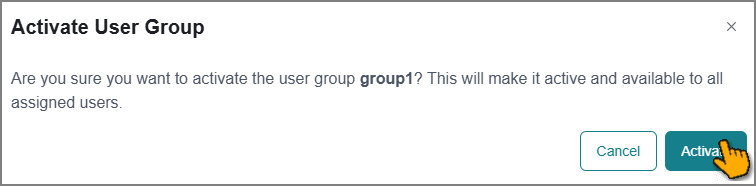
Click Activate.
The success message displays, and the group is marked active in the list.
Roles & Permissions
Important
Users with user_management permissions will have access to Roles & Permissions.
The platform allows you to define roles and configure permissions for exactly what each role can see and do. You can reuse and view permission sets for modules.
You can access this feature from Business AI Cloud's home page.
Click the Admin icon in the left-side panel.
The Admin page opens.
Click the User Management Card.
Switch to the Roles & Permissions tab to view a list of existing roles and their configured permissions.
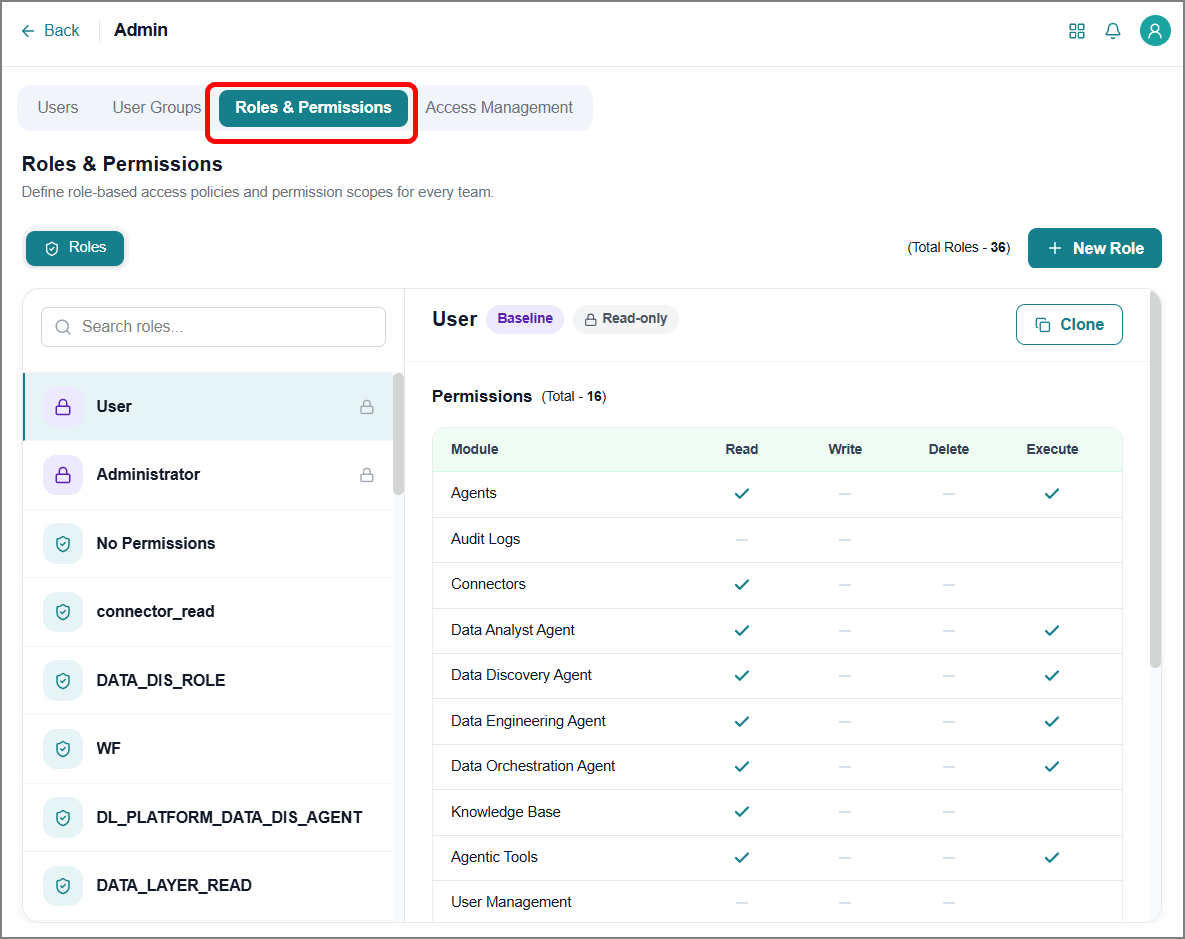
Use the Search roles field to find a role.
Select a role from the list.
The right panel displays the role's permissions in a table format.
Creating a New Role
You can create a custom role with a precise set of permissions across every module in the platform. You choose exactly which combination of Read, Write, Delete, and Execute permissions the role grants.
On the Roles tab, click New Role.
The New Role panel opens from the right.
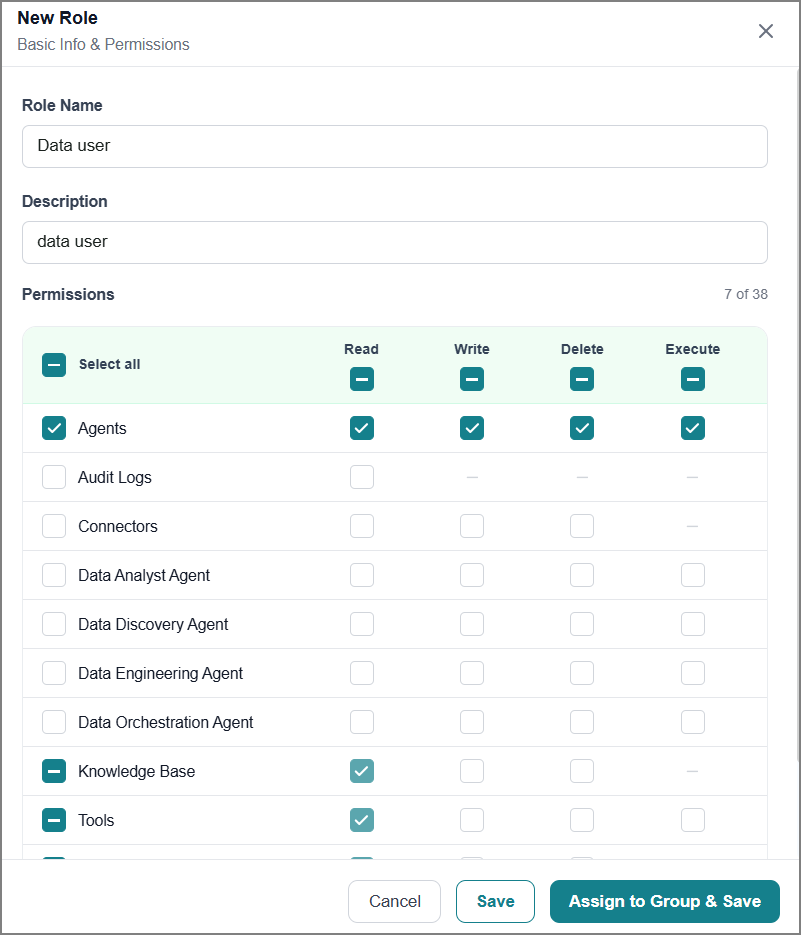
Enter a Role Name.
Enter a Description for the role.
In the Permissions table, select the permissions to grant.
Select an individual Read, Write, Delete, or Execute checkbox for a specific module.
Some permissions depend on other permissions to function. If you select a permission that requires others, the Required permissions dialog lists the dependent permissions that are enabled automatically.
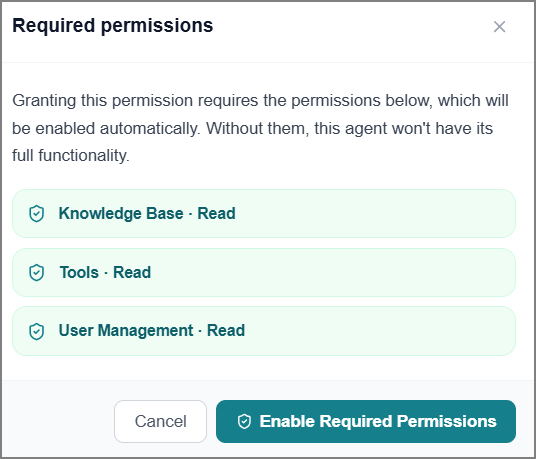
Select Enable Required Permissions to accept them and continue, or Cancel to back out of the original selection.
Select the checkbox next to a module name to grant all available permissions for that module.
Select all to grant all available permissions across every module.
Note
Not every module supports all four permission types. Where a permission doesn't apply (for example, Delete for Audit Logs), the checkbox is replaced with a dash and is unavailable.
Click Save to create the role without assigning it to a group.
Click Cancel to close the window without saving.
Click Assign to Group & Save to assign a user group.
The Assign Groups panel opens.
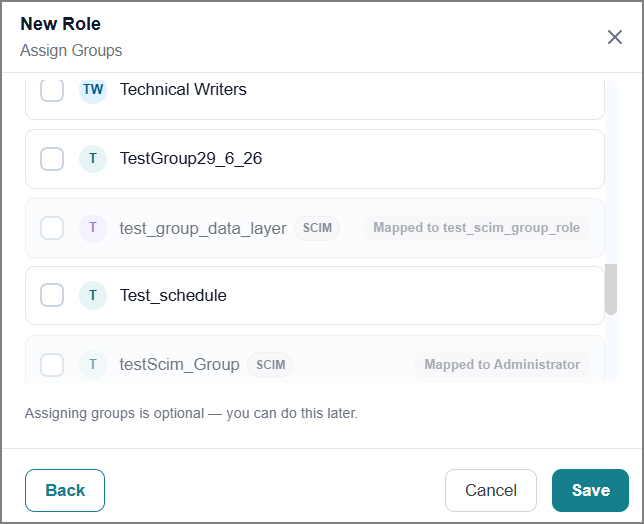
Select one or more existing user groups.
Note
The role assigned to the user group applies only to SCIM-based user groups.
Click Save to create the role and assign groups to it.
Assign a User Group
You can assign a user group to a role individually, either when you create the role or afterward on the same page.
Note
The role assigned to the user group applies only to SCIM-based user groups.
To assign a user group to an existing role:
Select the role you want to assign.
In the role's permissions panel, under Mapped Groups, click Add Group.
The Add Group panel opens on the right.
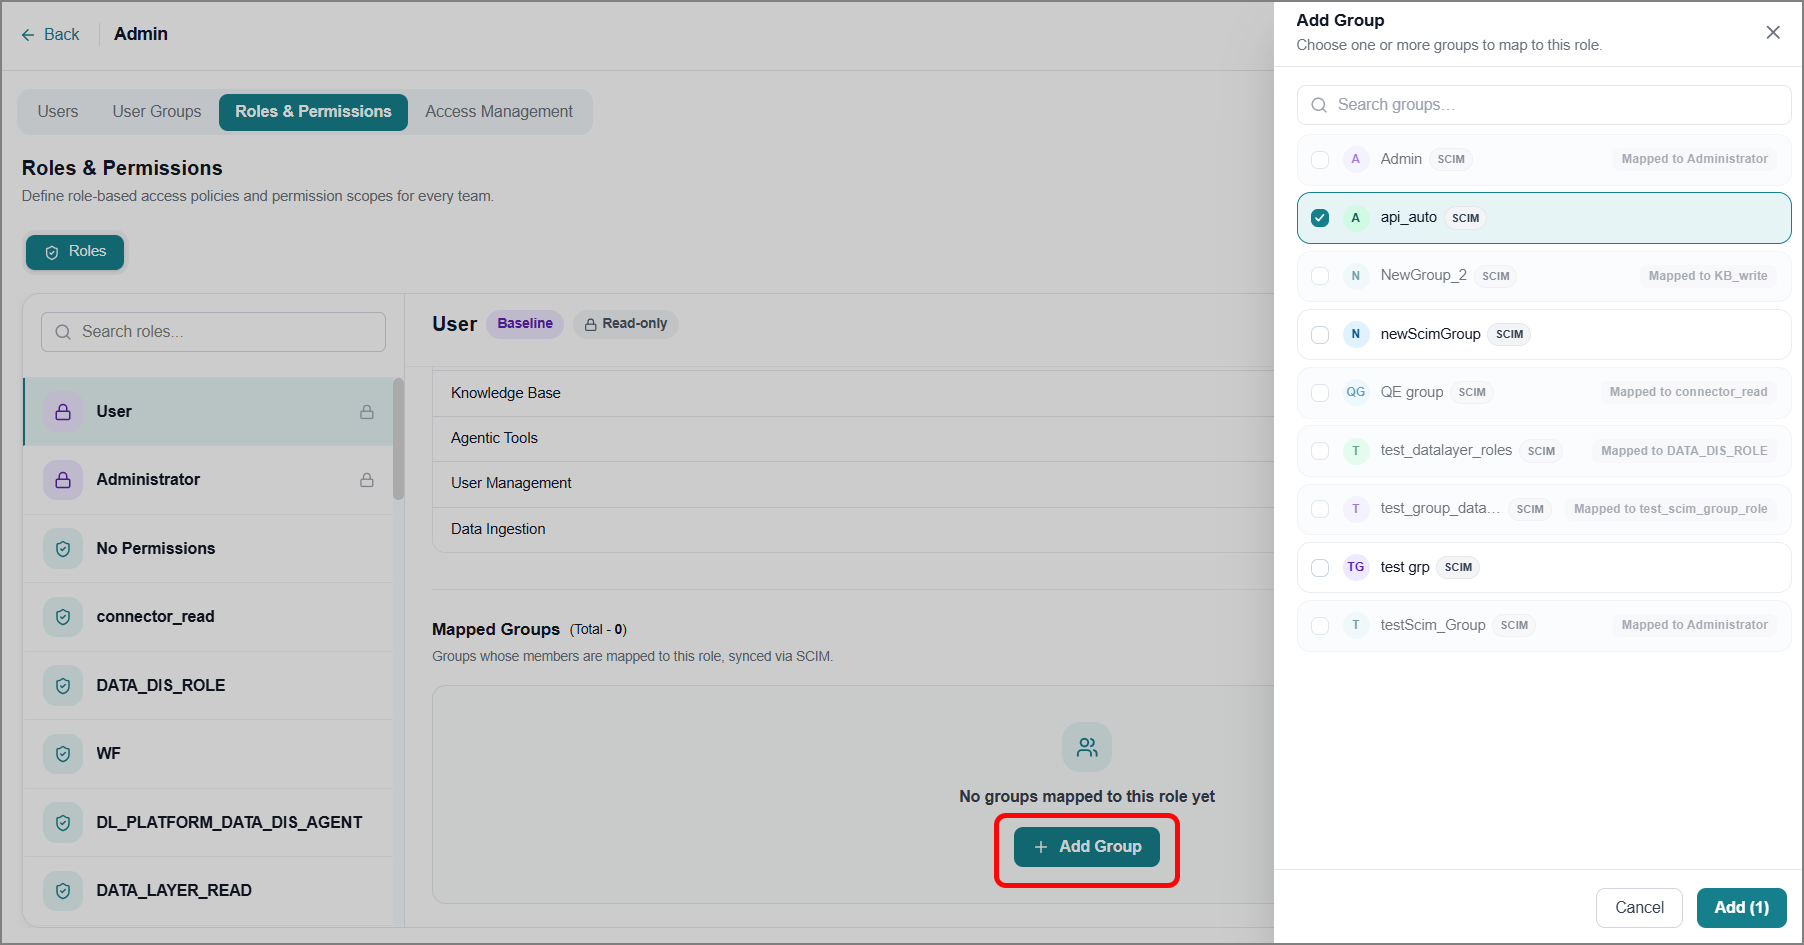
Select one or more user groups from the list.
Click Add to save the changes.
Every user in the assigned group receives this role's permissions.
Modifying Permissions
You can edit an existing role's permissions quickly on the same page.
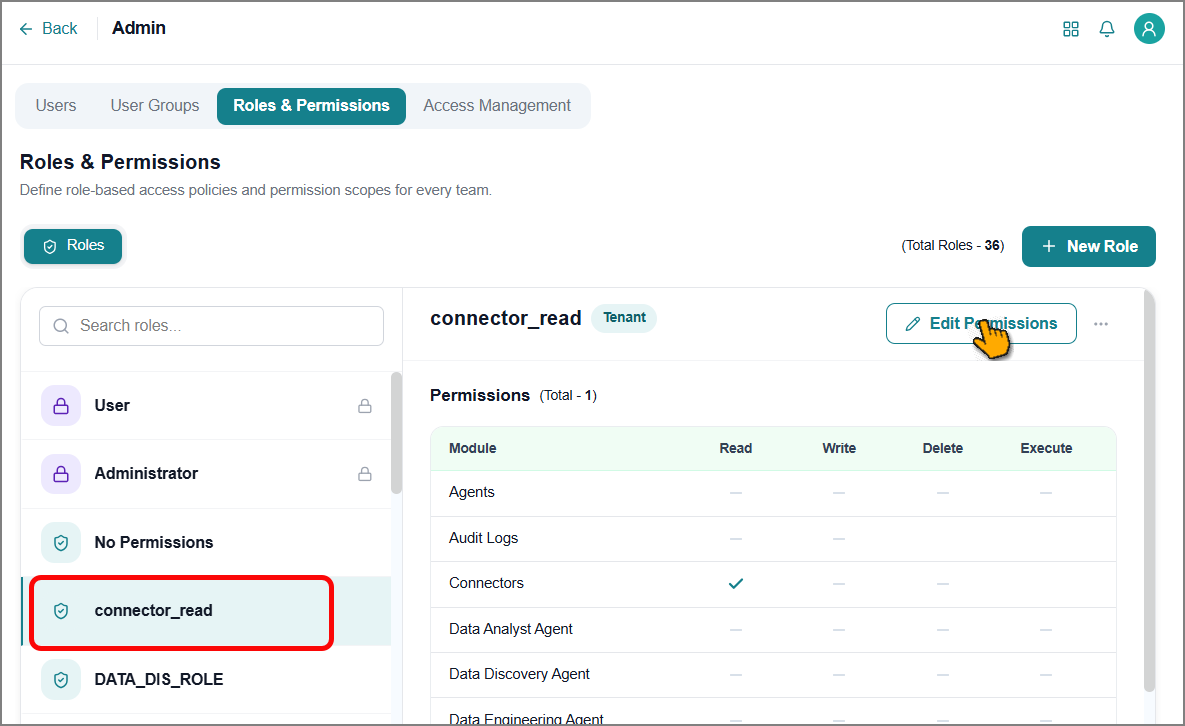
On the Roles tab, select the role you want to update.
Click Edit Permissions.
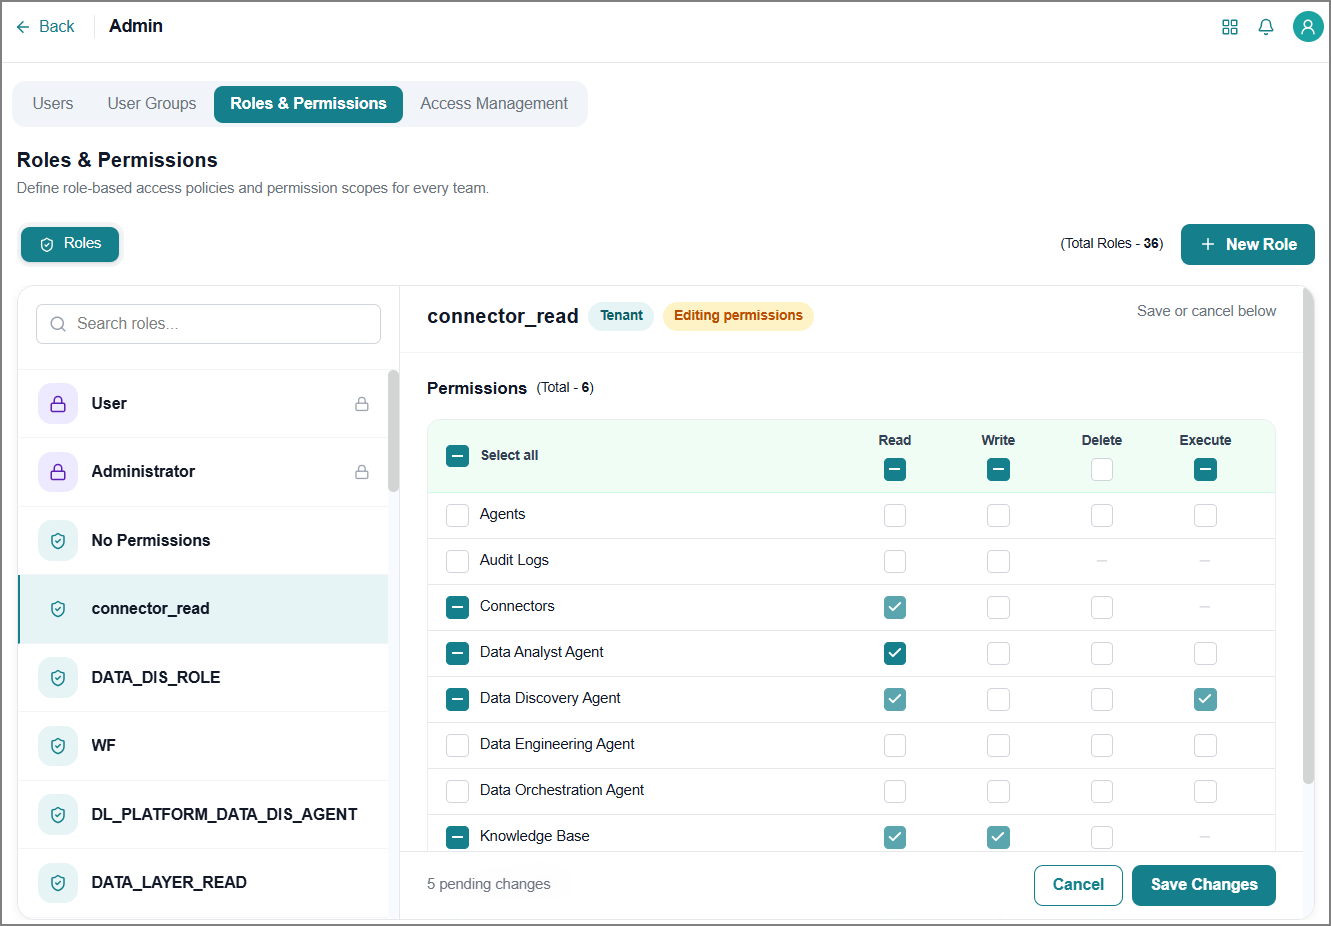
Select an individual Read, Write, Delete, or Execute checkbox for a specific module.
Some permissions depend on other permissions to function. If you select a permission that requires others, the Required permissions dialog lists the dependent permissions that must be enabled automatically.
Select Enable Required Permissions to accept them and continue, or Cancel to back out of the original selection.
Select the checkbox next to a module name to grant all available permissions for that module.
Select all to grant all available permissions across every module.
Click Save Changes to apply the changes to the role.
Duplicating a Role
You can duplicate, or clone, a role to create a new role that starts with the same permissions as an existing one.
Tip
Use this to quickly create a new role based on a baseline role, then update the name, description, and permissions as needed.
To duplicate a role:
On the Roles tab, select the role you want to duplicate.
Do one of the following:
If it's a your orginatation specific role, select the Ellipsis icon, then select Duplicate Role.
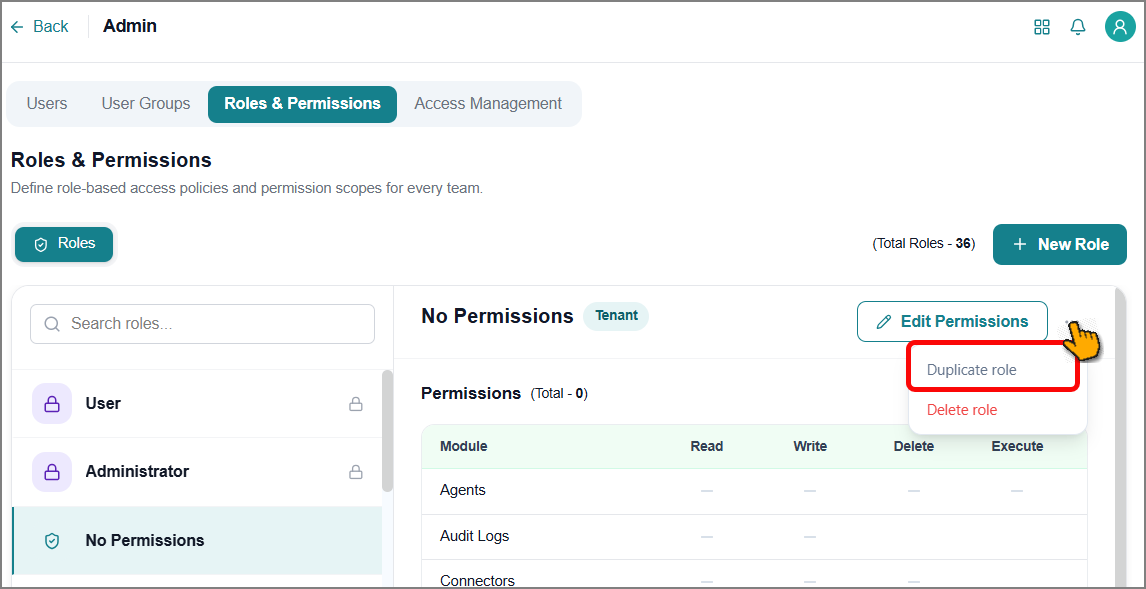
If it's a Default role, select Clone.
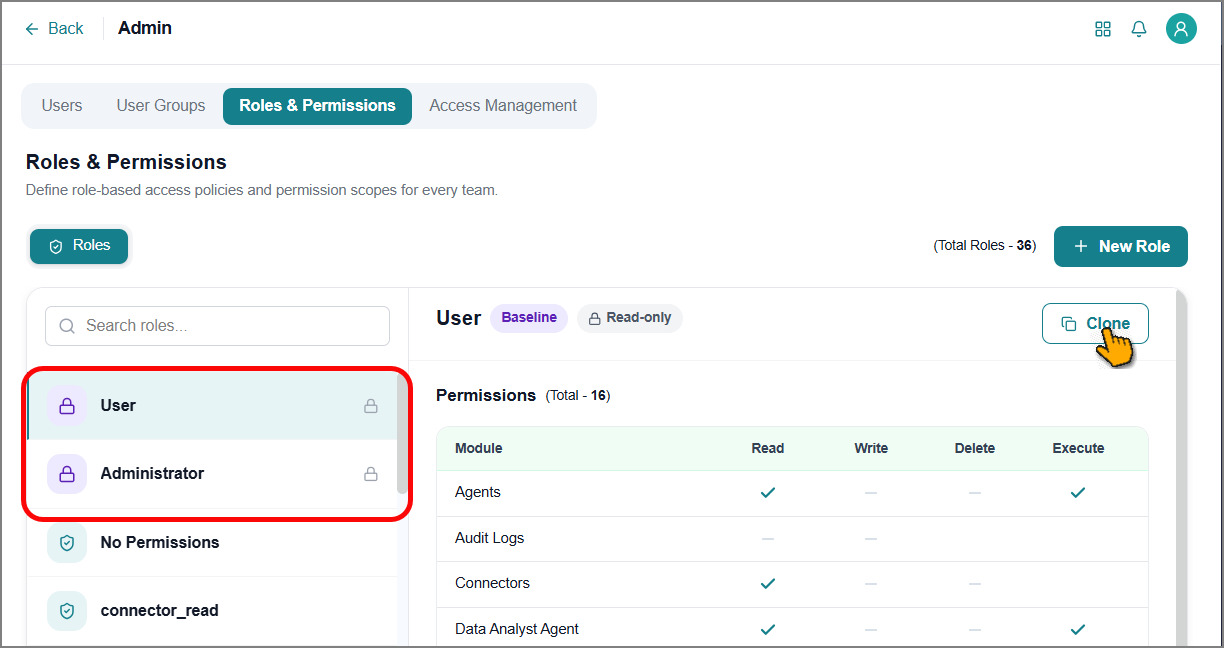
The new role is created with the same name, followed by the suffix "(copy)" (for example, Analyst (copy)). It has the same permissions as the original role.
Deleting a Role
You can remove the role from the list.
Important
If a user group is assigned to the role, remove them before deleting the role.
To delete a role:
On the Roles tab, select the role you want to delete.
Tip
Only your orginatation specific roles can be deleted.
Click the Ellipsis icon, then select Delete Role.
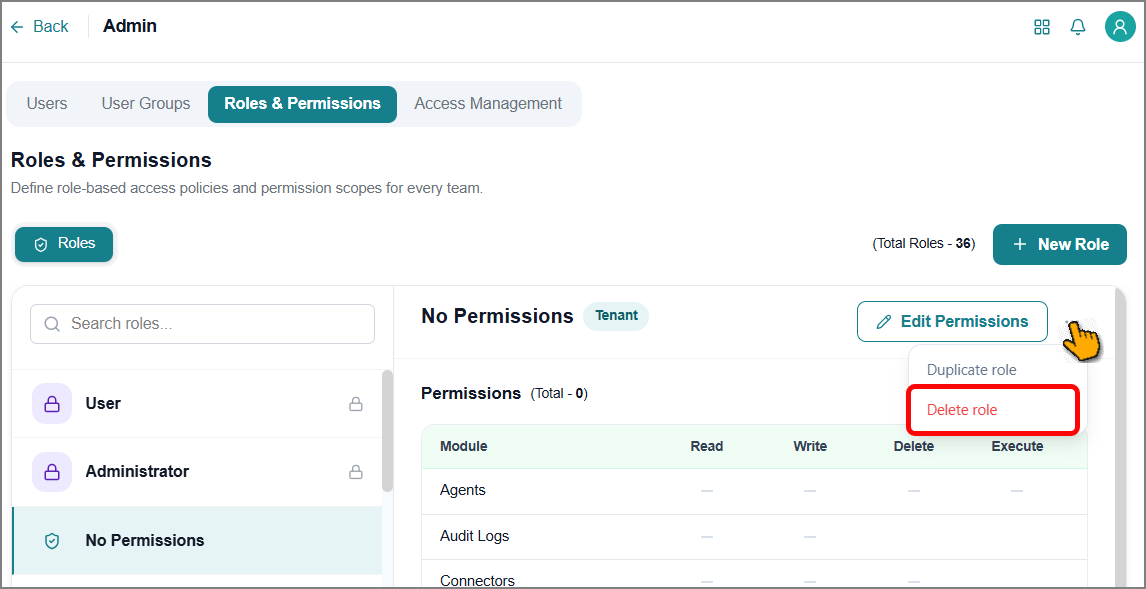
The confirmation window opens.
Enter Delete in the text box, and click Delete.
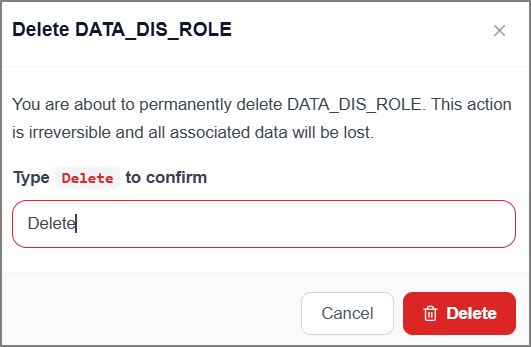
The role is removed from the list.
Access Management
Important
Only account Administrators have access to the Access Management feature.
Access Management enables you to control which user groups can access the platform and perform actions within it. By assigning permissions to groups rather than individual users, you can efficiently manage access to knowledge bases, agents, and platform features across your organization.
Access Management uses a group-based permission model. When you grant permissions to a user group, all users in that group automatically receive those permissions. This approach ensures consistent access control and simplifies permission management as your organization grows.
You can access this feature from the Business AI Cloud home page.
Click the Admin icon in the left-side panel.
The Admin page opens.
Click the User Management card.
Switch to the Access Management tab to view and assign resources.
There are three modules:
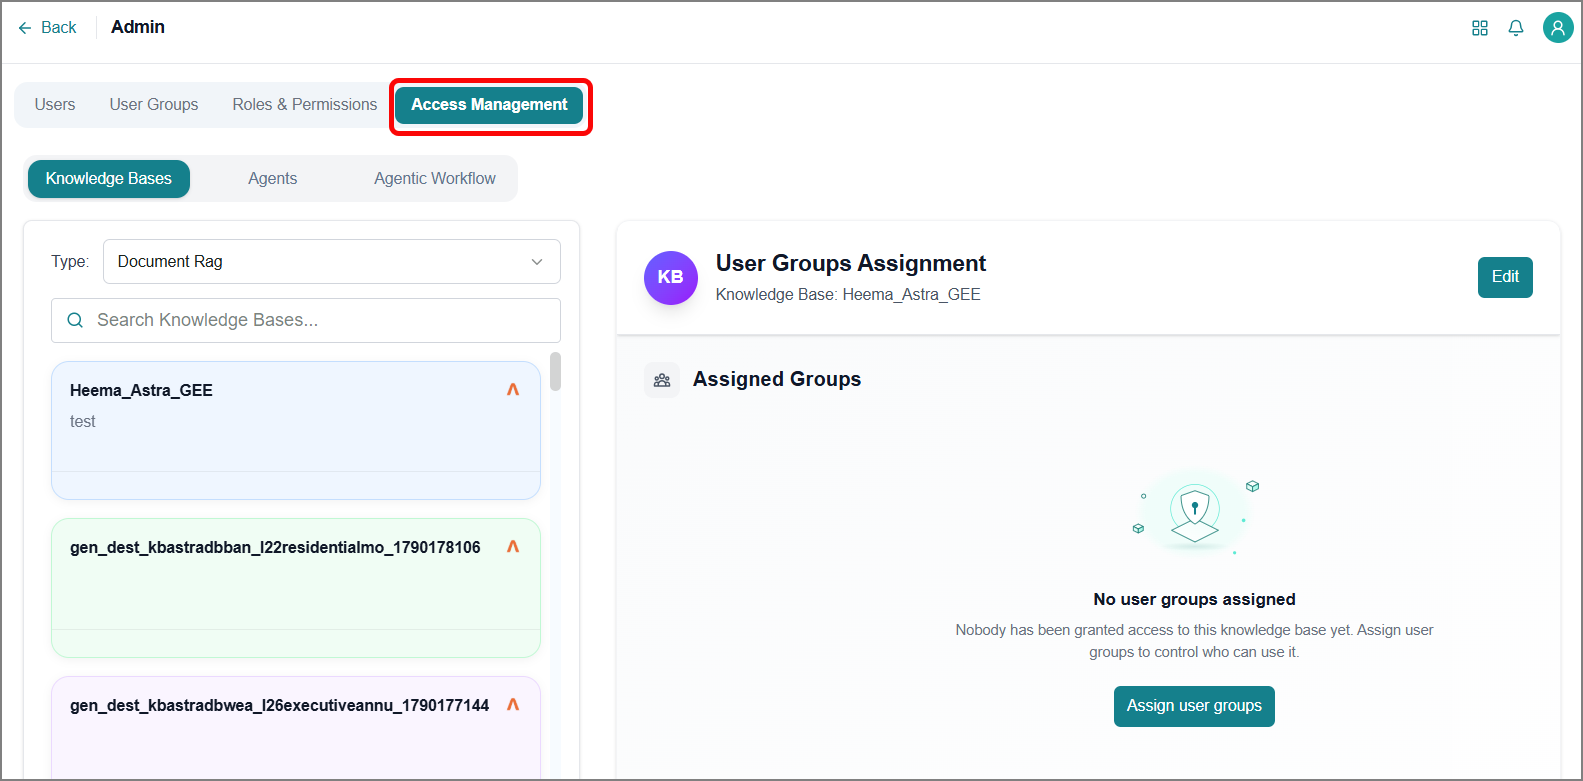
Knowledge Bases - Assign user groups to specific knowledge bases (KBs) as needed.
Agents - Assign user groups to specific agents as needed.
Agentic Workflow - Assign user groups to specific agentic workflows as needed.
Assigning Knowledge Bases to User Groups
Click the Knowledge Bases tab.
Choose the KB type from the dropdown.
The relevant KBs are displayed.
Conversation Rag
Document Rag
Relational DB Rag
Enter the KB name in the search box to find the desired KB.
Select the KB from the list.
The user group's details open in the right panel.
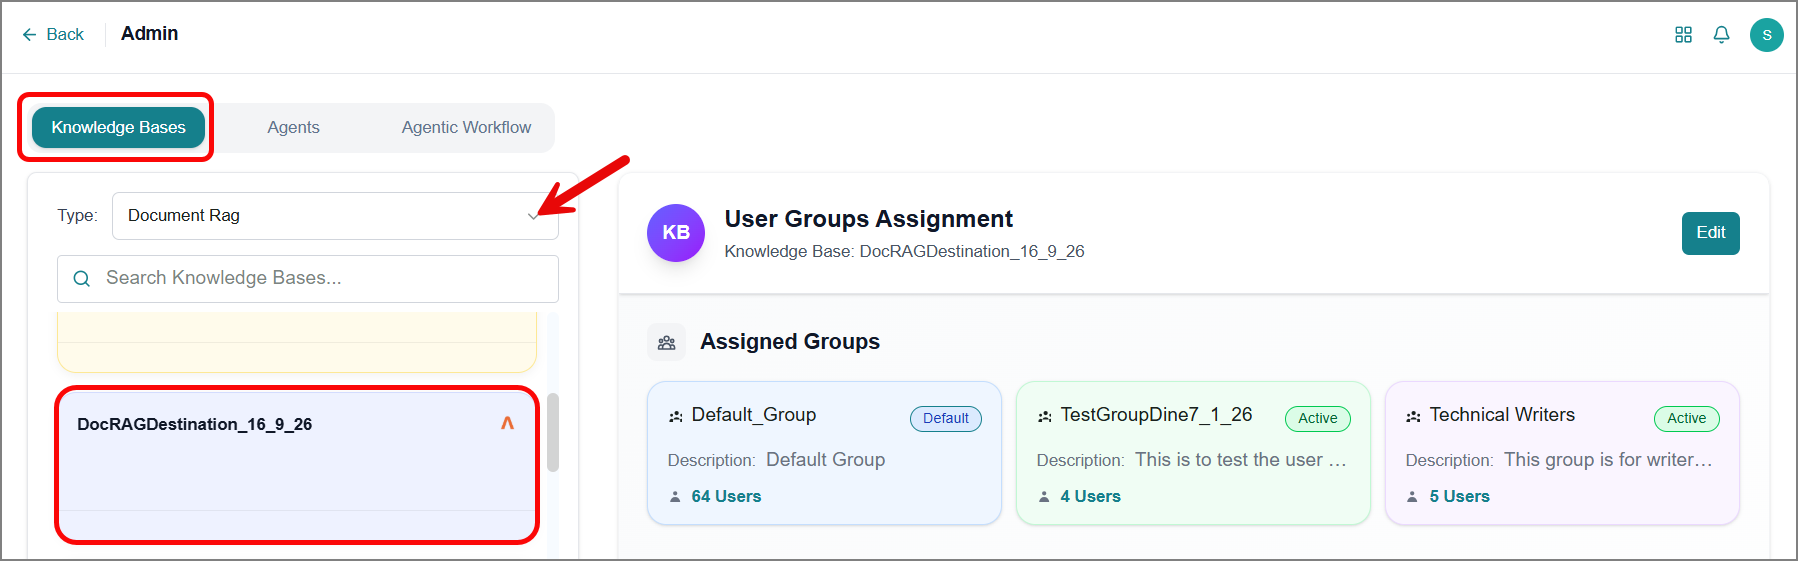
Click Edit.
The Select User Group field is enabled.
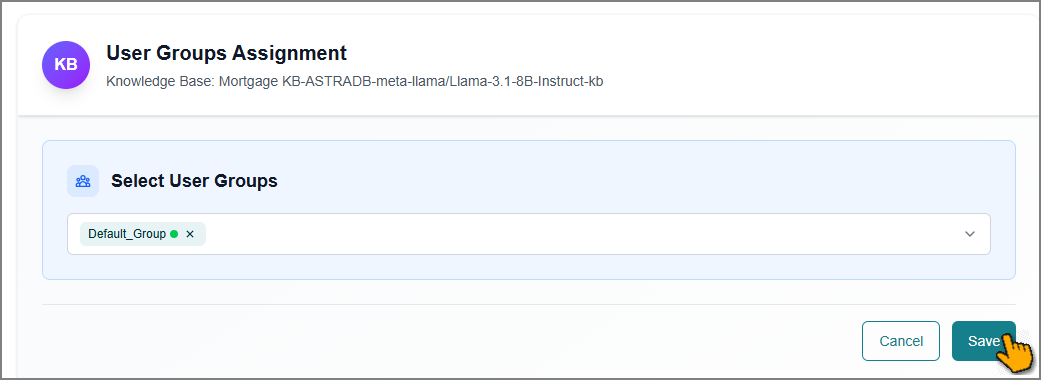
Select one or more user groups from the dropdown.
Click Save to apply the changes.
The newly assigned user groups now have access to the selected KB.
Assigning Agents to User Groups
Click the Agents tab.
The page displays all agents created in your account.
Enter the agent name in the search box to find the desired agent.
Select an agent.
The agent's details open in the right panel.
Note
When a supervisor agent is mapped to a user group, the mapping and any subsequent changes automatically apply to all its sub-agents.
Click Edit.
The Select User Group field is enabled.
Select one or more user groups from the dropdown.
Click Save to apply the changes.
The newly assigned user groups now have access to the selected agent.
Note
The above process must be followed in the Agentic Workflow tab to assign one or more user groups to an agentic workflow.