My Clips
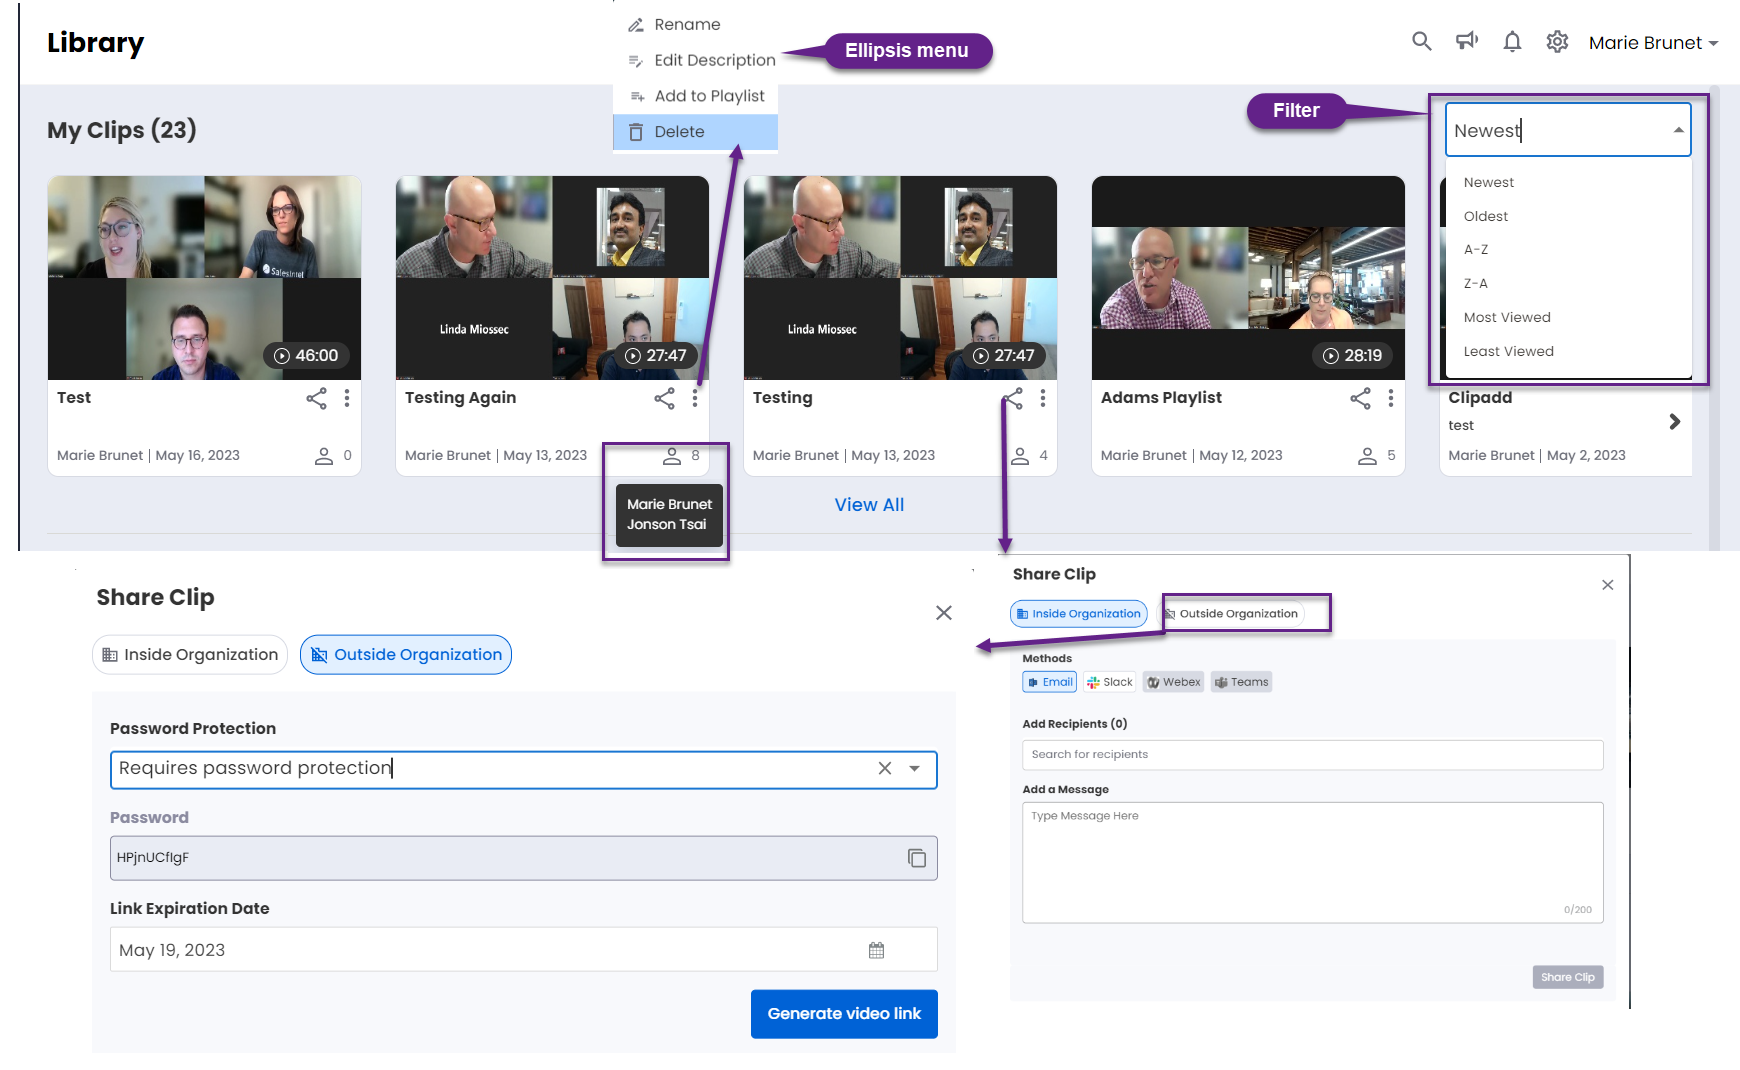
The clips that you created in the Meeting Replay page Left Pane – Video Area and Controls are shown here.
Click on the individual video to view the replay pop out shown below:
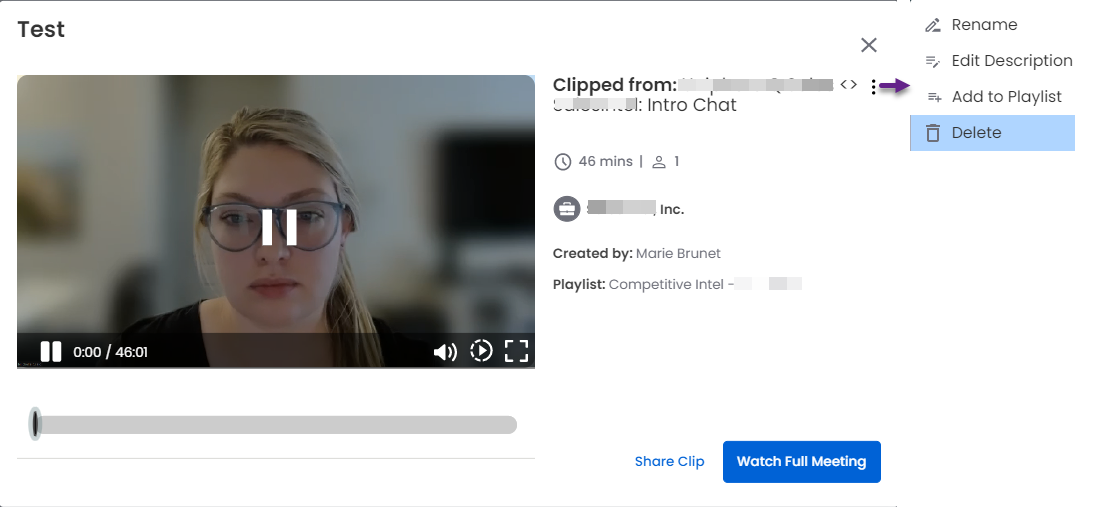
Click on Watch Full Meeting to view the full meeting in the Meeting Replay page Left Pane – Video Area and Controls.
Click on Share Clip to share the clip either inside organization or outside organization.
See To share inside organization and To share outside organization for details.
They can be filtered by:
Newest
Oldest
A-Z (Ascending order)
Z-A (Descending order)
Most Viewed
Least Viewed
Click on the vertical ellipsis icon to:
Rename
Edit Description
Add to Playlist
Delete
Click on share icon to share the clip either inside organization or outside organization. The Share Clip window pops out as shown below:
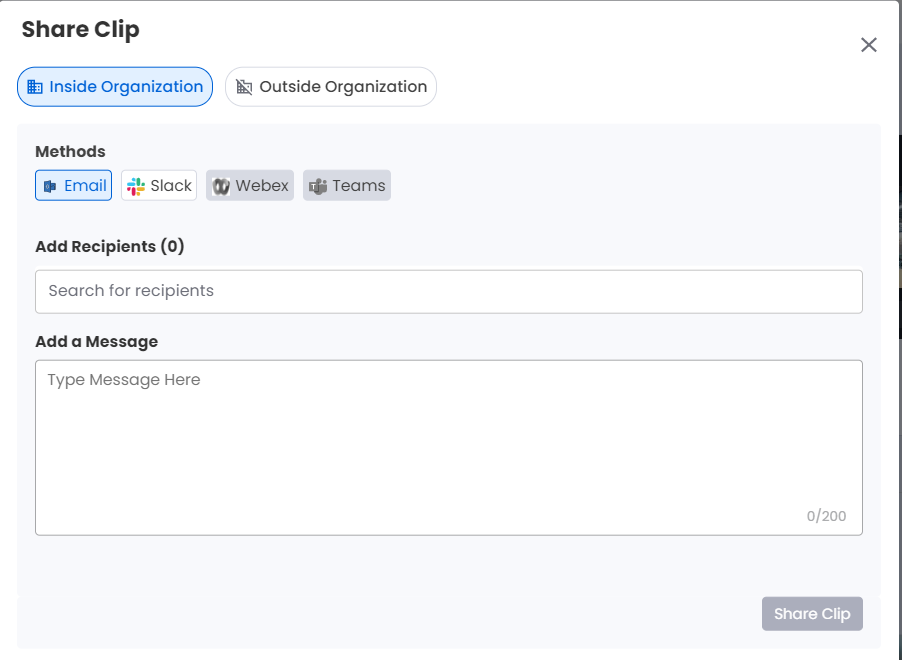
To share inside organization:
Click and choose either of the Methods (Email, Slack, Webex or Teams).
Click Add Recipients and choose the recipient(s) from the drop-down list or type the recipient's name to select. To deselect a recipient, click the clear icon near the recipient's name. To deselect all the recipients in one go, click the clear icon at the right of the Add Recipients search box.
Type the message in the Add a Message dialogue box if required (this is optional).
Click Share Clip.
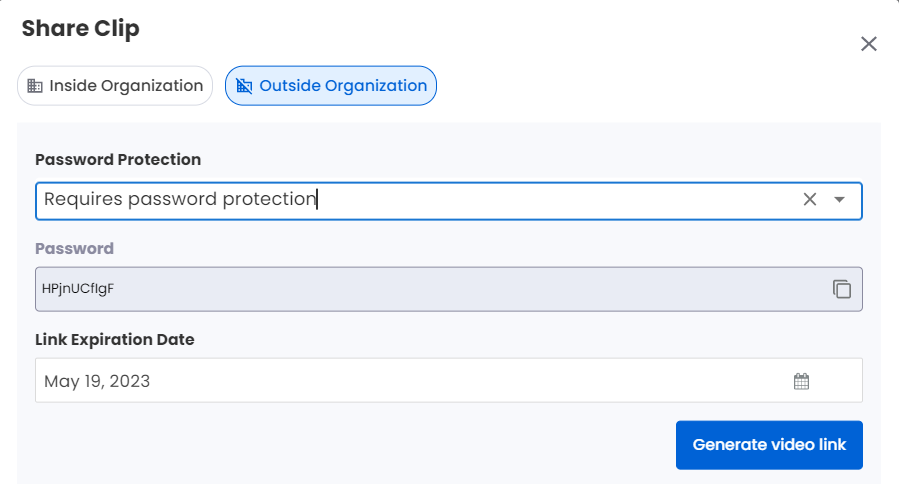
To share outside organization:
Select the desired option from the Password Protection drop-down. You can choose any one of the options from the drop-down. The options are:
Requires password protection: For this option, the viewers will need to enter a system generated password to view the clip. When this option is selected a system generated password dialogue box appears below the Password Protection drop-down. It is non-editable. You can click the copy icon on the right of the dialogue box to copy the password
Open access: For this option, anyone with the link can have viewing access to the clip
Click the calendar icon in the Link Expiration Date to choose the expiration date. The date succeeding the current date is selected by default for link expiration
Click Generate video link to create a link of the clip. The Link dialogue box appears below the Generate video link button. You can click the copy icon on the right of the dialogue box to copy the link.
Click View All to view all the clips.