How does a Quality Analyst Manually Evaluate Conversations?
A Quality Analyst can manually evaluate conversations after assigning them to themselves.
To manually evaluate a conversation:
Log in to Conversation Insights Agent with Quality Analyst credentials.
Go to Analytics > Conversations. A list of conversations is displayed based on the filters.
Select the date range to filter the data within the specified time frame. The default filter is This Week.
Click the All Filters
 button to view the selected filters, and the number of applied filters is displayed. For example, when two filters are applied, 2 is displayed. You can filter by Conversation ID, Session ID, Agent(s), Direction, and Channel.
Click Agent(s) to filter by both Agent ID and Agent Name. Ten Agent details are displayed by default. To list the next set of ten Agents, click Load more at the end of the dropdown. To find an Agent, enter the Agent's name in the box. This retrieves the Agent details even if they are not available in the currently loaded list. This is an optional field.
Click the Column Recorder
 icon to add the columns to be displayed.
Select the conversation to be evaluated, click the Bulk Action dropdown, and select Add to QM.

Warning
Once a conversation is assigned to a Quality Analyst, it cannot be reassigned to the same or another Quality Analyst.
Ensure the correct conversation is selected, as you cannot undo this action.
Note
Up to five conversations can be selected at a time.
Conversations that are mapped to Scorecard are eligible for evaluation.
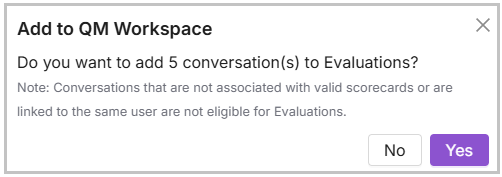
The Add to QM Workspace dialog appears. Click Yes to assign the conversation for manual evaluation.
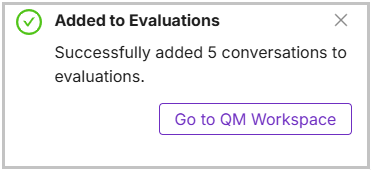
The Added to Evaluations notification appears. Click the Go to QM Workspace button to navigate to the Score Evaluations page, or you can follow the steps mentioned below.
Click Evaluations from the left pane. Under the QM Workspace tab, the Score Evaluation page appears. You can see the entire list of Conversations assigned to the Quality Analyst.
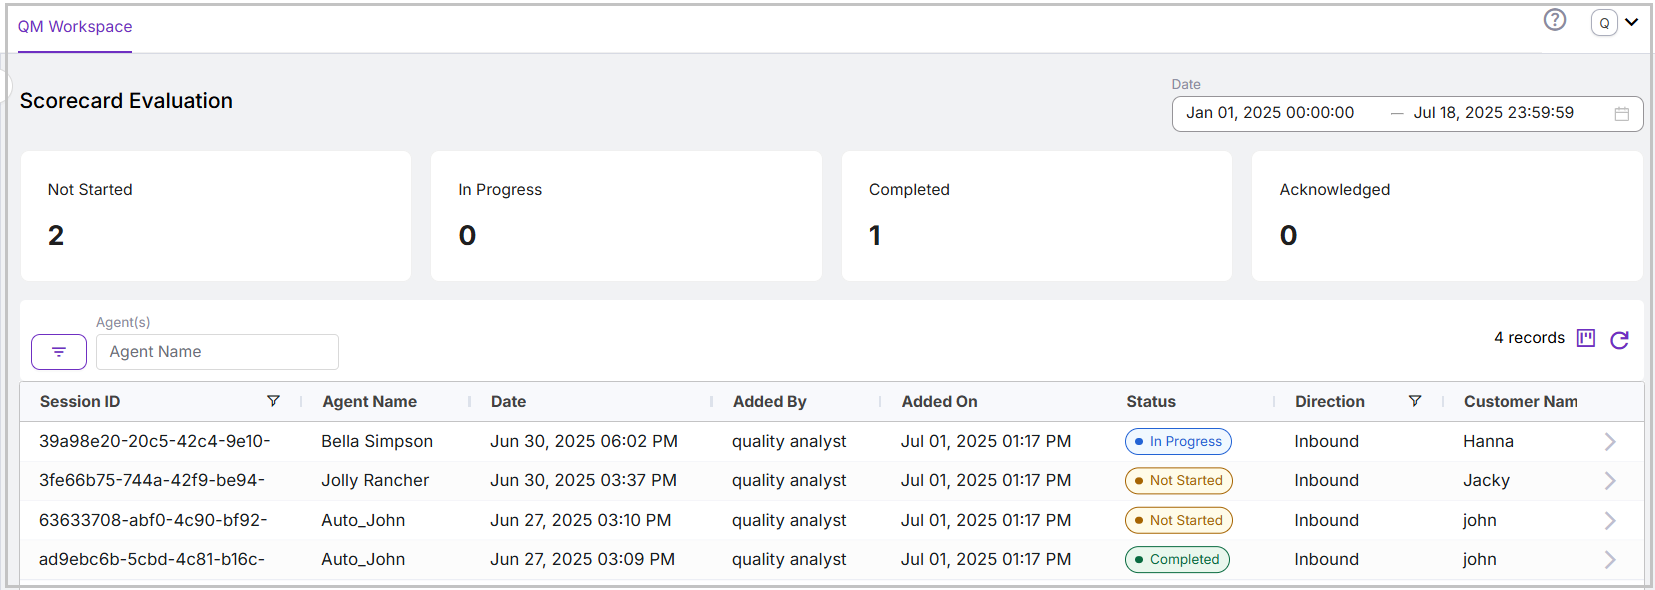
Click the > icon of the conversation with the Status as Not Started to proceed with the evaluation. The conversation details page appears.
In the Scorecards tab on the right, the list of Scorecards to be evaluated associated with the conversation is displayed.
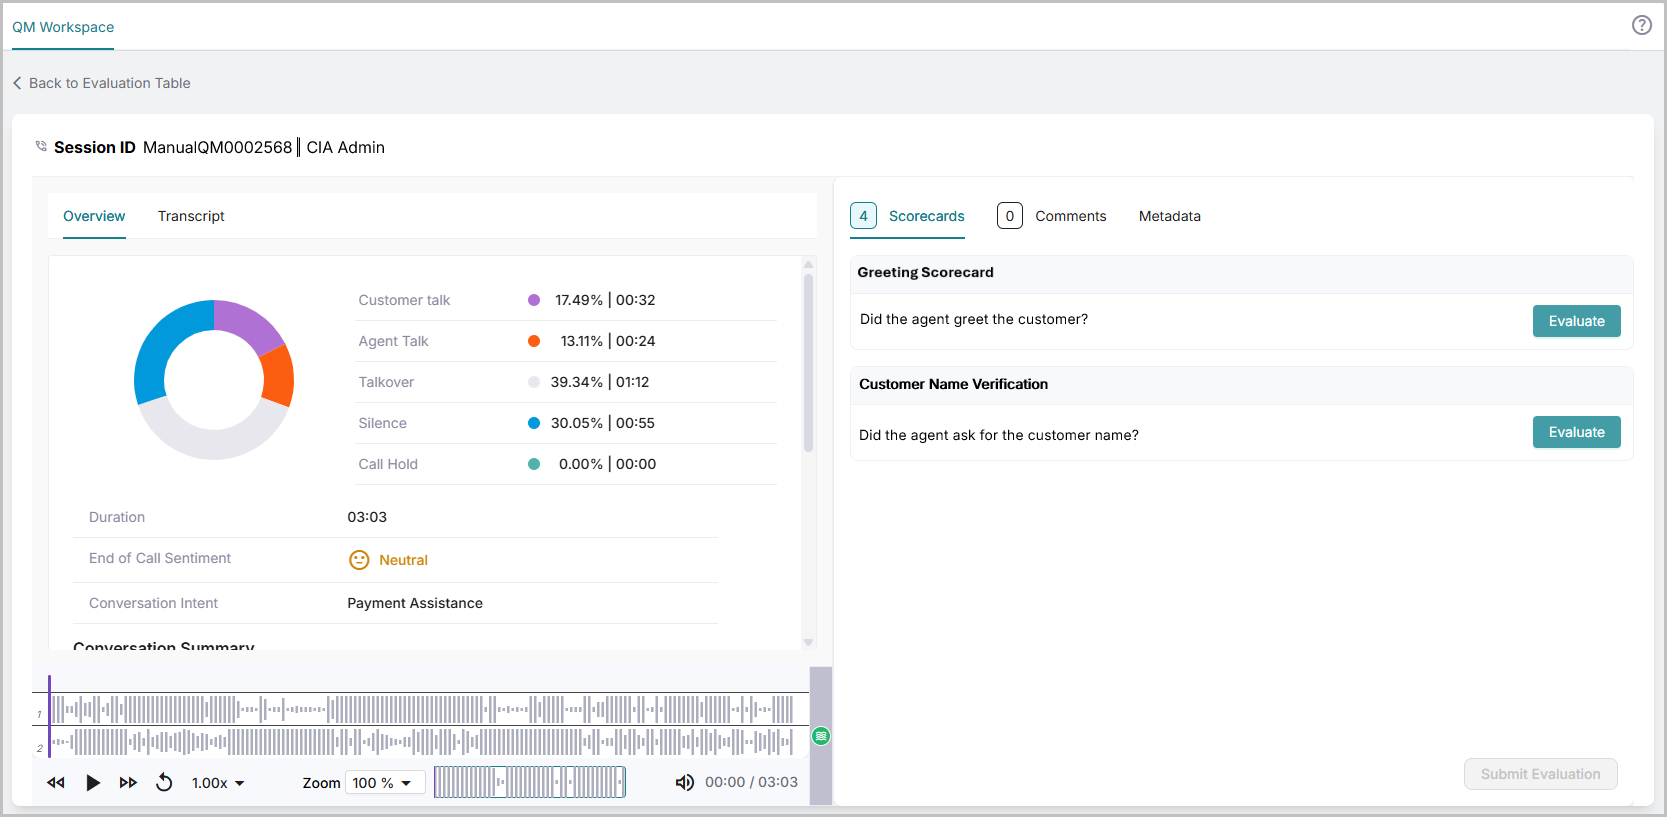
Once you click Evaluate, the corresponding Scorecard opens, and you can see the sections, sub-sections, and questions. During evaluation, you can view the Auto-evaluated score. For more details, click here.
While evaluating a Scorecard that contains questions with Conditional Logic, Yes/No options are displayed as a score in the question. For the positive impact question, when "Yes" is selected, the conditions are displayed. Similarly, for the negative impact question, when "No" is selected, the conditions are displayed. From the Conditions, the option to change the Auto Evaluation is allowed. Auto fail is applied when the QA selects No for the positive impact question and Yes for the negative impact question.
Before answering a question, you can listen to the audio or view the transcript.
Read the question and select the appropriate answer (Yes/No). To learn more about manual scoring, click here.
The score allotted for the question, the evaluation guideline icon (if configured), and the comment icon to add question-level comments are available for each question.
When you evaluate a scorecard for the first time, you will see the New icon in the top-right corner.
Negative Impact questions display a (-) icon in red. Positive Impact questions display a green (+) icon.
If Auto Fail is enabled for a question, then an (x) icon is displayed.
When Auto Fail is enabled for a Negative Impact question and the answer is Yes, the score of the entire Scorecard becomes zero, and the Auto Fail status is displayed. In the same scenario, if the answer is No, a full score is awarded for the question with a Pass status.
When Auto Fail is enabled for a Positive Impact question and the answer is No, the question's score will become zero. In the same scenario, if the answer is No, a full score is awarded for the question.
After you answer all questions in the Scorecard, click the Test Score. The score is calculated and displayed at the top right of the section. If the score equals or exceeds the pass criteria configured in the Scorecard, the Pass icon is displayed. If not, the fail icon is displayed. New status is displayed for questions that are not evaluated.
Note
It is mandatory to answer all questions in all scorecards.
Click Complete & Next to evaluate the next Scorecard and follow steps 7 - 10.
Click Save as Draft if you wish to complete the evaluation process later. The In Progress status is displayed at the top right of the section.
From the Scorecard section, click Edit if you wish to make any changes to the scorecards that show In Progress status.
Once you answer all questions from all scorecards, click Complete & Close.
Click Submit Evaluation , and the Scorecard will be submitted for evaluation.
To view an auto-evaluated score:
The Scorecard section of the Manual Evaluation screen displays the auto-evaluation results for each question. Quality analysts can view the AI-recommended result highlighted with a star icon, and the Yes/No result is displayed in the AI icon. They can review these results and choose to accept or override them based on their judgment. When they modify the result, they can optionally add a comment explaining the reason for changing the auto-evaluation.
The auto-evaluated score is displayed in the Scorecard only if Assisted Manual QM was enabled when the Scorecard was created. The Scorecard lists the Boolean, Exact Match, and Complex Facts. To learn more about Scorecard evaluation, click here.
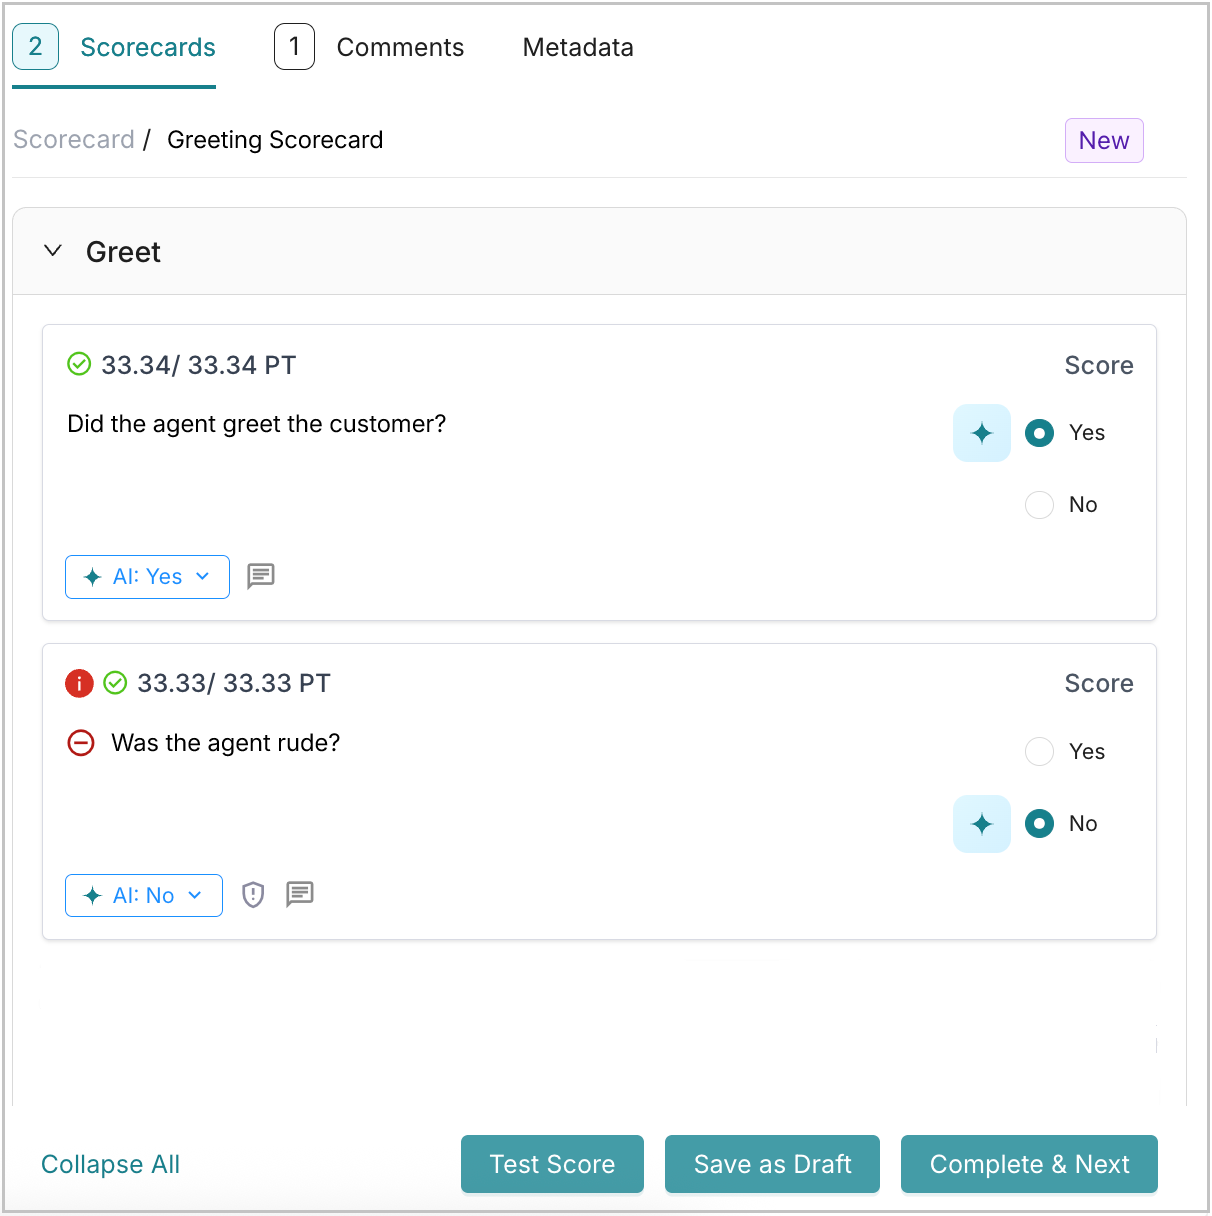
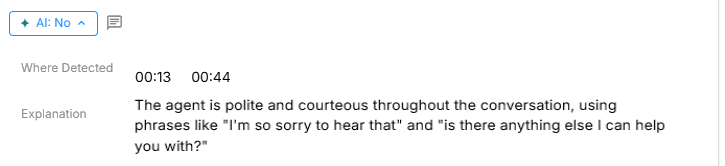
Click the AI icon to view the Where Detected and Explanation details. The AI icon displays the AI-generated responses (Yes/No).
Where Detected displays the relevant offset occurrences associated with the question. This reduces the need to manually review the full audio recordings or transcripts.
The Explanation section outlines the basis on which the AI determined the score.
Click the Comment icon and add the explanation for the change. Once added, the comments are shown by default.
Once the changes are made, follow steps 16 to 21, as mentioned above.