Create Schedules
Use Schedules to determine when your Storage Policies are applied. Multiple Schedules and Storage Policies can be configured to provide fine control of your data storage. This topic details how to create a new schedule for your Communication Recording Agent system. To view your existing Schedules, see View and Update Schedules.
A video has been created to demonstrate the steps to create a new Schedule, see Schedule Demo below.
Tip
Before creating a new Schedule, it's worth reviewing your existing Schedules. To save time, you can clone an existing Schedule to start the Create Schedule process with matching details of an existing Schedule.
Find the existing Schedule that you want to clone (Configure > Schedules) and click the three dots menu  > Clone. This will open the Create Schedule page with the existing Schedule's configuration. Make any changes and then click Create to confirm and create a new Schedule.
To Create a New Schedule:
Go to Configure > click configure under Communication Recording Agent > Schedules, and click + Create.
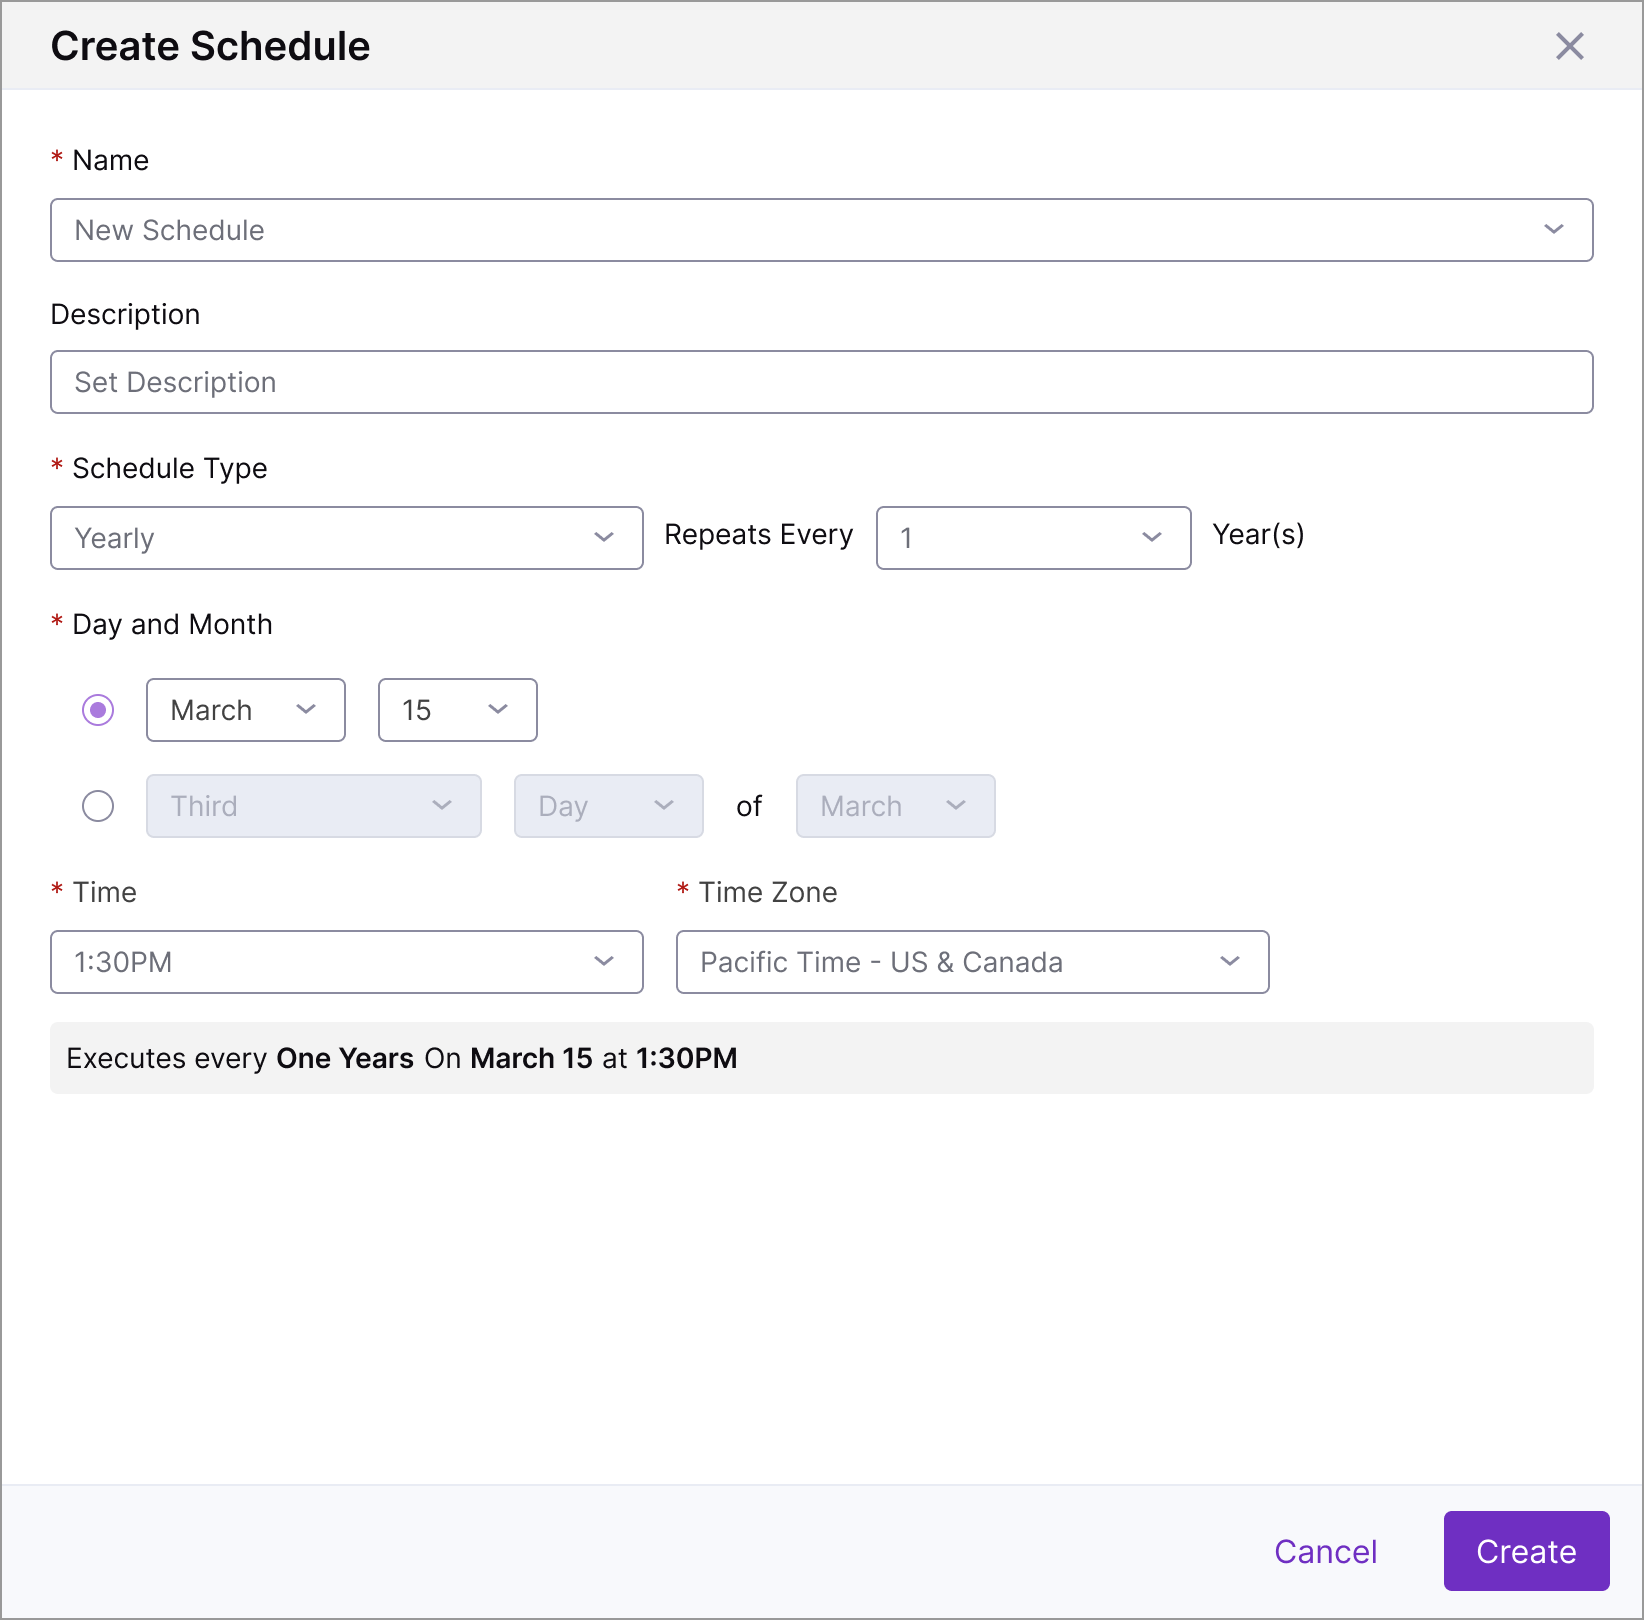
Under Name, enter a useful name for the Schedule.
Under Description, enter a useful description for the Schedule.
Under Schedule Type, determine the frequency of the Schedule. This is how often the affected Policies will be applied. Choose either Minutes, Hourly, Daily, Weekly, Monthly, or Yearly.
Determine the value for the frequency using the dropdown adjacent to Repeats Every. For example, if Hourly is the frequency, you can set the value to 3 to apply the affected Policies every 3 hours.
If Schedule Type is set to either Weekly, Monthly, or Yearly, set the Days of the Week, Day of the Month, or Day and Month to determine the days to apply the affected Policies.
Caution
If Day of the Month is set to a value that not every month has, then the Schedule will not be triggered in that month. For example, a Schedule set to trigger on the 30th of every month will not be triggered in February.
Set the Time and Time Zone for the Schedule frequency. This determines exactly when the affected Policies are applied.
Review the summary at the bottom of the Create Schedule page, then click Create.
Once a new Schedule has been created, a Schedule Created pop-up will display in the bottom right corner of the screen with the name of the new Schedule. You can now view and update the Schedule as needed. See View and Update Schedules for further details.
Schedule Demo
The following video demonstrates how to set up a new Schedule: