Actions
In the Properties panel, perform various actions – lock, annotate, and search for an agent’s previous calls.
Note
The annotate and lock actions are controlled, and you may not have permissions to use them – see your System Administrator for help if needed.
Annotate
Use Annotations to add customized metadata to recordings – things like notes, follow-up actions, tags, etc. Annotations are added to the recording's metadata.
A brief video has been created to demonstrate how to annotate live calls. See the Live Annotate Demo below.
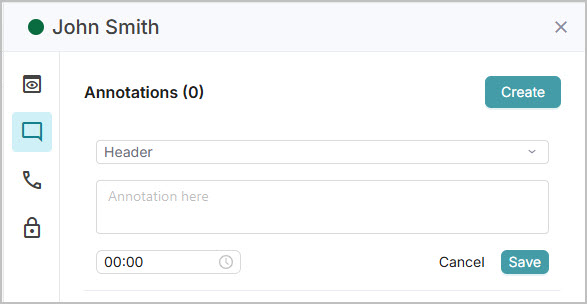
To add an annotation to a recording, click the Annotations tab in the Properties panel and click Create. Select your annotation type from the Header dropdown, enter the details in the Annotation here text box, and if you’d like to relate the annotation to a specific point in the recording, you can define an offset (in the format minutes:seconds). If you specify an Offset, the Annotation icon will display at that exact point in the media player when playing the call back later. When you’re done, click Save to add the annotation to the recording.
Note
If no annotation headers exist, a system administrator must first create one (Configuration> Recording Control > Annotation Headers > + Add New).
Tip
Once the call has ended in Live Monitor, use Recorded to review and edit the annotations – see View Previous Calls.
The following video demonstrates how to annotate an agent's live call to add notes for later review.
Lock
Use locks on recordings to prevent manual or automated deletion – ideal for legal hold, complaint resolution, and specialized retention.
See Understand Locks for everything you'll need to know when working with locks, including how to lock captured conversations, live conversations, and multiple conversations at a time, how to export lock data, and the permission considerations when unlocking conversations.
A brief video has been created to demonstrate how to lock live calls. See the Live Lock Demo below.
To lock a recording, either:
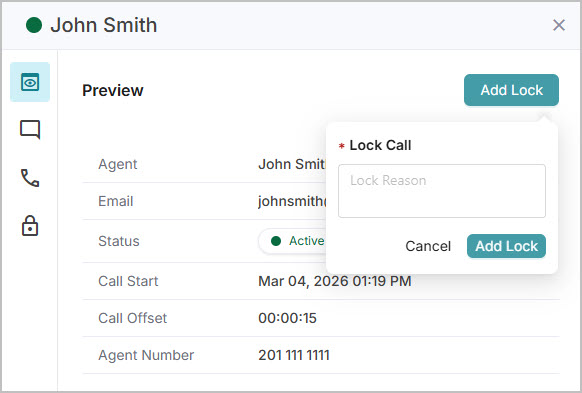
Click Lock in the Summary tab and enter a reason for the lock (used to identify individual locked items), and click Add Lock to confirm.
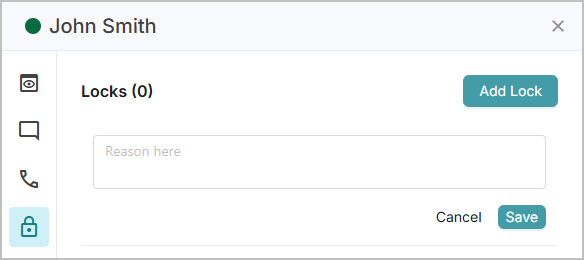
Click the Locks icon to go to the Locks tab, then click the Add Lock button and enter a reason for the lock (used to identify individual locked items), and click Add Lock to save the lock.
Tip
Try to keep it short, simple, and consistent, for example: LegalHold#245 or Complaint#347.
The Locks icon includes a number that indicates any current locks applied to the recording, 0 if there are no locks, and a number greater than zero if there are locks. Click the Locks icon to show all current locks, add another lock, or remove a lock. Once the locked call has ended in Live Monitor, use Recorded to review the locks – see View Previous Calls.
 |  |
The following video demonstrates how to lock an agent's live call to prevent it from being automatically or manually deleted.
View Previous Calls
To see an agent’s previous calls, click the Call Records tab in the agent details panel – this action is useful when you need to quickly review an agent’s call history. However, the best way to review previously captured calls is through the Recorded tab at the top.