Access Management
Important
Only account Administrators have access to the Access Management feature.
Access Management enables you to control which user groups can access the platform and perform actions within it. By assigning permissions to groups rather than individual users, you can efficiently manage access to knowledge bases, agents, and platform features across your organization.
Access Management uses a group-based permission model. When you grant permissions to a user group, all users in that group automatically receive those permissions. This approach ensures consistent access control and simplifies permission management as your organization grows.
You can access this feature from the Business AI Cloud home page.
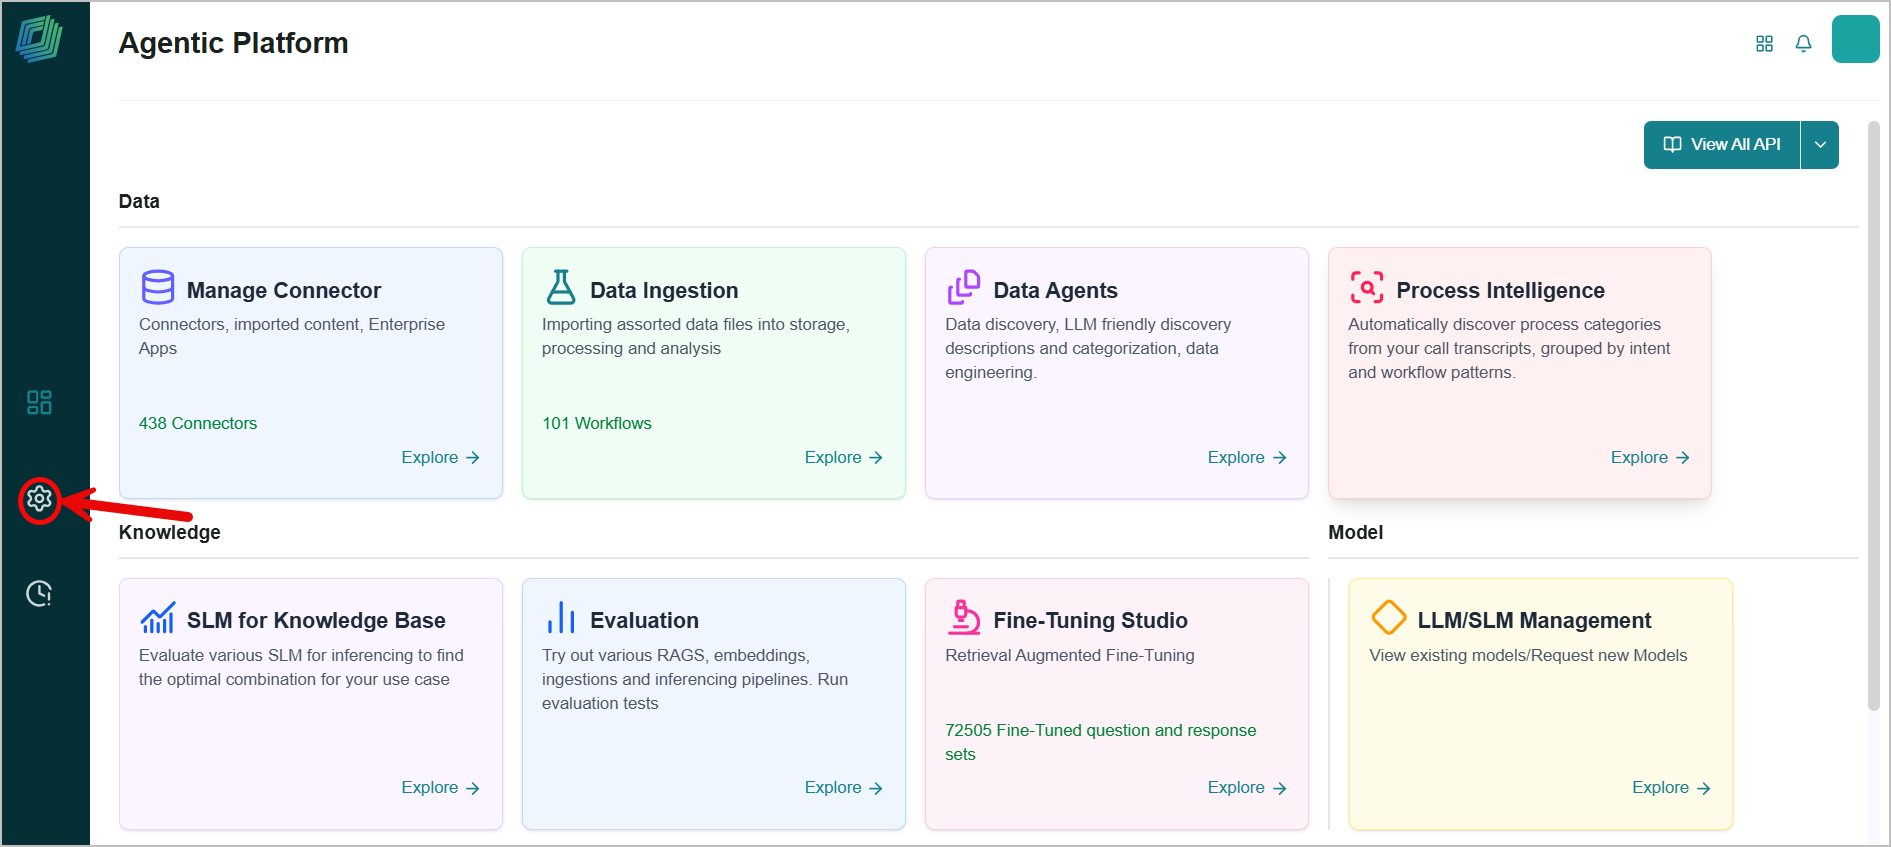
Click the Admin icon in the left-side panel.
The Admin page opens.
Click the Access Management tab to view and assign resources.
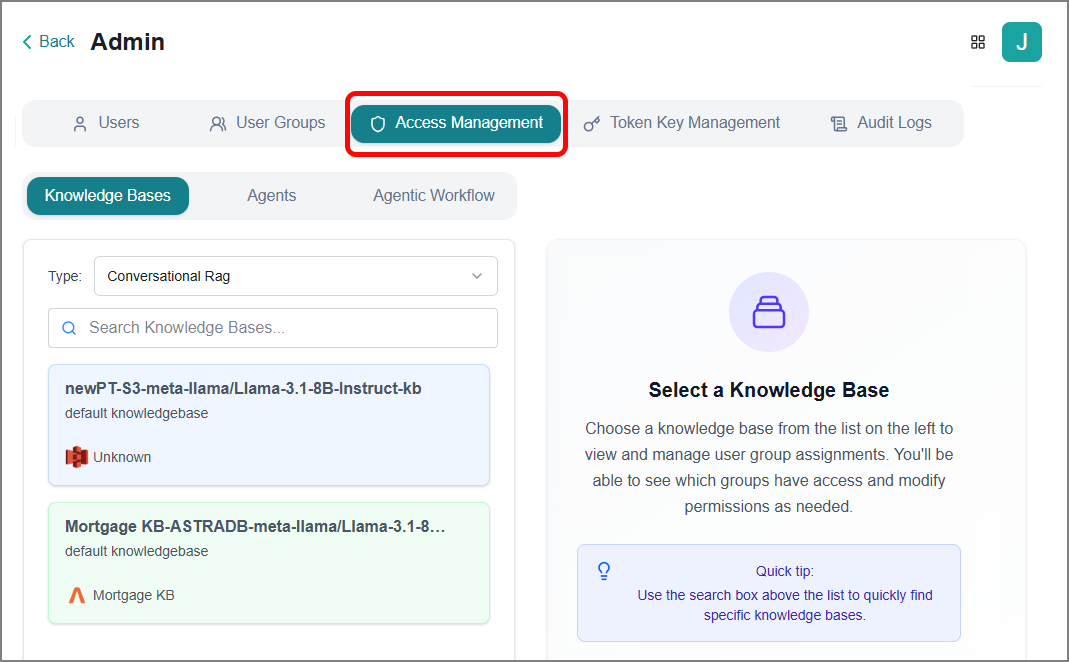
There are three modules:
Knowledge Bases - Assign user groups to specific knowledge bases (KBs) as needed.
Agents - Assign user groups to specific agents as needed.
Agentic Workflow - Assign user groups to specific agentic workflows as needed.
Assigning Knowledge Bases to User Groups
Click the Knowledge Bases tab.
Choose the KB type from the dropdown.
The relevant KBs are displayed.
Conversation Rag
Document Rag
Relational DB Rag
Enter the KB name in the search box to find the desired KB.
Select the KB from the list.
The user group's details open in the right panel.
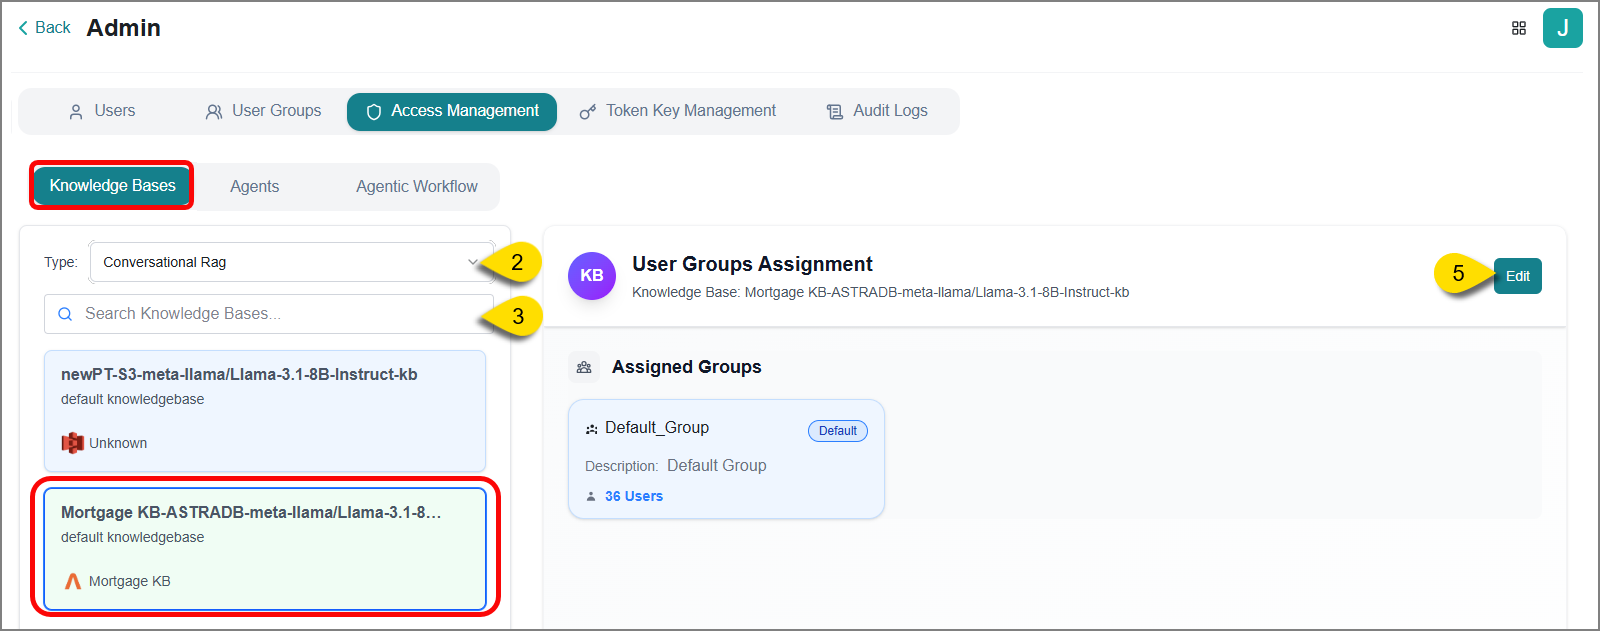
Click Edit.
The Select User Group field is enabled.
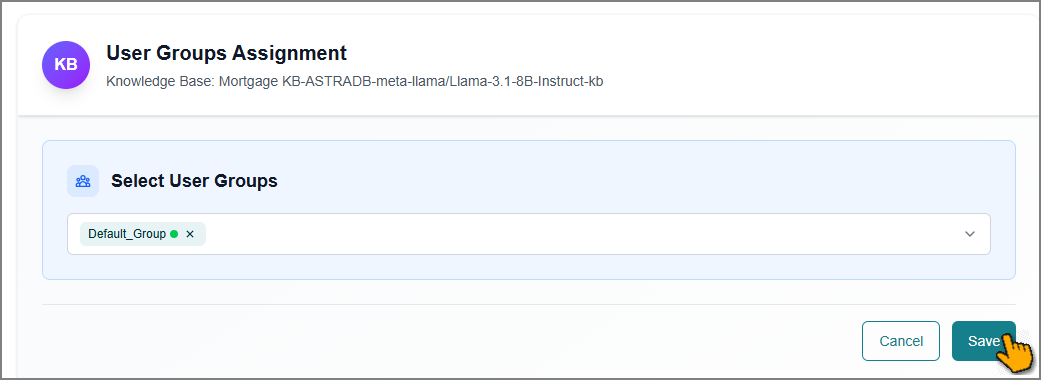
Select one or more user groups from the dropdown.
Click Save to apply the changes.
The newly assigned user groups now have access to the selected KB.
Assigning Agents to User Groups
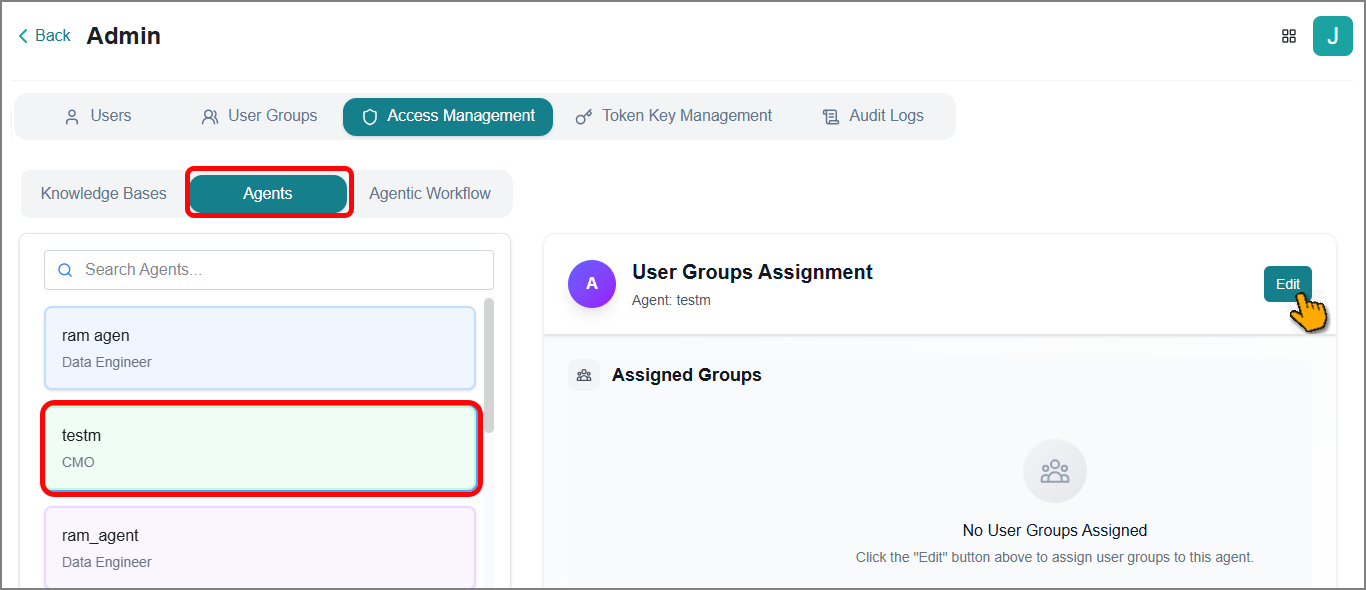
Click the Agents tab.
The page displays all agents created in your account.
Enter the agent name in the search box to find the desired agent.
Select an agent.
The agent's details open in the right panel.
Note
When a supervisor agent is mapped to a user group, the mapping and any subsequent changes automatically apply to all its sub-agents.
Click Edit.
The Select User Group field is enabled.
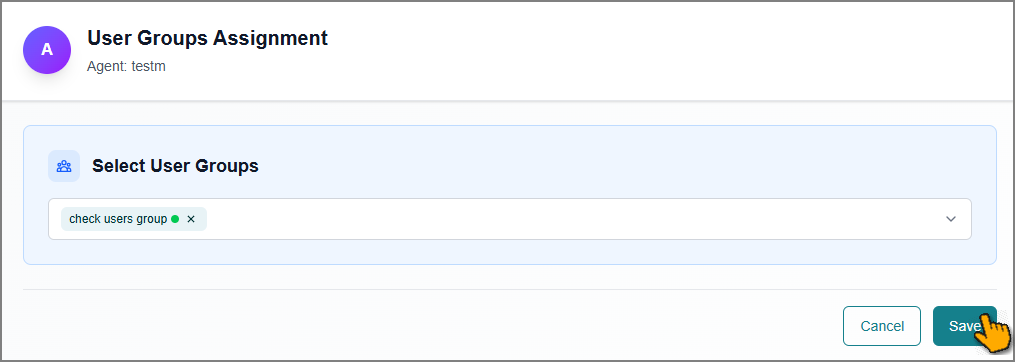
Select one or more user groups from the dropdown.
Click Save to apply the changes.
The newly assigned user groups now have access to the selected agent.
Note
The above process must be followed in the Agentic Workflow tab to assign one or more user groups to an agentic workflow.